To change an engine oil filter, park your car on level ground, let the engine cool, drain the oil if required, remove the old filter, lubricate the new filter seal, install it according to the manufacturer’s instructions, refill the engine with the correct oil, and check for leaks.
If you maintain a car in the United States, learning how to change an engine oil filter can help you save on routine service costs and keep your engine in good shape. Whether you drive a daily commuter through Texas traffic, take weekend trips across California, or deal with cold winters in Minnesota, clean engine oil plays a key role in protecting moving parts. The oil filter helps remove dirt, metal particles, and other debris before they can circulate through the lubrication system.
Changing an oil filter is a manageable DIY task for many vehicles, but the exact method depends on the engine design. Some cars use a metal spin-on filter that screws onto the engine, while others use a replaceable cartridge inside a housing. The filter may be located near the bottom of the engine, high in the engine bay, or behind an access panel. Before you begin, check your owner’s manual or service information for the correct filter, oil specification, drain procedure, tightening method, and safety precautions.
This guide explains how to replace an engine oil filter, which tools you may need, how to avoid common installation mistakes, and how to confirm that the new filter is working as intended. It covers the filter replacement process as part of a routine oil change, while also explaining what changes when you need to replace a filter separately. No vehicle-specific torque value or filter specification should be guessed; use the instructions for your exact make, model, engine, and model year.
What Does an Engine Oil Filter Do?
An engine oil filter removes contaminants from the oil as it circulates through the engine. During normal operation, the oil picks up tiny particles from wear, combustion byproducts, and other sources. The filter traps many of these particles so the oil can continue lubricating bearings, pistons, camshafts, and other moving parts.
Most modern vehicles use a full-flow oil filtration system. In this design, the filter cleans the oil that passes through the main lubrication circuit. Many filters also include internal features such as a bypass valve or an anti-drainback valve, depending on the design. These parts help the lubrication system operate under certain conditions, but their exact functions and presence vary by filter and engine.
An oil filter has a limited service life. As it collects debris, its filter media becomes loaded, and the filter must continue working within the engine’s intended flow and pressure limits. Replacing the filter at the prescribed interval helps maintain the intended filtration performance and reduces the risk of problems caused by a damaged, incorrect, or excessively loaded filter.
Filter media
The internal material traps particles as oil passes through it. Its design and filtration properties vary by filter model.
Sealing gasket
The gasket forms a seal between a spin-on filter and its mounting surface. Cartridge filters use seals designed for their specific housing.
Bypass and anti-drainback valves
Depending on the design, these features help maintain oil flow under certain conditions or limit oil draining out of parts of the lubrication circuit when the engine is off.
Why Replace the Oil Filter During an Oil Change?
Fresh engine oil cannot remove every contaminant that remains trapped in an old filter. Replacing the filter with the oil allows the lubrication system to start the new service interval with a fresh filter element. This is especially important when the vehicle manufacturer’s maintenance schedule calls for both items to be replaced together.
Some engines and service plans have specific filter replacement intervals or special procedures. Follow the maintenance schedule for your vehicle rather than relying on one universal mileage rule. Severe service, such as frequent short trips, heavy towing, dusty roads, or repeated stop-and-go driving, may affect the maintenance schedule for some vehicles.
Follow the maintenance schedule
Use the interval and service conditions listed in the owner’s manual or the manufacturer’s maintenance information.
Use the specified filter
Match the replacement filter to the exact engine application, including any required bypass-valve, pressure, size, or seal specifications.
Tools and Supplies Needed to Change an Engine Oil Filter
Gather your tools and supplies before opening the oil system. Having the correct parts ready makes the job easier and reduces the time the engine remains without its normal oil supply. The exact list depends on whether your car uses a spin-on filter or a cartridge filter and whether you are changing the engine oil at the same time.
Check the owner’s manual and the replacement filter instructions before buying parts. A filter that looks similar to the original may have a different thread, gasket size, internal design, or application. The correct filter is the one specified for your vehicle, not simply the one that appears to fit.
Replacement oil filter
Choose the correct spin-on filter or cartridge element for your engine. Confirm the part number using reliable vehicle-specific application information.
Correct engine oil
Use the viscosity grade and performance specification required by the manufacturer. Check the required capacity, including whether the listed amount includes a filter change.
Oil filter wrench
A suitable filter wrench can help loosen a tight spin-on filter or the correct cartridge housing cap. Use a tool designed for that filter to reduce the chance of damage.
Drain pan
Use a pan with enough capacity to collect the engine’s used oil. Position it to catch oil from both the drain opening and the filter.
Basic hand tools
You may need a socket, ratchet, wrench, or screwdriver to remove an access panel, loosen the drain plug, or open a filter housing.
Safety supplies
Wear suitable gloves and eye protection. Keep absorbent material, clean rags, and a stable work light nearby.
Replacement seals and drain-plug washer
Replace cartridge housing O-rings and the drain-plug washer when the service instructions require it. Do not reuse a damaged or flattened seal.
Safe lifting equipment
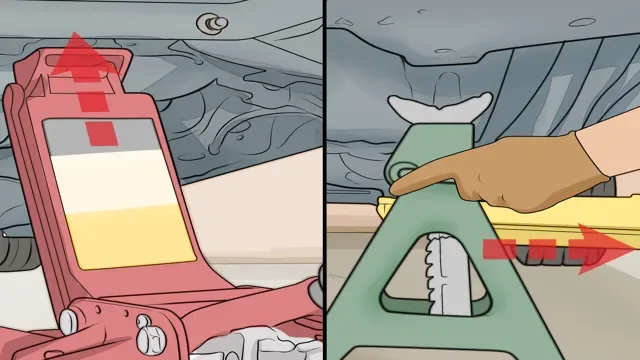
If access from below is necessary, use a properly rated jack and suitable jack stands at the approved lifting points, following the vehicle and equipment instructions.
Spin-On Filter vs. Cartridge Filter
A spin-on filter is a self-contained metal canister that usually screws onto a mounting base. You remove the entire canister and install a new one. Many older vehicles and some modern engines use this style.
A cartridge filter has a replaceable internal element that sits inside a reusable housing. You remove the housing cap, take out the old element, replace any required O-rings, and install the new element. The housing may be plastic or metal, so the correct socket and tightening specification are important.
Neither style is automatically better for every vehicle. The engine manufacturer selects the filter system for the specific design. Identifying the filter type before starting helps you buy the right parts and avoid damaging a housing that requires a particular tool or installation method.
Spin-on filter
Replace the whole filter assembly and inspect the mounting surface for the old gasket.
Cartridge filter
Replace the internal element and specified housing seals, then tighten the cap to the documented specification.
Safety Checks Before You Start
Prepare the work area before loosening any drain plug or oil filter. Park on a firm, level surface, set the parking brake, and switch off the engine. Keep children and pets away from the work area, and make sure you have enough light to see the filter, seals, and mounting surface.
If the engine has been running, allow it to cool enough to avoid burns. Warm oil may drain more readily than cold oil, but hot engine parts and hot oil can cause serious injuries. Follow the manufacturer’s procedure for oil temperature and draining, and never work beneath a vehicle supported only by a hydraulic jack.
If you need to raise the car, use the designated lifting points and correctly rated stands on a firm surface. Do not rely on a driveway slope, loose blocks, a tire jack alone, or improvised supports. If you cannot support the vehicle safely or reach the filter without putting yourself at risk, use a professional service facility.
Prevent burns
Keep your hands and skin away from hot oil, the exhaust system, and hot engine parts. Wear eye protection when oil could splash.
Prevent vehicle movement
Set the parking brake, select Park for an automatic transmission or the appropriate gear for a manual transmission, and follow the manufacturer’s lifting procedure.
Protect the environment
Keep a drain pan under the work area and prepare a sealed container for used oil. Never pour used oil into a storm drain, sewer, or onto the ground.
Can You Change an Oil Filter Without Raising the Car?
Yes, if the filter is accessible from above or from the side without placing any part of your body beneath the vehicle. Some engines have an upper-mounted cartridge filter or an accessible spin-on filter in the engine bay.
If the filter is underneath the engine or behind an underbody panel, you may need to raise the vehicle according to the service instructions. Never reach under a car that is supported only by a jack, and do not assume a vehicle is safe to work beneath because it has high ground clearance.
Accessible from above
Use the specified filter tool and protect nearby wiring, hoses, and engine components.
Access from below
Use the correct lift points and approved support equipment, or have a qualified shop perform the job.
How to Change an Engine Oil Filter Step by Step
For most vehicles, the most straightforward approach is to replace the oil filter during a routine engine oil change. This allows you to drain the old oil, install the new filter, and refill the engine before checking for leaks and verifying the final oil level.
The steps below describe a common process, not a substitute for vehicle-specific service instructions. Some engines use special filter housings, drain plugs, prefill requirements, priming procedures, or access methods. If your service manual gives a different sequence, follow that procedure.
Step 1: Confirm the parts and procedure
Check the engine code or vehicle details, correct filter part number, oil specification, oil capacity, seal requirements, and tightening instructions before you begin.
Step 2: Park and prepare the vehicle
Park on level ground, switch off the engine, apply the parking brake, allow the engine to cool as required, and arrange safe access to the filter and drain plug.
Step 3: Locate the filter and drain plug
Use the owner’s manual or service diagram to identify the correct parts. Remove an access panel only if the procedure calls for it.
Step 4: Drain the old engine oil when required
Place the drain pan beneath the plug, loosen the plug with the correct tool, and let the oil flow into the pan. Reinstall the plug with the specified washer and tightening method when draining is complete.
Step 5: Remove the old filter
Use a suitable filter wrench if needed. Keep the drain pan in place because oil may spill from the filter, housing, or mounting area.
Step 6: Inspect the mounting area and seals
Remove old gasket material or O-rings as specified, check the mounting surface for damage, and confirm that the old spin-on gasket has not remained stuck to the engine.
Step 7: Prepare and install the replacement filter
Lubricate the new spin-on gasket with clean engine oil when instructed. For a cartridge filter, install the new element and seals in their specified positions. Tighten using the manufacturer’s method.
Step 8: Refill with the correct engine oil
Confirm that the drain plug is installed, then add the specified oil in measured amounts. Avoid exceeding the recommended capacity.
Step 9: Check the oil level and inspect for leaks
Follow the manufacturer’s procedure for checking the dipstick or electronic oil-level display. Start the engine only when the system is correctly assembled and filled, then inspect for leaks and recheck the level as directed.
Step 1: Confirm the Correct Replacement Filter
Use the vehicle identification number, engine details, owner’s manual, or a reliable parts catalog to confirm the correct filter. Model year alone may not be enough because a single vehicle model can have several engine options and filter designs.
Compare the replacement with the original where practical. Check the mounting thread or cartridge dimensions, gasket size, overall fit, and any specified internal features. A filter that screws onto the engine is not necessarily suitable simply because the threads appear to match.
If you are unsure whether a filter fits, stop and verify the application before installing it. An incorrect filter can leak, fail to seal, or interfere with the intended oil flow.
Verify the part number
Use vehicle-specific application data rather than appearance alone.
Check replacement seals
Make sure the filter package includes the required gasket or O-rings, and confirm whether a separate drain-plug washer is needed.
Step 2: Drain the Engine Oil When Performing a Full Oil Change
Position the drain pan beneath the engine oil drain plug. Loosen the plug carefully with the correct tool, keeping your hands clear of the oil stream. Oil may initially flow farther sideways than expected, so adjust the pan position as the stream weakens.
Allow the oil to drain according to the service procedure. Inspect the drain plug and washer for damage, then reinstall them as directed. Use the specified torque if the manufacturer provides one, especially on engines with aluminum oil pans or special drain-plug designs.
If you are replacing a filter separately rather than performing a full oil change, do not assume the drain plug must always be removed. The filter’s position and the engine’s design determine how much oil will escape. Follow the documented procedure, collect any spilled oil, and refill the system if the level drops.
Watch for oil flow
Keep the drain pan correctly positioned and allow sufficient time for the oil to drain.
Avoid overtightening
Excessive force can strip drain-plug threads or damage the oil pan. Use the specified torque and any required new washer.
Step 3: Remove the Old Oil Filter
Place the drain pan beneath the filter before loosening it. A spin-on filter may contain oil even after the crankcase has drained, while a cartridge housing can release oil when its cap is opened. Loosen the component slowly and allow trapped oil to drain into the pan.
For a spin-on filter, turn it in the loosening direction specified by the filter design, commonly counterclockwise when viewed from the mounting end. If it is tight, use the correct filter wrench rather than crushing the canister with pliers. Avoid striking the filter or using improvised tools that can damage nearby parts.
For a cartridge filter, use the correct socket or housing tool. Open the cap carefully, following any instructions about pressure, oil drainage, or cap removal. Plastic housings can crack if the wrong tool or excessive force is used.
Keep the area clean
Catch the oil that drains from the filter and wipe away spills before they spread to belts, wiring, or hot exhaust parts.
Do not force a stuck filter
Recheck the tool size, access angle, and loosening direction. If the housing or mounting base begins to twist or crack, stop and seek appropriate repair help.
Step 4: Inspect the Old Filter and Mounting Surface
Once the old filter is removed, inspect the mounting surface for dirt, damage, and leftover gasket material. On a spin-on filter, confirm that the old rubber gasket came off with the filter. If it remains stuck to the engine, remove it carefully before installing the replacement.
Leaving the old gasket in place can create a double-gasket condition. When the new filter is tightened over the old seal, the joint may not seal correctly, and oil can escape rapidly after the engine starts. This is one of the most important mistakes to prevent during filter replacement.
For a cartridge filter, remove the old O-rings from the designated grooves using a suitable non-damaging tool if required. Do not scratch the housing or sealing surfaces. Compare the old element with the new one and make sure any required components, such as end caps or seals, are accounted for according to the filter design.
Check the gasket
A spin-on filter should have one correctly positioned sealing gasket, not an old gasket trapped beneath the new one.
Inspect for damage
Look for damaged threads, cracks, gouges, or distorted sealing surfaces before installing the replacement.
Step 5: Prepare the New Oil Filter
For a spin-on filter, check the new filter’s gasket and make sure it is seated correctly. Apply a thin film of clean engine oil to the rubber gasket when the filter manufacturer’s instructions call for it. This helps the seal seat smoothly during installation and can reduce the chance of the gasket binding.
Do not apply grease, sealant, or other substances unless the specific service instructions require them. The filter gasket is designed to seal without improvised materials. If the gasket is torn, displaced, dry-rotted, or otherwise damaged, replace the filter rather than trying to repair the seal.
Pre-filling a new filter is not a universal requirement. Some filters are mounted vertically and may be suitable for pre-filling under the manufacturer’s instructions, while horizontal or inverted filters can spill oil during installation. Some engines require a particular priming procedure, and others specify that the filter must be installed dry. Follow the instructions for your exact engine and filter.
Lubricate the gasket when instructed
Use clean engine oil on the new spin-on filter’s rubber seal. Do not lubricate threads unless the specified procedure calls for it.
Replace cartridge O-rings correctly
Fit each new seal into its specified groove and lubricate it only as directed by the filter or vehicle manufacturer.
Step 6: Install and Tighten the New Filter
For a spin-on filter, start threading the new filter onto the mounting base by hand. It should turn smoothly when properly aligned. If it binds or feels cross-threaded, stop, remove it, and inspect the threads rather than forcing it into place.
Once the gasket contacts the mounting surface, tighten the filter using the exact procedure printed on the filter or provided by the vehicle manufacturer. Depending on the design, the instruction may specify a fraction of a turn after gasket contact or a torque value. Do not substitute a generic tightening rule for the specified method.
For a cartridge filter, install the element and seals in the correct positions, then thread the housing cap into place. Tighten it to the documented torque using the correct tool when required. Overtightening can crack a plastic cap, distort an O-ring, damage threads, or make future removal difficult.
Start by hand
Hand-starting the filter or housing helps reduce the risk of cross-threading.
Use the correct tightening method
Follow the vehicle or filter manufacturer’s instructions, including any torque specification and tool requirements.
Do not add extra force
A filter that is excessively tight is not necessarily more secure. Correct sealing depends on the design and installation procedure.
Step 7: Refill the Engine With the Correct Oil
Before adding oil, confirm that the drain plug is installed correctly and that the filter or housing is secure. Reinstall any required access panels according to the service instructions, and make sure no tools or loose parts remain in the engine bay.
Add the engine oil specified for your vehicle. Check both the viscosity grade and the required performance standard; a matching viscosity number alone does not establish that an oil meets every requirement. The owner’s manual or manufacturer service information is the primary reference for the correct specification and capacity.
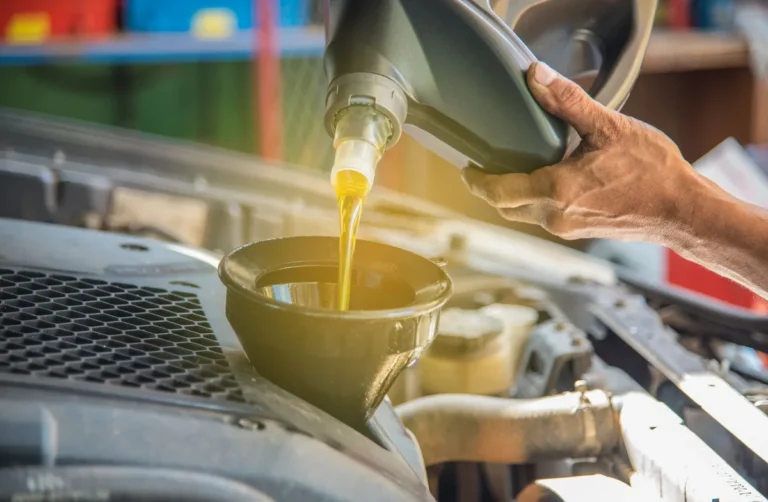
Use a clean funnel and add the oil in measured amounts. If the published capacity includes an oil filter change, use that figure as a guide rather than pouring the full amount in without checking. The actual level should be verified using the manufacturer’s dipstick or electronic measurement procedure.
Avoid overfilling
Too much oil can cause problems in some engines. Add oil in stages and verify the level using the correct procedure.
Check the oil-level method
Some vehicles require the engine to be off for a specified period, while others use an electronic display and a particular temperature or operating condition.
Step 8: Start the Engine and Check for Leaks
Before starting the engine, make a final visual check of the drain plug, filter, housing, oil filler cap, and dipstick if fitted. Confirm that the correct oil has been added and that all required components are installed. Keep clear of moving belts and fans when checking the engine bay.
Start the engine according to the vehicle manufacturer’s procedure. Watch the oil pressure warning light or gauge and inspect the filter area and drain plug for leaks. The oil pressure warning should behave as described in the owner’s manual; if the warning remains on, stop the engine immediately and investigate rather than letting it run in the hope that the light will go out.
Switch off the engine if you see active leakage, hear unusual mechanical noise, or receive an oil pressure warning. Once the engine is off, wait for the specified period and recheck the oil level as directed. Do not reach near moving engine parts or touch hot components while inspecting the system.
Look for fresh oil
Check around the filter gasket, cartridge housing, and drain plug. A dry, clean joint after the prescribed inspection is a good sign.
Respond to warning lights
If the oil pressure warning stays on or returns, shut the engine off immediately and arrange diagnosis before driving.
Verify the final level
Use the specified dipstick or electronic oil-level procedure after the oil has settled as required by the manufacturer.
How Long Does It Take to Change an Engine Oil Filter?
For someone with the correct parts and tools, a routine oil and filter change may take roughly 30 to 60 minutes on a vehicle with straightforward access. This is a planning estimate, not a guaranteed service time. The job can take longer if the filter is difficult to reach, an underbody panel must be removed, a housing is stuck, or the vehicle requires a special service procedure.
Replacing only the oil filter may take less time, but it can still require cleanup, oil-level checks, and a leak inspection. The amount of oil lost during a filter-only replacement varies by filter location and engine design. Never assume that no oil will escape simply because the drain plug remains installed.
Simple access
An upper-mounted filter and an accessible drain plug can make the job easier.
Restricted access
An undertray, tight engine bay, or special housing may add time and require dedicated tools.
First-time maintenance
Allow extra time to read the instructions, identify the correct parts, position safety equipment, and clean up used oil.
Should You Change the Oil Filter Every Time You Change the Oil?
For most routine oil changes, replacing the filter at the same time is the standard approach when the vehicle manufacturer’s maintenance schedule specifies it. The new oil then passes through a fresh filter rather than one that has already collected contaminants during the previous service interval.
Some vehicles have specific maintenance instructions that differ from a general rule. Follow the prescribed oil and filter intervals for your exact engine and driving conditions. Do not extend a filter’s service life simply because the oil still looks clean on the dipstick.
Use vehicle-specific guidance
Follow the manufacturer’s service schedule and any special instructions for severe driving conditions.
Replace damaged filters promptly
A leaking, damaged, incorrect, or improperly installed filter requires attention regardless of the normal maintenance interval.
Common Oil Filter Replacement Mistakes to Avoid
Most problems during a DIY oil filter change come from using the wrong part, damaging a seal, applying the wrong tightening method, or failing to verify the oil level. Taking a few extra minutes to inspect the mounting area and check the service instructions can prevent costly mistakes.
If the filter does not fit smoothly or the housing shows signs of damage, stop rather than forcing the installation. A small delay to confirm the correct part is safer than running an engine with a poor seal or a damaged filter mount.
Leaving the old gasket in place
A trapped spin-on gasket can cause a double-gasket leak. Confirm that the old seal came away with the removed filter.
Installing the wrong filter
A similar-looking filter may have incompatible dimensions or internal specifications. Verify the exact application before installation.
Overtightening the filter
Excessive force can damage threads, crush a seal, or crack a cartridge housing. Use the specified tightening procedure.
Forcing a cross-threaded filter
If the filter will not turn smoothly by hand at the start, remove it and inspect the alignment and threads.
Ignoring a leaking filter
Oil escaping around the filter can reduce the engine’s oil supply. Shut off the engine and correct the leak before driving.
Overfilling or underfilling the engine
Use the specified oil capacity as a guide and confirm the final level through the manufacturer’s measurement procedure.
Using unsafe lifting equipment
Never work beneath a vehicle supported only by a jack. Use the approved support method or a professional lift.
What If the Old Oil Filter Is Stuck?
A stuck filter can result from excessive tightening, a seal that has bonded to the mounting surface, corrosion, or use of the wrong installation method. First confirm that you are turning it in the correct direction and using a filter wrench designed for the filter’s shape and location.
Apply steady force with the proper tool and keep the wrench aligned. Avoid crushing the filter canister, puncturing it with a screwdriver, heating it with a torch, or striking it near hoses and wiring. These improvised methods can create sharp edges, oil spills, fire hazards, or damage to nearby parts.
If the filter begins to deform without loosening, or if the mounting base or housing starts to move, stop. A professional mechanic can use the appropriate removal equipment and assess whether the mounting surface or housing has been damaged.
Use a correctly sized tool
Choose a cap, strap, claw, or other wrench designed for the filter and the available clearance.
Know when to stop
Do not keep increasing force if the canister collapses or the housing begins to crack.
What If the New Filter Leaks?
If oil leaks around a newly installed filter, switch off the engine immediately when it is safe to do so. Check the oil level after shutdown and allow the area to cool before inspecting the joint. Do not continue driving to see whether the leak stops on its own.
Possible causes include a trapped old gasket, a damaged new seal, a filter that is not seated correctly, incorrect tightening, damaged threads, or the wrong filter. On a cartridge system, a displaced or pinched O-ring or an incorrectly fitted housing cap may cause leakage.
Correct the cause using the specified service procedure, replace damaged parts, refill the engine as required, and inspect again before returning the vehicle to service. If the oil pressure warning appears, the leak is substantial, or the mounting threads are damaged, have the vehicle assessed by a qualified mechanic.
Stop the engine
Do not let the engine continue running while oil is leaking from the filter or housing.
Inspect the seal and fit
Check the gasket or O-ring, filter part number, seating surface, and installation method.
Recheck before driving
Verify the oil level and confirm that the repaired joint remains dry under the manufacturer’s prescribed inspection procedure.
Troubleshooting After an Oil Filter Change
A successful filter change should leave the engine at the correct oil level, with no active leaks and no abnormal oil pressure warning. If something seems wrong after the service, stop and assess the symptom before driving. A new filter does not automatically mean the lubrication system is working correctly.
Oil pressure warning stays on
Shut off the engine immediately. Check the oil level only after shutdown and follow the vehicle-specific troubleshooting procedure. If the warning remains unexplained, do not restart the engine until the problem has been assessed.
Oil is dripping from the filter
Switch off the engine and inspect the gasket, housing seal, filter fit, and mounting surface. Correct the problem before restarting.
Oil level appears too low
Use the correct dipstick or electronic measurement procedure and add the specified oil in measured amounts if needed. Look for leaks before driving.
Oil level appears too high
Recheck the measurement method and vehicle position. If the level remains above the specified range, remove the excess using an appropriate method before driving.
Engine makes unusual noise
Turn the engine off. Do not assume the sound is normal after an oil change, especially if it occurs with an oil pressure warning or a leak.
Filter housing will not tighten
Stop if the cap binds, threads appear damaged, or a seal will not seat correctly. Confirm the element, O-ring location, tool, and tightening specification.
How Do You Know the New Oil Filter Is Installed Correctly?
The filter should be the correct part for the engine, seated according to its design, and tightened using the specified method. The mounting surface should be clean, and the required gasket or O-ring should be correctly positioned without visible damage.
After the engine has been started and checked according to the service instructions, there should be no active oil leakage around the filter, housing, or drain plug. The oil pressure warning should behave normally, and the oil level should fall within the manufacturer’s specified range when measured correctly.
These checks provide useful signs of correct installation, but they do not replace any special priming, scan-tool, or post-service procedure required for a particular engine. If the vehicle behaves abnormally, follow the manufacturer’s diagnostic guidance rather than assuming the filter is the only possible cause.
Correct part and seal
The filter matches the engine, and the gasket or O-ring is fitted as specified.
Correct oil level
The dipstick or electronic reading falls within the specified range under the required measurement conditions.
No leaks or warnings
The filter area remains dry, and no unresolved oil pressure warning or abnormal engine noise is present.
How to Dispose of Used Engine Oil and Oil Filters
Used engine oil should be collected in a clean, leak-resistant container and taken to a suitable collection or recycling facility. Never pour it onto the ground, into a household drain, into a storm sewer, or into a waterway. Used oil can contain contaminants that make improper disposal harmful to soil and water.
Used oil filters also retain oil and may be accepted by automotive recycling centers, municipal household hazardous waste programs, or other collection sites. Requirements vary by location and facility, so check the receiving site’s rules before transporting the materials. Keep oil away from children, pets, open flames, and food containers.
In the United States, many auto parts stores, repair shops, and local waste programs offer used-oil collection, although acceptance policies and fees vary. Seal the container securely, keep it upright during transport, and avoid mixing engine oil with coolant, gasoline, solvents, brake fluid, or other waste unless the receiving program explicitly allows it.
Collect the used oil
Use a clean, sealed container that will not leak during storage or transport.
Keep the filter contained
Allow excess oil to drain into the collection pan when safe and practical, then transport the filter according to local facility rules.
Check local requirements
Confirm which facilities accept used oil and filters, and whether they impose quantity limits or packaging rules.
Can You Reuse an Engine Oil Filter?
For ordinary passenger-car maintenance, use a new replacement filter at the interval specified by the manufacturer. Most conventional spin-on filters are designed to be replaced as a complete unit, while cartridge systems require a new element and any specified replacement seals.
Do not wash a disposable filter and reinstall it. Cleaning may not remove embedded contaminants or restore the filter’s intended filtration performance, and opening a sealed filter can damage its internal structure. Reusable filtration systems are a separate category and should be maintained only according to their own documented instructions.
Replace disposable filters
Install a new filter element or complete filter assembly that matches the engine application.
Follow special-system instructions
If a vehicle uses a documented reusable filtration system, follow the specific maintenance procedure rather than applying general disposable-filter rules.
A Simple Checklist Before You Drive
Before considering the job complete, verify each item in the checklist below. These final checks are useful because small errors, such as a loose filler cap or a misplaced seal, can create problems after the tools have been put away.
Correct filter installed
Confirm that the part number and filter type match the engine.
Correct seals in place
Check the spin-on gasket or cartridge O-rings and make sure the old gasket has been removed.
Drain plug secured
Verify that the drain plug and required washer are installed according to the specified procedure.
Oil filler cap installed
Make sure the cap is fitted correctly and any dipstick is returned to its proper position.
Oil level verified
Use the vehicle’s specified measurement procedure and correct any underfill or overfill.
No active leaks
Inspect the filter, housing, and drain plug after the prescribed startup and inspection process.
No unresolved warning lights
Do not drive if an oil pressure warning remains on or the engine shows abnormal noise or behavior.
Waste stored safely
Seal used oil and the old filter for transport to an appropriate collection facility.
Next Steps for Better Engine Maintenance
After changing the engine oil filter, record the date, mileage, oil specification, and filter part number. This simple service log helps you track maintenance and identify the correct parts next time. Follow the next service interval listed by the vehicle manufacturer, including any adjustments for severe driving conditions.
If you plan to perform future oil changes yourself, learn where your vehicle’s approved lifting points are, how to measure the oil level, and which drain-plug and filter-housing specifications apply. Keep the owner’s manual and service information available instead of relying on generic values from another engine.
For a filter that is difficult to access, a damaged housing, stripped threads, an unexplained oil pressure warning, or a persistent leak, a qualified mechanic is the safer next step. Routine maintenance can be a practical DIY task, but protecting the engine and keeping yourself safe matter more than finishing the job without help.
Keep a maintenance record
Write down the service date, odometer reading, oil type, filter part number, and any issues found.
Use reliable service data
Keep the correct oil capacity, filter application, tightening specifications, and service interval for your exact engine.
Get help when needed
Use a qualified repair shop if safe access, correct installation, or proper oil pressure cannot be confirmed.
Frequently Asked Questions
Q
Can I change an engine oil filter without changing the oil?
Yes, it may be possible, depending on the filter location and engine design. However, removing the filter can release some engine oil, and the amount varies by vehicle. Follow the service procedure, collect any spilled oil, and check the oil level after installation.
If the manufacturer’s maintenance schedule calls for an oil and filter change together, replacing only the filter does not replace the required oil service. Use the full prescribed service when it is due.
Q
Do I need to fill a new oil filter with oil before installing it?
Not always. Whether pre-filling is appropriate depends on the filter orientation, engine design, and manufacturer instructions. A vertically mounted filter may permit pre-filling in some applications, while a horizontal or inverted filter may spill oil during installation.
Some engines specify a dry filter or a particular priming process. Follow the exact service instructions rather than applying a universal pre-filling rule.
Q
How tight should an engine oil filter be?
Tighten the filter using the method specified by the filter or vehicle manufacturer. A spin-on filter may use a specified fraction of a turn after gasket contact or another documented method, while a cartridge housing may require a torque value.
Do not guess or use excessive force. Overtightening can damage the gasket, threads, or housing and make future removal difficult.
Q
What happens if I install an oil filter incorrectly?
An incorrectly installed filter can leak oil, fail to seal, or cause problems with the intended lubrication system. A particularly serious mistake is leaving the old spin-on gasket in place, which can cause a double-gasket leak.
If you notice a leak, an oil pressure warning, or unusual engine noise after replacement, switch off the engine and investigate before driving. Correct the installation and verify the oil level, or seek professional help if the cause is unclear.
Q
How often should I replace my engine oil filter?
Replace the oil filter at the interval specified by your vehicle manufacturer. For many passenger cars, the filter is replaced during each scheduled oil change, but exact service requirements vary by engine and maintenance plan.
Check the owner’s manual for normal and severe-service intervals. Frequent short trips, heavy towing, dusty conditions, or other demanding use may affect the recommended schedule for some vehicles.
Q
Can I drive immediately after changing the oil filter?
You can generally drive after the replacement is complete, but only after confirming the filter is installed correctly, the oil level is correct, and the required leak inspection has passed. Follow any special startup or priming procedure specified for your engine.
Do not drive if oil is leaking, the oil pressure warning remains on, or the engine makes unusual noise. Shut the engine off and resolve the problem before returning the vehicle to the road.
Q
Why is my oil filter leaking after installation?
Common causes include a trapped old gasket, a damaged or displaced new seal, incorrect filter fit, improper tightening, damaged threads, or a cartridge housing O-ring that is not seated correctly. The wrong filter can also fail to seal against the mounting surface.
Turn off the engine and inspect the installation after it is safe to do so. Replace damaged seals or parts, use the correct tightening method, refill the engine if needed, and confirm that the leak has stopped before driving.
Q
Can I use any oil filter that fits my car?
No. Physical fit alone does not establish compatibility. The filter must meet the engine’s required dimensions, sealing design, filtration needs, and any specified internal valve requirements.
Use the exact application listed in the owner’s manual or a reliable vehicle-specific parts catalog. If you cannot confirm compatibility, do not install the filter until the correct part is identified.
✦ Wrapping Up
Conclusion
Learning how to change an engine oil filter can make routine car maintenance easier and help you understand how your vehicle’s lubrication system works. The core process is simple: identify the correct filter, prepare the vehicle safely, remove the old filter, inspect the sealing surface, install the replacement correctly, refill the engine when required, and verify the oil level and leak condition.
The details matter more than speed. Use the correct part, follow the filter and vehicle manufacturer’s tightening instructions, replace required seals, and never run an engine with an unresolved oil pressure warning or active oil leak. If a filter is stuck, a housing is damaged, or safe access is uncertain, stop and get qualified assistance.
A careful installation, a proper final inspection, and responsible disposal of used oil and filters help make this routine task safer for both your vehicle and the environment. Keep a record of the service and use the manufacturer’s maintenance schedule to plan the next oil and filter change.
💡 Key Takeaway
Before starting, confirm your exact engine’s filter part number, oil specification, oil capacity, access procedure, and tightening requirements. Gather the correct tools, work safely, inspect every seal, and do not drive until the oil level is correct and there are no leaks or unresolved oil pressure warnings.
Learning how to drain motor oil is usually simple when the engine has a clear sump plug. Motor oil, also called engine oil, lubricates, cools, and cleans the…
If you’re asking what is high mileage motor oil, it is engine oil marketed for aging engines, not a universal viscosity or repair formula. It may combine the…
 You’ve stood in the auto aisle, grabbed a bottle, and had no idea what do…
Wondering which engine oil is best? Compare five engine oils and treatments to find the right match for your car, diesel engine, mower, or outdoor tool.