How to Change Your Motor Oil: Easy guide
Most oil changes go wrong because people copy a generic routine instead of matching the car. Knowing how to change your motor oil starts with the year, engine, and VIN. A 5W-30 label can still be wrong if the engine needs another standard or approval.
Access, torque, and safe oil disposal matter just as much.
Manufacturer manuals specify the viscosity, capacity, filter, drain-plug torque, and level-check method. SAE J300 defines viscosity grades, while other labels may carry API SP or SQ performance categories. As of 2026, using the exact manual is more reliable than any internet interval.
Those numbers decide what to check before tools come out.
Quick Answer
How to change your motor oil? Start with the exact vehicle manual. Match its oil specification, capacity, filter, and drain-plug torque.
Position a drain pan before loosening the drain plug. Install the correct filter and seal, then refill gradually. Check pressure, leaks, and level before recording the service.
Problem / Pain Point: Why an Oil Change Can Go Wrong
Most oil-change mistakes come from a small number of decisions. People use a plausible oil, trust a lookalike filter, copy a nearby engine’s torque, or fill by eye. Each shortcut can turn a routine service into an expensive failure.
Start by separating a normal service from a vehicle that may already have a fault. Low oil, low pressure, an overdue interval, and mechanical wear look similar from the driver’s seat. They require different actions.
| Symptom or situation | What it may mean | Best next move |
|---|---|---|
| Level below MIN | Long interval, leak, or excessive consumption | Add the correct oil and find the cause |
| Red oil-pressure warning | Low flow, wrong viscosity, pump failure, or sensor fault | Shut the engine off safely |
| Level normal but warning remains | Pressure-system or mechanical problem | Seek a proper pressure test |
| Oil falls again soon after filling | External leak or internal consumption | Inspect the engine |
| Knocking or rumbling | Possible bearing or other internal damage | Stop driving |
| Service is simply overdue | Normal maintenance need | Match the manual and complete the service |
| Drain plug is hidden or seized | Access problem | Use professional service or approved extraction |
Low oil level is not the same as low oil pressure
A low level means the engine contains less oil than the manufacturer specifies. Low pressure means the oil pump isn’t producing the flow the engine needs. One condition can lead to the other, but they aren’t interchangeable.
Check the level first when the engine is safe to inspect. If it’s dangerously low, add the correct oil before restarting. If it’s already at the proper level, don’t assume the warning is false.
A pressure problem can come from a failed oil pump, blocked filter, damaged sensor, incorrect viscosity, or worn bearings. A complete oil change won’t repair any of those faults by itself.
If the engine is knocking, don’t keep driving to reach a shop. Shut it off and arrange qualified help. Fresh oil can’t protect bearings after lubrication flow has collapsed.
The wrong oil can look completely right
A jug marked 0W-20 may still be wrong. The engine may require an industry performance category, an OEM approval, a diesel rating, or a low-SAPS formula.
Viscosity describes how oil flows at different temperatures. It doesn’t confirm compatibility with seals, emissions equipment, or the engine’s bearing system.
The most dangerous mistake is choosing a plausible substitute without checking the manual. Don’t ask whether 5W-30 “sounds better” than 0W-20. Ask which grade and specification the manufacturer requires for that engine.
A lookalike filter may not seal or flow correctly
Spin-on and cartridge filters can look similar while using different threads, seals, and housings. A wrong baseplate diameter may prevent the filter from seating. A missing housing O-ring can cause a fast leak.
Filter part numbers often contain letters and suffixes for revisions. Don’t treat the main number as optional detail. Confirm the complete number, including any revision suffix.
Incorrect capacity causes underfill or overfill
Underfilling reduces the oil available to the pump and engine. Overfilling can cause foaming, leakage, ventilation-system problems, and exhaust smoke.
The amount that drains from the pan isn’t the refill amount. Oil remains in the filter, engine passages, and galleries. The correct total comes from the manual for the exact engine and filter setup.
An overdue service may be hiding a mechanical problem
A long interval can increase sludge, varnish, contamination, and wear. It doesn’t automatically mean the engine is damaged.
If you also have low pressure, smoke, metallic noise, coolant in the oil, or heavy fuel odor, the overdue service is only part of the problem. Diagnose those symptoms before treating the vehicle as a routine oil change.
Know when the DIY boundary has been reached
DIY service makes sense when the manual is available, access is safe, and you can verify the final torque and oil level. It’s not a good use of time if the drain plug is inaccessible or the engine has active warning signs.
Use a shop when the vehicle requires oil-pan removal, specialized extraction, a rated lift, or a mechanical diagnosis. The labor cost may be lower than repairing a stripped oil-pan thread or an oil-starved engine.
Core Explanation / How It Works: What Engine Oil Does
Engine oil is the working fluid in an engine’s lubrication system. It forms a film between moving parts, carries heat and contaminants, and helps protect metal surfaces from corrosion and deposits.
What the oil does
Engine oil performs several jobs at once.
- Lubrication: It separates moving surfaces and carries loads without direct metal contact.
- Cooling: It carries heat away from oil-cooled pistons, bearings, and turbochargers.
- Cleaning: It holds wear particles and combustion products in suspension for filtration.
- Seal protection: Some approved formulas condition aged elastomer seals.
- Corrosion protection: Additives limit rust and corrosion during shutdown periods.
- Deposit control: Detergents and dispersants help control varnish, sludge, and carbon.
- Hydraulic operation: Some engines use oil pressure for valve timing or other systems.
Oil can’t repair a damaged pump, a cracked oil pan, worn bearings, or a stretched timing chain. It protects a healthy system. It doesn’t make a failed engine healthy again.
Viscosity and cold-start flow
SAE J300 is the viscosity classification system used for engine oils. A multigrade label contains two temperature-related numbers.
For example, 5W-30 means:
- 5W describes cold-temperature pumping behavior.
- 30 describes viscosity at operating temperature.
A 0W oil is formulated for very cold flow. Modern engines often use 0W-20 or 0W-30, but the manual must specify that grade.
Cold-start wear matters because much of the lubrication happens during startup. The oil must reach the pump, filter, bearings, and cylinder walls quickly. A too-thick oil can pump slowly.
A too-thin oil may not maintain the required hot-oil film.
Oil flow and pressure are temperature-dependent. A reading taken with cold oil may look different from one taken after the engine reaches operating temperature.
Viscosity does not prove performance
The viscosity grade tells you how oil behaves across temperatures. It doesn’t show whether the oil meets a fuel, emissions, or wear requirement.
The American Petroleum Institute publishes passenger-car and diesel oil performance categories. Common gasoline-engine designations include API SP and API SQ. API SQ succeeded SP and is designed to maintain backward performance compatibility, but the vehicle manual still controls the choice.
ILSAC GF-6 categories, ACEA categories, and OEM approvals answer different questions. They apply to different engines and markets. A label with several ratings may still miss the one your engine requires.
OEM approval is a separate requirement
An OEM approval shows that the oil was formulated and tested for compatibility with a particular vehicle or engine family. The approval can include requirements for seals, materials, emissions systems, and additive chemistry.
Follow the manual’s wording carefully.
- If the approval is required, don’t use an oil without it.
- If the approval is recommended, the manual may allow another oil that meets the listed specification.
- If no approval appears, the viscosity and performance requirements still apply.
An “approved” oil is not automatically better in every engine. A technically suitable substitute can be valid when the manufacturer allows alternatives. The problem is a substitute chosen without checking the manual.
Diesel engines may need more than a viscosity grade
Diesel engines may require a diesel performance category, a particular OEM approval, or low-SAPS oil. That matters when the engine protects a diesel particulate filter, catalytic converter, or other emissions equipment.
Passenger-car oil and diesel oil may share a viscosity grade. They don’t necessarily share the same performance specification.
Low-SAPS oil limits sulfur, ash, and phosphorus. It isn’t automatically correct for every diesel. It should be used when the engine’s emissions system calls for it.
How oil pressure forms
The oil pump creates flow, while viscosity, temperature, clearances, and passage restrictions affect the resulting pressure. A healthy system must meet the manufacturer’s pressure specification under defined test conditions.
| Factor | Effect on oil pressure |
|---|---|
| Low oil level | Reduces available oil volume and can lower flow |
| Low viscosity | May reduce pressure at operating temperature |
| High viscosity when cold | Can slow pump flow during startup |
| Blocked filter | Restricts flow through the lubrication system |
| Failed pump | Reduces or eliminates pressure |
| Worn bearings | Can alter flow and create a low-pressure condition |
| Failed sensor or switch | Can trigger a warning without a true pressure loss |
| Oil temperature | Changes viscosity and therefore pressure |
A dashboard warning lamp is a warning, not a full diagnostic test. It may illuminate below a preset pressure threshold. It doesn’t identify the failed component.
If the lamp comes on, shut the engine off safely. Check the level first. Then diagnose the pump, filter, sensor, oil specification, and engine if the level is correct.
The oil level changes with temperature
Oil expands as it warms. A level check performed cold may differ from one taken hot. Some manufacturers ask for a warm check, while others use a defined cold procedure.
A dipstick reading also depends on the vehicle’s position. Don’t check on a steep driveway unless the manual specifically accounts for that condition.
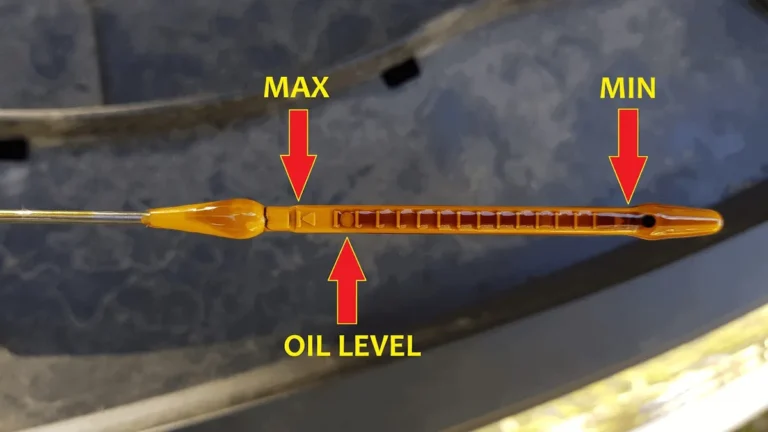
For many dipsticks, the process is:
- Park on level ground.
- Shut the engine off.
- Wait for the manufacturer’s stated time.
- Pull and wipe the dipstick.
- Reinsert it to the specified depth.
- Remove and read it again.
Some dipsticks are read while partially inserted. Others require full insertion. Copying another vehicle’s sequence can produce a false reading.
Electronic oil-level systems have their own conditions. The display may need a warm engine, a minimum runtime, or a settling period after shutdown. An oil-level warning is not always a precise numerical reading.
The filter protects the system
The oil filter captures particles that circulate through the engine. Its media and valve arrangement may also manage startup flow and the volume of oil retained during shutdown.
A filter can fail in several ways.
- A damaged gasket can cause an external leak.
- A wrong thread can prevent installation.
- A blocked filter can reduce flow.
- A stuck bypass valve can delay lubrication during startup.
- A missing housing seal can drain oil from the cartridge area.
A spin-on filter gasket normally seals against the engine adapter. A cartridge filter may use several O-rings in the housing and cap. Replace every seal named by the manufacturer.
The oil-life monitor is a reminder
An oil-life monitor estimates service need from factors such as time, mileage, engine runtime, temperature, trip length, and idle time. It doesn’t directly measure oil cleanliness or mechanical condition.
The monitor cannot detect every leak, failed water pump, or damaged bearing. It also can’t replace a time or mileage interval printed in the manual.
After a complete service, reset the monitor only as the manufacturer directs. A reset without the required oil-and-filter service creates a false maintenance record.
Features / Components / What’s Inside: The Parts and Tools You’ll Handle
Compatibility depends on exact parts, not general appearance. A correct-looking plug, washer, filter, or oil cap can fit poorly if one detail differs.
Engine oil and its identification
The oil must satisfy every requirement listed for the vehicle. Check the viscosity, performance category, fuel type, OEM approval, and emissions-system needs.
Use a clean, sealed container that holds the full specified capacity. Keep the label readable until the service is complete. A loose container in a dirty work area can introduce contamination.
If a top-up becomes necessary, use the same approved specification whenever possible. Don’t blend incompatible oils just to use what you have.
Spin-on and cartridge filters
A spin-on filter screws directly onto an engine-mounted adapter. A cartridge filter sits inside a housing secured by a cap or cover.
| Filter feature | What to verify |
|---|---|
| Part number | Complete number, including revision suffixes |
| Filter style | Spin-on or cartridge |
| Thread or dimensions | Correct fit for the mounting surface |
| Baseplate diameter | Correct adapter contact |
| Gasket or O-ring | Correct size, material, and position |
| Bypass arrangement | Matches the engine design |
| Housing seals | Replaced where required |
| Priming | Required or not required by the manufacturer |
Cartridge filters may need prefill. Spin-on filters normally arrive empty, though they can contain residual manufacturing oil. Don’t apply one procedure to every filter design.
Drain plug and sealing hardware
Drain plugs may use a crush washer, O-ring, bonded seal, or prepared thread compound. The manual identifies the correct part and tightening method.
Inspect the old plug for corrosion, damaged threads, and a rounded head. A previously overtightened plug may strip even when the replacement is tightened correctly.
Never reuse a crushed washer unless the manufacturer permits it. Don’t add thread sealant to a factory-sealed plug unless the instructions call for it.
Oil filler and level-check components
The oil filler neck is normally marked on the cap or nearby. Keep dirt and tools away from the opening.
A vehicle may use a dipstick, an electronic oil-level sensor, or both. Some engines have separate sensors for pressure, temperature, and level. The manual identifies what each warning means and how to check it.
Oil drain access
Oil drains through a plug in the sump, though some vehicles use a drain hose or require oil-pan removal. An underbody shield, heat shield, splash guard, or access panel may block the plug.
Keep removed fasteners organized. Plastic retainers and Torx screws can strip or disappear if forced.
If the plug is recessed or inaccessible, don’t improvise with an unstable drain setup. Approved extraction may be safer. A technician can handle a seized plug or a hidden filter.
Tools and supplies
| Tool or supply | Purpose | Key requirement |
|---|---|---|
| Correct socket | Fits the drain plug without rounding it | Correct size and type |
| Calibrated torque wrench | Applies the specified final plug torque | Correct range and units |
| Oil drain pan | Collects sump oil and filter residual | Larger than the full sump volume |
| Filter wrench | Removes a spin-on filter | Protects the canister and engine |
| Clean funnel | Guides oil into the filler | Clean and stable |
| Oil-resistant gloves | Protect hands from oil and hot surfaces | Intact and oil-resistant |
| Eye protection | Reduces splash risk | Properly fitting protection |
| Absorbent pads | Catch small spills | Kept away from ignition sources |
| Ramps or a rated lift | Raises the vehicle safely | Rated for the vehicle weight |
| Wheel chocks | Prevent rolling | Placed as specified |
| Flashlight or mirror | Improves access and inspection | Safe around hot components |
| Approved waste container | Stores used oil | Clean, closed, and leakproof |
| Sealed metal container | Stores oily rags | Tight-fitting lid |
A torque wrench is useful only if it’s in good condition and set correctly. If you can’t verify the plug’s final torque, a shop may be the safer choice.
A drain pan should hold the entire sump volume plus residual oil in the filter. Don’t use a shallow tray that can overflow when the plug comes out.
Comparison / Alternatives / Options: Choose the Right Oil, Filter, and Change Method
Choosing by price or appearance can create expensive problems. The correct option must match the engine, the service condition, your equipment, and your disposal plan.
Full synthetic, synthetic blend, or conventional oil
The base oil type is one decision. The manual’s viscosity and performance requirements are the controlling factors.
| Oil type | Best fit | Potential benefit | Main caution |
|---|---|---|---|
| Full synthetic | Engines that specify or permit it | Consistent temperature behavior | It isn’t correct without the required approval |
| Synthetic blend | Engines that allow a blend | Balances formulation and cost | “Blend” alone doesn’t prove specification |
| Conventional oil | Engines that explicitly allow it | Often lower cost | May not suit modern low-viscosity requirements |
| High-mileage oil | Selected older engines with compatible needs | Targets aged seals and oxidation | It doesn’t override another required approval |
| Low-SAPS oil | Engines with sensitive after-treatment systems | Limits certain harmful additives | It isn’t universally correct |
| Diesel oil | Diesel and qualifying commercial engines | Matches diesel lubrication needs | It isn’t interchangeable with gasoline oil |
Full synthetic isn’t automatically safer for every engine. Some modern engines require it. Other engines explicitly permit conventional oil.
A high-mileage label is not a viscosity grade or performance category. It describes a formulation aimed at selected aging concerns. The manual still decides whether it fits.
Required approval versus a general substitute
A product that matches the required viscosity and performance category may still lack the OEM approval. Conversely, an oil carrying the approval will usually meet the linked viscosity and performance requirements.
Use this order of comparison:
- Confirm the exact engine and fuel type.
- Match the required viscosity.
- Match the performance category.
- Check the OEM wording.
- Confirm any low-SAPS requirement.
- Confirm the oil capacity and filter setup.
If the manual is unavailable, use the VIN with the manufacturer’s support system. Don’t rely on a forum label, a parts-store scan result, or another vehicle’s receipt.
OE filter versus aftermarket filter
An OE filter is the manufacturer’s specified or supplied part. An aftermarket filter can be suitable if its complete part number and specifications match.
An aftermarket filter may cost less without being lower quality. The real question is whether it matches the thread, baseplate, seal, cartridge, and valve arrangement.
| Choice | Best for | Advantage | Risk if selected carelessly |
|---|---|---|---|
| OE filter | Drivers wanting the simplest fitment match | Confirmed vehicle compatibility | Higher cost or limited availability |
| Quality aftermarket filter | Drivers comparing cost and fitment | Often lower cost | Wrong seal or dimensions can cause leaks |
| Unknown or unverified filter | Nobody | None | Uncertain fitment and flow |
| Used filter | No replacement use | None | A used filter can’t be reliably restored |
Don’t reject an aftermarket filter just because it isn’t branded OE. Verify the complete part number and packaging information. Don’t accept it just because it looks similar.
DIY service versus professional service
A DIY service saves labor and gives you direct control. It also places responsibility for safe access, torque, parts, and disposal on you.
| Factor | DIY service | Professional service |
|---|---|---|
| Materials | You buy oil, filter, and seal | Shop supplies them |
| Labor | Your time and effort | Charged labor |
| Access | Your ramps, lift, or ground-level setup | Controlled shop equipment |
| Specification | You must verify every requirement | Shop should still verify it |
| Error risk | Stripped plug, leak, or incorrect fill | Depends on shop quality and terms |
| Disposal | You arrange approved collection | Often handled by the shop |
Use professional service when the drain point is hidden, the plug is seized, or the engine has symptoms. DIY service works better when the manual is clear and your workspace is safe.
Top-up versus a complete service
A top-up restores the level between scheduled services. It doesn’t remove contaminated oil or replace the filter.
Use a top-up when the level is slightly low, the oil is correct, and there’s no leak, warning, or unusual consumption. Use a complete oil-and-filter service when the interval is due or the condition is unknown.
Repeated top-ups are a diagnostic clue. If the engine needs oil every few hundred miles, find the loss before buying another container.
Conventional draining versus extraction
Draining through the plug gives access to the old filter and lets you inspect the underside. It’s the usual method when access is safe.
Extraction uses a hose and pump to remove oil through an approved opening. It may suit a vehicle with no usable drain plug or very low access.
Ask whether extraction includes a filter replacement, oil analysis, and underbody inspection. You may still need to remove access panels or the oil pan.
Normal service versus severe service
Normal service assumes ordinary driving. Severe service covers repeated conditions such as short trips, extended idling, extreme cold, towing, hauling, or dusty use.
The manual may shorten the interval or require another oil approval. It may also call for additional inspections. Don’t apply a normal-use interval to severe use without checking.
The practical decision rule
- If the engine has a pressure warning or mechanical noise, diagnose it first.
- If the level is dangerously low, add the correct oil before extended driving.
- If the level keeps falling, inspect for leaks and internal consumption.
- If the service is simply due, match every manual specification.
- If the drain point is inaccessible, use professional service or approved extraction.
- If the oil specification is unclear, don’t guess.
Costs / Pricing / Data / Specs: The Numbers That Must Match
A correct service depends more on specifications than price. Engine displacement and model name aren’t enough to determine oil capacity, torque, or service interval.
The vehicle-specific specification sheet
Record the following values before buying anything.
| Specification | Why it matters |
|---|---|
| Engine and fuel type | Determines the correct oil category |
| Oil capacity | Prevents underfill and overfill |
| Viscosity grade | Controls cold and hot flow |
| Performance category | Confirms the required tested performance |
| OEM approval | Confirms vehicle-specific compatibility |
| Filter part number | Ensures correct fit and flow |
| Drain-plug torque | Prevents leaks and thread damage |
| Seal or washer type | Prevents plug leakage |
| Level procedure | Produces a valid dipstick or electronic reading |
| Service interval | Sets time and distance guidance |
| Pressure specification | Supports accurate diagnosis |
| Consumption guidance | Identifies abnormal oil use |
Use the manual for the exact model year, engine, fuel type, and production market. A similar model may use a different filter, sump, or oil specification.
Oil capacity and useful conversions
Oil capacity may appear in litres, US quarts, or both.
- 1 US qt = 0.946 L
- 1 L = 1.057 US quarts
For example, 4.7 US quarts converts to about 4.45 litres. Keep the original manual value as the primary reference.
Capacity can depend on whether the filter is pre-filled or empty. It can also differ between engine variants that share a model name. Don’t calculate capacity from engine displacement alone.
Drain-plug torque and angle
Torque may be specified in newton-metres, abbreviated N·m, or foot-pounds, abbreviated lb-ft.
One N·m is approximately 0.738 lb-ft. Use the original value and set the torque wrench accordingly.
Some engines require a base torque followed by an additional angle. The sequence might be 25 N·m plus 90 degrees. Another engine may specify one final torque only.
A locking plug, bonded seal, or special sealing washer can have a different procedure. Never copy the value from an engine that merely uses the same socket size.
Normal and severe service intervals
A manual may express service life in time, distance, or both. It may also provide a normal schedule and a separate severe-use schedule.
The oil-life monitor can estimate remaining service based on driving conditions. It doesn’t override the manual’s time limit or severe-use definition.
As of 2026, there’s no dependable single national oil-change interval. Engine design, oil specification, driving pattern, and manufacturer testing all affect the correct schedule.
Oil pressure and consumption data
A pressure test needs a specified oil temperature, engine speed, sensor location, and gauge range. A dashboard lamp doesn’t provide enough data for a mechanical conclusion.
Consumption guidance is also vehicle-specific. Some manufacturers state a serviceability limit, while others tell owners to investigate a sudden increase. Don’t treat a figure from another engine as a warranty or diagnostic threshold.
Record the baseline consumption after a service. A later change from a few miles between top-ups to a rapid loss is more useful than one isolated reading.
DIY and professional costs
A DIY material cost can be calculated as:
Oil quantity × unit price + filter + replacement seal + disposal + tax
Add ramps, lift rental, or tool purchases only if you don’t already own them.
Professional pricing can include:
- Oil quantity and type
- Filter and labor
- Shop supplies
- Disposal or environmental fees
- Taxes
- Travel or mobile-service charges
As of 2026, market prices vary by region, vehicle, oil type, labor, and service provider. A large-capacity diesel or premium synthetic service can cost more than a small gasoline-engine service.
The cheapest quote isn’t always the best deal. An incompatible filter, incorrect oil, or missing drain-plug seal can cost far more than a proper service.
Time and access affect the decision
A straightforward ground-level drain may finish quickly. Hidden plugs, cartridge housings, seized hardware, and oil-pan removal can turn a routine job into a shop task.
Forcing a plug or reusing a damaged filter to save time can create a second repair. If access is poor or the specification is uncertain, professional labor is the cheaper path.
Use Cases / Best For / Who It’s Right For: Match the Service Plan to the Vehicle and Driving Life
The same engine can need different service depending on how it’s driven. Time, temperature, load, idling, dust, and idling frequency all matter.
| Driving pattern | Main concern | Practical response |
|---|---|---|
| Repeated short trips | Moisture and incomplete warm-up | Use the severe-use schedule if defined |
| Extended idling | Fuel dilution and heat buildup | Shorten the interval as specified |
| Stop-and-go traffic | Repeated heat cycles | Follow the severe-use interval |
| Extreme cold | Slow cold-start flow | Match the specified 0W viscosity |
| Extreme heat | Oxidation and thermal stress | Maintain cooling and use the approved oil |
| Towing or hauling | Sustained high load | Follow severe-use and extra inspection rules |
| Gravel, dirt, or mud | Abrasive contamination | Maintain filtration and inspect for contamination |
| Highway-only use | Lower stop-start stress | Normal service may apply, but time limits remain |
| Long storage | Moisture and restricted operation | Follow the manufacturer’s storage procedure |
Short trips and city driving
Short trips may not let the engine reach a stable operating temperature. Moisture and small amounts of fuel can remain in the oil instead of burning off.
If short trips are routine, check whether the manual classifies them as severe service. A low-mileage vehicle driven mostly around town may need more frequent changes than its odometer suggests.
Fuel odor, a rising oil level, or a thin-looking oil sample can indicate fuel dilution. Fresh oil won’t fix a leaking injector or other fuel-system fault.
Extreme cold
Cold weather increases the importance of startup flow. Use the manual’s specified cold viscosity, which may be 0W-20 or 0W-30.
Don’t choose a heavier oil because the weather is cold. It may flow too slowly during startup. Don’t choose a thinner oil because it pours easily.
Cold-weather performance must match the manufacturer’s specification.
A slow winter start can also come from a weak battery, stale fuel, or other conditions. Oil doesn’t fix every starting problem.
Extreme heat and towing
Sustained high load increases heat and oxidation stress. Towing, hauling, and repeated high-speed use may qualify as severe service.
Follow the manual’s severe-use interval, oil approval, and extra inspection items. Don’t add a generic thickener or performance additive unless the manufacturer supports it.
If the engine overheats, changing the oil won’t repair the cooling system. Diagnose the temperature fault first.
Older and high-mileage vehicles
Age doesn’t determine the correct oil. The manual, service history, engine condition, and emissions equipment still control the choice.
A high-mileage oil may be suitable when the manufacturer allows it. It isn’t a universal requirement for every older engine.
At higher mileage, inspect common external leak points.
- Drain plug and oil-pan seams
- Filter housing and filter cap
- Valve-cover gasket
- Front crank seal
- Rear main seal
- Turbocharger oil lines
- Oil separator and breather
- Coolant-entry points
A sudden increase in consumption deserves investigation. A stable level and no fresh leak are reassuring, but they don’t replace regular checks.
Diesel engines
Diesel service can require a specific viscosity, diesel performance category, and low-SAPS formulation. A gasoline oil with the same viscosity isn’t automatically suitable.
Short trips and repeated idling can increase fuel dilution. If the dipstick level rises unexpectedly or the oil smells strongly of fuel, inspect the fuel system.
If the engine protects a diesel particulate filter, don’t use an additive that can raise harmful ash or phosphorus. Follow the oil and emissions-system specification together.
Hybrids and low-mileage vehicles
A hybrid’s gasoline engine can still need scheduled oil changes even when it runs infrequently. The manufacturer may base service on elapsed time and engine runtime.
If the car sits for months, follow the storage procedure. A few minutes of idling may not warm the engine enough to evaporate moisture.
Before returning it to regular use, check for leaks, rodent damage, low coolant, blocked vents, and other issues created during storage.
Modified engines
Turbochargers, engine swaps, camshaft changes, and performance tuning can alter heat and oil-flow demands. Use documentation from the vehicle or engine builder where available.
Generic high-viscosity oils and additives can conflict with tighter clearances, bearings, seals, or emissions systems. A modified engine needs documentation, not guesswork.
Used-car purchases
Ask for service dates, mileage, oil specification, and filter records. A generic “oil changed” entry doesn’t show whether the correct oil was used.
If the history is missing, ask for an oil-level check, underbody inspection, leak assessment, and oil sample when appropriate. A laboratory can check viscosity, wear metals, fuel, coolant, and other contamination markers.
If the engine uses large amounts of oil, find out whether the loss is external or internal before buying parts or topping it up repeatedly.
DIY work versus shop service
Choose DIY service when you have the exact manual data, safe access, correct parts, rated equipment, and approved disposal.
Choose a shop when the plug is hidden or seized, the filter housing is complex, the vehicle needs extraction, or the engine has warning signs. A shop is also safer if you can’t verify torque or the final oil level.
Safety / Legal / Compliance / Warnings
An oil change involves hot oil, heavy lifting, pressurized spray, and fluid disposal. The task is usually simple, but a careless mistake can cause burns, crushing injuries, engine damage, or contamination.
If the red oil-pressure warning comes on, shut the engine off safely. Don’t keep driving or rev the engine to test the warning.
Handle hot oil and hot components carefully
Used oil can remain hot enough to cause a serious burn. The exhaust system, turbocharger, and heat shields may be even hotter.
If the manual calls for warm oil, warm it only to the stated condition. Shut the engine off and allow enough time for safe handling.
Keep your face and hands away from the drain opening. Oil can flow quickly when the plug comes out. Don’t loosen it over bare feet or an unprotected drain pan.
Use oil-resistant gloves and suitable eye protection. Keep children and pets away from the work area.
Electric cooling fans can start without the engine running. Stay clear of the fan, belts, pulleys, and other moving components.
Support the vehicle correctly
Never work beneath a vehicle supported only by a jack. A jack can slip or settle under load.
Use the manufacturer’s jacking points, rated jack stands, or a rated vehicle lift. Follow the vehicle’s lifting instructions and chock the wheels as specified.
If using ramps, inspect them for damage and confirm they’re rated for the vehicle. Approach slowly and keep the vehicle within the supported area.
Don’t rely on a jack stand placed on an unapproved body point. A wrong support point can damage the vehicle or fail under load.
Prevent slips, fire, and spills
Clean up oil immediately. A spill can make a driveway slippery and attract cats, dogs, wildlife, and insects.
Keep oily rags in an approved metal container with a tight-fitting lid. Don’t leave them in a plastic bag near a hot engine.
Keep oil and oily materials away from flames, sparks, heaters, and hot exhaust components. Don’t use a shop vacuum or household vacuum for used oil unless it’s rated for oily liquids.
If oil reaches a storm drain, don’t wash it farther into the system. Contain the spill and follow local cleanup requirements.
Dispose of oil legally
Do not pour used oil into a storm drain, sink, toilet, storm gutter, or onto the ground. Don’t bury it unless local regulations specifically allow that method.
The U.S. Environmental Protection Agency explains that improper used-oil disposal can contaminate soil and water. Local rules may be stricter in some areas.
Use a repair shop, quick-lube center, service station, or approved collection site when available. Check for volume limits and container requirements.
The old filter contains residual oil. Keep it upright in a sealed bag or container until disposal. Don’t leave it open beneath the vehicle.
Oily absorbents, contaminated parts, and solvent-soaked materials may have separate disposal rules. Ask the collection site what it accepts.
Use only compatible replacement parts
Use the exact drain plug, washer, O-ring, filter, and housing seals specified by the manufacturer. A close-looking part may use a different thread, diameter, or material.
Don’t add thread sealant unless the manual calls for it. Extra sealant can alter the final torque and damage the plug or oil-pan threads.
Use the specified oil filler cap or a clean, compatible replacement. A loose or incorrect cap can allow oil leakage or admit contaminants.
Don’t start the engine during an incomplete assembly
Never run the engine with the drain plug removed or the filter absent. Oil can flow out before the lubrication system is supplied correctly.
Prime a cartridge filter only as directed. Close the housing and tighten the cap to specification before startup.
If the oil-pressure warning remains on, shut the engine off. Don’t leave it idling while you look for paperwork or replacement oil.
Step-by-Step Process / How to Guide: Prepare the Vehicle and Workspace
Preparation prevents the most common mistakes. Verify the vehicle, inspect the existing condition, gather exact parts, and secure a safe work area before loosening anything.
Confirm the exact vehicle
Record the year, make, model, trim, engine, fuel type, and VIN where available. Check the engine-bay label for an engine code.
Use the owner’s manual for the exact market and production period. Similar vehicles can use different oil filters, oil capacities, drain-plug washers, or oil approvals.
Gather the service specifications
Record these values in one place.
- Required viscosity
- Performance category
- OEM approval, if required
- Oil capacity
- Filter part number
- Drain-plug torque
- Replacement washer or O-ring
- Level-check procedure
- Priming requirement
- Normal and severe service intervals
If the manual is unavailable, contact the manufacturer using the VIN. Don’t substitute an internet chart built from generic engines.
Check the current oil condition
Use the manufacturer’s level procedure if the engine is safe to inspect. If the level is below MIN, identify the reason before beginning a routine service.
Look underneath for fresh oil around the drain plug, filter, housing, and oil pan. Fresh fluid is more meaningful than old residue.
If the oil is milky, metallic, fuel-heavy, or full of sludge, collect a sample if practical. Don’t assume fresh oil will remove an underlying coolant, fuel, or mechanical problem.
Gather the correct parts and tools
| Item | Verify before starting | Stop if |
|---|---|---|
| Engine oil | Viscosity, category, approval, and quantity match | Specification is uncertain |
| Oil filter | Complete part number and style match | Fitment is unverified |
| Drain-plug seal | Washer or O-ring matches the plug | Correct seal is missing |
| Drain pan | Capacity exceeds sump and filter residual | Pan is damaged or too small |
| Torque wrench | Range and units cover the value | Final torque can’t be verified |
| Lifting equipment | Rated for the vehicle | Jack is the only support |
| Oil-waste container | Clean, closed, and leakproof | Container is unsafe |
| Work area | Level and clear of drains | Spills can’t be contained |
Buy enough oil for the specified capacity and a small reserve in the same approved product. Don’t rely on an unrelated substitute for the reserve.
Secure the vehicle
Park on firm, level ground. Engage the parking brake and place the transmission in the specified position.
Use wheel chocks as directed. If the vehicle must be raised, follow the manufacturer’s jacking instructions and use rated supports.
Keep the work area clear of stones, gravel, and loose tools. A dropped object can damage the oil pan or become trapped near a ramp.
Warm the engine only if directed
Some service procedures call for a short warm-up. Others require a cold drain because of plug sealing or oil-retention requirements.
Follow the manual’s temperature guidance. Don’t idle for twenty minutes simply because hot oil drains faster.
After any warm-up, shut the engine off and allow a safe handling period before opening the plug.
Prepare the drain area
Identify the drain plug, drain hose, underbody shields, and filter access before starting. Clean around the plug with a rag.
Position the drain pan before loosening the plug. A pan that’s too low, too small, or unstable can overflow.
If the plug is seized, inaccessible, or surrounded by fragile wiring, stop. Use a shop or an approved extraction process.
Step-by-Step Process / How to Guide: Drain the Old Oil and Replace the Filter
The assembly is ready for draining when the correct parts are present and the drain pan is in place. Work slowly, inspect the old oil, and keep every seal visible.
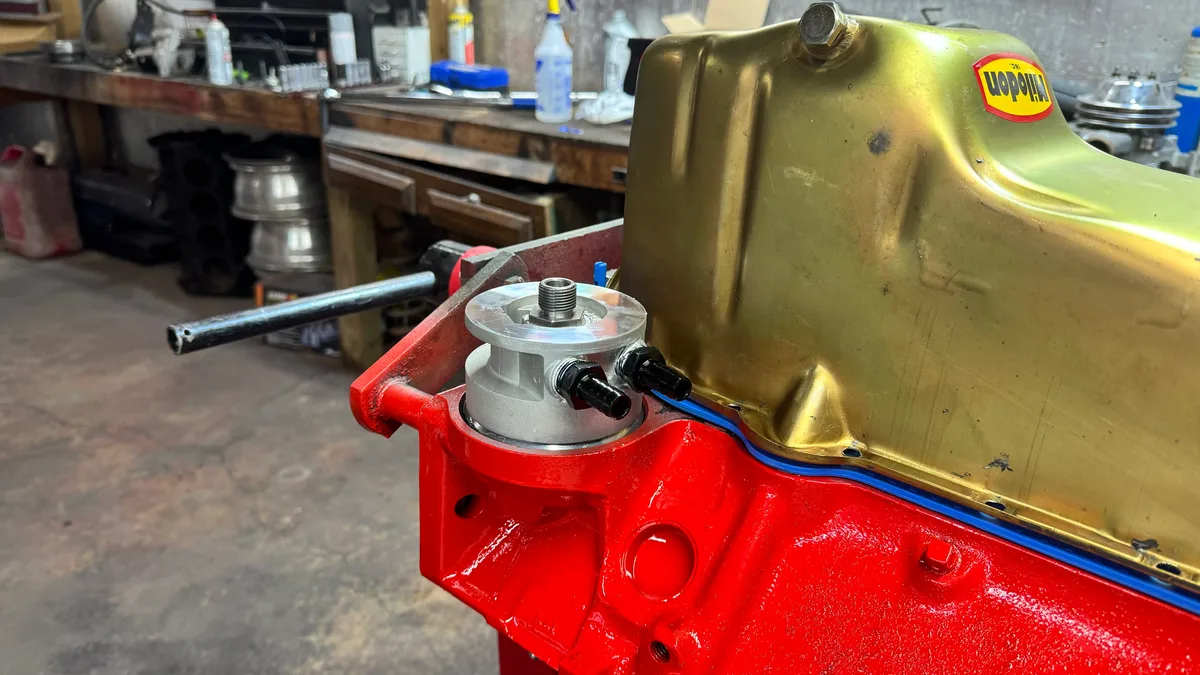
Remove access panels safely
Remove only the shields or panels named in the manual or clearly needed for access. Keep every fastener in its original location.
Support a panel once it’s free from its mounts. Don’t let it rest against the oil pan, wiring, or exhaust.
Plastic retainers can break if pried with the wrong tool. Replace a damaged retainer with the correct part.
Loosen the drain plug
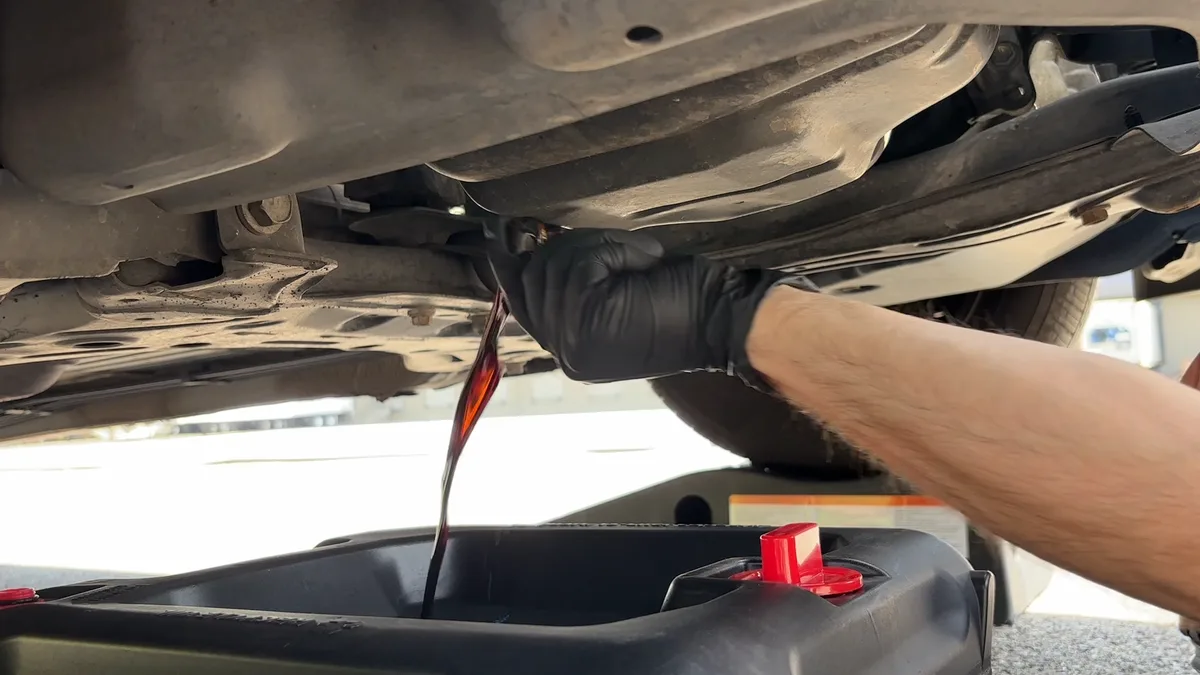
Wipe dirt away from the plug and place the drain pan beneath it. Use the correct six-sided socket if possible.
Turn the plug by hand first when it moves freely. Then break it loose gradually with the socket.
Once it’s free, lower the plug into the pan. Don’t let it fall beneath the vehicle.
Allow the oil to drain for the time stated by the manufacturer. Don’t assume every engine needs the same number of minutes.
Some engines need prompt plug replacement after draining. A thin oil film on the sealing surface can help, but follow the manual and fit the new seal correctly.
Inspect the oil and plug
Look for milkiness, fuel odor, metallic particles, heavy water, or unusual sludge. Keep a sample if the engine has symptoms or an uncertain history.
Inspect the plug for damaged threads, corrosion, a rounded head, or a scored sealing face. Replace a damaged plug when the manual or condition requires it.
Check the old washer or O-ring for crushing, tearing, or distortion. Replace it with the exact specified part.
Fit the drain plug and seal
Install the new washer or O-ring in the correct position. Don’t fold, stretch, or rotate it onto the plug.
Thread the plug in by hand for several turns. If it doesn’t start smoothly, remove it and inspect the threads.
Tighten it with a calibrated torque wrench. Follow a base-torque-plus-angle procedure if the manual specifies one.
Don’t add extra force after reaching the final value. Overtightening can strip the oil-pan threads.
Remove the old spin-on filter
Wipe the filter mounting area and place the drain pan beneath it. Use steady pressure to turn the filter counterclockwise.
A band-style filter wrench can reduce the risk of damaging the painted canister. Don’t use a tool that can crush the filter against the engine.
As the filter clears the adapter, expect residual oil to drain. Move the pan if necessary.
Inspect the old gasket or O-ring for damage. A filter with a torn gasket can leak immediately after installation.
Install a new spin-on filter
Confirm the complete part number before installation. Check that the sealing gasket or O-ring is seated correctly.
If the manufacturer calls for a light film of oil on the gasket, apply only a thin coat. Don’t use grease or thread sealant.
Screw the filter by hand until the gasket seats. Add only the turns specified for that design.
If it won’t thread easily, stop. The gasket may be misplaced, or the filter may be the wrong part.
Remove and replace a cartridge filter
Open the housing as specified and let the oil drain into the pan. Keep dirt out of the housing and engine openings.
Inspect the cartridge, cap, housing, and every O-ring. Replace the specified seals even if they look flexible.
If the manufacturer requires a primed cartridge, fill it with the correct oil before installation. Seat it without damaging the media or end caps.
Install the cap or cover and tighten it to specification. A cap that moves under light hand pressure may not be seated correctly.
Check the complete assembly
Before adding oil, verify several points.
- The drain plug is present and correctly torqued.
- The washer or O-ring is seated.
- The filter is correctly installed.
- The cartridge housing is closed.
- All required housing seals are present.
- No rag or tool remains in the engine bay.
- Access panels can be refitted without trapping oil.
A fresh leak often appears only after the oil warms and pressure develops. The first startup is an inspection point, not proof that the service is finished.
Step-by-Step Process / How to Guide: Refill, Start, Check, and Record
Once the drain plug and filter are secure, the engine can be refilled with the approved oil. Add it in stages, confirm pressure, inspect for leaks, and verify the level under the manual’s conditions.
Verify the assembly before opening the filler
Check the drain plug, filter gasket, and cartridge cap one more time. Remove every tool and rag from the engine bay.
Clean the oil filler neck and inspect the new oil container. Confirm the viscosity, performance category, and approval before opening it.
Add the oil gradually
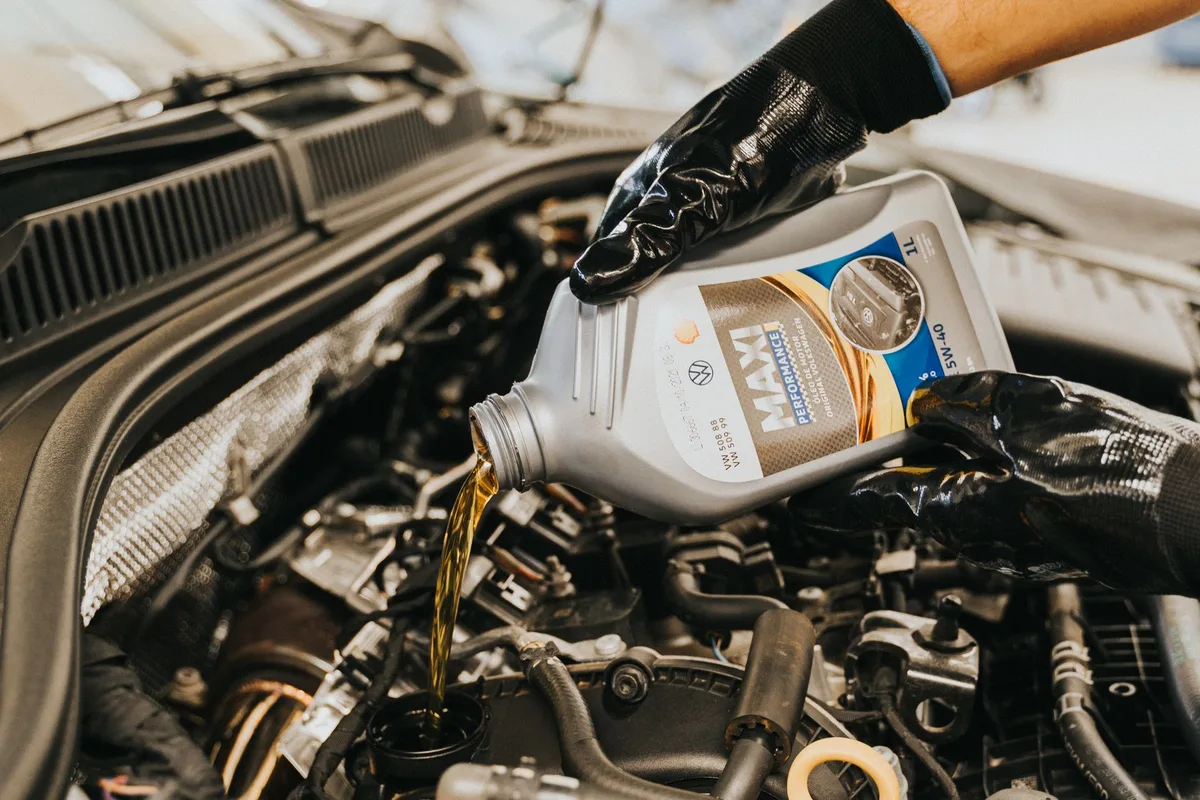
Use a clean funnel and add oil in stages. Follow any refill quantity stated in the manual.
If the manual gives only total capacity, stop before the final target and check the level. Keep a small amount of the same approved oil for correction.
Don’t use the amount that drained as the refill amount. Oil remains in the filter, galleries, and engine passages.
Watch the level carefully during filling. A cartridge prefill and the engine’s internal retention affect the final quantity.
Prime the system if required
Some engines use an electric pump or specified pre-ignition sequence. Follow that procedure with the drain plug and filter fully installed.
If the manufacturer doesn’t specify priming, proceed to a normal start. Don’t improvise a prolonged crank with the filter removed.
Start the engine
Close the filler and start the engine. The oil-pressure indication may behave differently during cranking, so follow the manual’s guidance.
If the warning stays on, the gauge shows no pressure, or the engine knocks, shut it down. Don’t rev the engine to test it.
Inspect for leaks
Watch the drain plug, filter, cartridge cap, oil pan, filler neck, and front of the engine.
Look for fresh oil movement rather than old residue. If you see a leak, shut the engine off and correct it before adding more oil.
Listen for new knocking, rumbling, or hissing. Check the temperature gauge and charging warning while the engine is running.
Allow the required settling time
Park on level ground and wait for the manufacturer’s stated settling period. The correct wait may be brief, while another engine may require a longer period.
Don’t check while the engine is running. Don’t move the vehicle across a slope or uneven surface before reading the level.
Check the level
Use a dipstick or electronic procedure exactly as specified. A dipstick may need to be inserted fully, partially, or read while seated.
The target should match the manufacturer’s MIN and MAX range or stated target. Don’t fill to the top of the dipstick.
| Reading | Meaning | Action |
|---|---|---|
| Below MIN | Not enough oil | Add the correct oil gradually and recheck |
| Within range | Correct amount | Continue the final inspection |
| Above MAX | Excess oil | Correct the level before driving |
| Unstable or unclear | Procedure or system problem | Repeat the specified check or seek diagnosis |
Correct an overfilled engine
If the level is above MAX, don’t add any more oil. Use approved extraction or have a shop remove the excess safely.
Excess oil can foam, leak past seals, enter the ventilation system, or reach the exhaust. Don’t loosen a hot plug casually to remove a small amount.
Repeat the level check afterward. Make sure the dipstick procedure isn’t creating a false high reading.
Correct a low level
Add the correct oil in small amounts. Recheck using the same manual procedure.
If the level falls quickly after filling, inspect for an external leak, high consumption, fuel dilution, or another fault. Don’t rely on repeated top-ups.
If the oil-pressure warning returns, stop the engine. A level correction hasn’t solved the problem if pressure remains inadequate.
Reset the oil-life monitor
Reset the monitor after completing the required service. Follow the dashboard menu, scan tool, or manufacturer procedure.
If the monitor is automatic, confirm the service was recorded. Don’t assume every vehicle allows a manual reset.
Record the work
Keep a clear maintenance record.
| Record item | What to include |
|---|---|
| Date | Service date |
| Mileage | Odometer reading |
| Oil | Quantity, viscosity, category, and approval |
| Filter | Complete part number |
| Seal | Washer or O-ring type |
| Observations | Leaks, noise, smoke, or warnings |
| Next service | Time, mileage, and duty-cycle reminder |
Keep the receipt or written record with the vehicle’s maintenance file. It helps the next owner and technician verify the service.
Run a short verification drive
Drive only after normal oil pressure appears, the level is correct, and no fresh leak is visible. Follow any manufacturer verification procedure.
During the first drive, watch warning lights, oil pressure, engine noise, temperature, and exhaust. Avoid hard acceleration or towing during the check.
After the drive, repeat the level check at the specified interval. A large drop or a returning warning needs investigation.
Mistakes to Avoid / Common Errors
Most oil-change failures come from a small number of avoidable mistakes. Learn the lookalike parts and conditions that cause them, and check those points before startup.
Wrong oil caused by matching only viscosity
Two 0W-20 oils can carry different performance categories and approvals. The viscosity alone doesn’t identify the correct product.
| Manual requirement | Common error | Correct approach |
|---|---|---|
| 0W-20 | Choosing 0W-30 as a “safer” grade | Match the specified viscosity |
| API SP or SQ | Using any gasoline oil | Match the listed category |
| ILSAC GF-6 | Ignoring the category | Confirm the exact ILSAC requirement |
| ACEA category | Substituting a domestic rating | Match the listed ACEA category |
| Diesel oil | Using passenger-car oil | Match the diesel specification |
| Low-SAPS oil | Using a high-SAPS substitute | Protect the specified emissions system |
| OEM approval | Assuming any reputable brand is approved | Verify the complete code or allowed alternative |
If the manual and the container seem to conflict, don’t guess. Contact the manufacturer or a qualified shop.
Wrong filter style or part revision
A spin-on filter can’t replace a cartridge filter. A cartridge can’t fit a spin-on adapter unless the housing design supports it.
Don’t rely on the main part number alone. Check revision suffixes, gasket diameter, baseplate dimensions, cartridge length, and housing seals.
A filter that won’t thread may have a displaced gasket. Don’t force it and damage the engine’s filter threads.
Reusing the wrong drain-plug seal
Use the washer or O-ring specified for the plug. Don’t substitute a generic washer that’s the wrong diameter or thickness.
A reused crush washer may leak. An O-ring can stretch or tear during installation. A bonded seal may be damaged if the plug is dropped.
Extra thread sealant can change the effective torque. Use it only when the manufacturer specifies it.
Overtightening or cross-threading the drain plug
Start the plug by hand for several turns. It should turn smoothly before you use a wrench.
If it binds immediately, back it out and inspect the threads. A plug that crosses at a slight angle can strip the oil pan or plug threads before the final torque reading is reached.
Overtightening may feel secure while leaving less thread engagement. A strip can form even when the wrench displays the correct value.
Stop if the plug won’t reach the specified torque without excessive force. The threads may be damaged or the wrong plug may be installed.
Overfilling the engine
Overfilling is easy to do when the dipstick method is unfamiliar or a cartridge filter has been prefilled. It can cause foaming, leaks, ventilation-system problems, and exhaust smoke.
Never add oil above the manufacturer’s MAX mark. If the level remains unclear, repeat the exact procedure on level ground.
Excess oil needs controlled removal. Don’t loosen a hot drain plug casually or pour the oil out through the filler.
Checking the level at the wrong time
A cold reading, hot reading, and immediate post-fill reading can differ. A slope or unsettled engine can produce another result.
Use the manual’s timing and position. Don’t compare your reading with an online photo showing a different dipstick or engine.
If the manual calls for a warm engine, don’t use a cold dipstick reading to fill to MAX. The hot check may leave the sump overfilled.
Starting the engine too soon
The drain plug, filter, and cartridge housing must be fully installed before startup. A loose filter can drain oil before pressure reaches the engine.
Prime a cartridge filter only as directed. Don’t run the engine with the drain plug removed to “let the oil circulate.”
After startup, confirm oil pressure and inspect for leaks. Don’t assume a dashboard light that goes out proves the filter gasket is correct.
Resetting the service monitor before completing the service
Resetting the oil-life monitor doesn’t change the oil, filter, or engine condition. A reset without service creates a false record.
Complete the required oil-and-filter work first. Then reset the monitor using the manufacturer’s dashboard or scan-tool procedure.
If you perform only an oil top-up, don’t record it as a complete service. Keep the type of maintenance separate in your records.
Ignoring driving conditions
A generic annual rule may be too long for repeated short trips, idling, towing, hauling, extreme cold, or dusty use. A low-mileage vehicle can still need frequent service.
Check the manual’s severe-use definition. Record your normal driving pattern so future intervals are based on real use.
The oil-life monitor helps estimate use, but it doesn’t account for every leak or mechanical fault.
Troubleshooting a problem after the service
| Symptom | Likely cause | Correct response |
|---|---|---|
| Warning light remains on | Low level, wrong oil, filter, pump, sensor, or bearing fault | Shut off and diagnose |
| Oil appears under the plug | Bad washer, loose plug, or damaged threads | Inspect the seal and threads |
| Oil appears at the filter | Damaged gasket or loose filter | Shut off and reseal or replace it |
| Level is above MAX | Overfill, prefill, or wrong dipstick procedure | Correct the level before driving |
| Level falls quickly | Leak, fuel dilution, or internal consumption | Find the loss |
| Engine knocks or clatters | Possible bearing or other mechanical damage | Stop using the engine |
| Oil smells like fuel | Fuel dilution or an injection-system issue | Inspect fueling and combustion |
| Milky oil appears | Possible coolant contamination | Stop and test the cooling system |
| Fresh oil appears on the dipstick | Possibly an overfilled or fuel-diluted sump | Diagnose before adding more oil |
Don’t keep tightening parts or adding oil without identifying the cause. A quick fix can hide a larger lubrication or mechanical fault.
Maintenance / Long-Term Optimization: Keep the Engine Protected Between Changes
An oil change protects the engine only while the system remains healthy. Records, correct top-ups, leak checks, and realistic service intervals help keep that protection in place.
Record a baseline after the service
Write down the date, mileage, oil specification, filter part, and final level. Note any existing leaks, noises, smoke, or warning messages.
Keep the receipt, oil container, or written specification with the vehicle records. A service log helps the next owner and technician avoid repeating mistakes or guessing at maintenance history.
Include the next service point in miles or kilometres and months. Add a note if the vehicle regularly sees severe use.
Check the level on a consistent schedule
Use the manufacturer’s interval for checking between services. Check sooner if you notice a warning, smoke, leak, or unusual engine noise.
Measure from the same position and under the same conditions. A consistent comparison is more useful than a random reading on a slope.
The dipstick can’t identify the oil specification. Use the container and service record when topping up.
Track changes in oil consumption
Record the amount of oil added and the mileage between additions. Compare the pattern with the manufacturer’s consumption guidance.
A small, stable amount may fall within the vehicle’s guidance. A sudden increase can indicate a leak, failing seal, damaged bearing, fuel dilution, or another fault.
If the engine needs frequent top-ups, diagnose the loss. Fresh oil can temporarily refill the sump, but it won’t correct where the oil is going.
Inspect fresh leak evidence
Clean residue from beneath the engine during a safe service. Inspect the area again after the vehicle warms and after a short drive.
Watch the drain plug, filter housing, oil-pan seams, valve cover, front crank seal, and rear main seal. Fresh oil near an old stain may point to a new or worsening leak.
A small leak can enlarge as seals age, fasteners loosen, or oil thins with heat. Don’t wait for oil to reach the pavement.
Keep the same approved oil for top-ups
Use the same viscosity, performance category, and OEM approval whenever possible. This keeps the oil’s additive and seal chemistry consistent.
Don’t blend products unless the manufacturer or oil supplier confirms the result is acceptable. A mixture may have a viscosity that falls outside the required range.
If the original container is unavailable, confirm the replacement specification before pouring it in.
Plan for seasonal and severe use
Use the manual’s oil specification year-round unless it provides a specific climate alternative. A thicker oil isn’t automatically better in cold weather.
Severe driving can require a shorter interval. Record towing, hauling, repeated idling, short winter trips, off-road use, and dusty travel when they are regular.
If your driving pattern changes, revisit the service plan. A long highway commute and winter city driving produce different maintenance needs.
Use oil analysis when the history is uncertain
A used-oil sample can help when the service record is missing, the engine has high mileage, or symptoms suggest contamination. It can measure elements such as fuel dilution, coolant markers, and wear metals.
Use a clean sample container and follow the laboratory’s collection instructions. Avoid contaminating the sample with a dirty dipstick or a leaking container.
Use the results with mechanical tests. A wear-metal result can guide diagnosis, but it doesn’t identify the failed component by itself.
Know when maintenance has become diagnosis
An oil change can’t repair a failed oil pump, damaged bearings, a cracked oil pan, coolant leakage, or a stretched timing chain. Stop treating the vehicle as routine maintenance when warning signs continue.
Document the symptom, the time it occurs, the engine temperature, and the mileage. That record helps a technician avoid replacing parts without a test.
If oil pressure returns to a low or unstable value, the repair takes priority over another interval. Maintain the engine only when the lubrication system is operating correctly.
Frequently Asked Questions
Can I change my car’s oil myself?
Yes, you can change your car’s oil yourself if you have the exact oil, filter, drain-plug torque, safe access, and approved disposal. Use a vehicle lift or rated stands, never a jack alone. Choose a shop if the plug is hidden or seized, the specification is unclear, or the engine has warning signs.
How much oil does my engine need?
Use the capacity listed for the exact engine and filter setup in the owner’s manual. Don’t estimate from engine displacement or the amount that drained. Add oil gradually, then check it between MIN and MAX using the specified level procedure.
Do I need to warm the engine before changing the oil?
Only warm the engine when the manufacturer’s procedure calls for warm oil. Some engines benefit from a short warm-up, while others require a cold drain for sealing or oil-retention reasons. Follow the manual’s temperature guidance and allow a safe handling period before opening the plug.
Can I top up between complete oil changes?
A small top-up is appropriate when the level is slightly low, the correct oil is available, and there’s no leak or warning. Use the specified oil and recheck the level. Repeated top-ups mean the engine is consuming oil too quickly, so find the cause.
What should I do if I overfill the engine?
If the level is above MAX, stop adding oil and correct the excess through approved extraction or qualified service. Overfill can cause foaming, leaks, and exhaust smoke. Don’t loosen a hot drain plug casually to remove a small amount.
What should I do if the oil-pressure light comes on?
Shut the engine off safely and check the oil level. Add the specified oil if the level is dangerously low. If the level is normal, or the light returns after filling, stop driving and have the pressure system diagnosed.
Final Recommendation / Verdict / Decision Guide: Choose the Next Step Safely
Use the vehicle’s condition, manual information, and access to choose the next step. Don’t start the service until you can answer the important questions below.
Make the decision in order
If the engine has a pressure warning, knocking, or metallic noise, shut it off and diagnose the problem first.
If the level is below MIN, add the specified oil before extended driving. Investigate why the level is low.
If the level keeps falling, inspect for external leaks, fuel dilution, or internal consumption.
If the service is simply due, match the exact viscosity, performance category, OEM approval, capacity, filter, and torque.
If the drain plug is accessible, use safe support, a correctly sized drain pan, and a calibrated torque wrench.
If access is poor or the specification is unclear, choose professional service or approved extraction.
After the service, confirm pressure, inspect for leaks, check the level, and record the work.
Use DIY service when the conditions are clear
DIY service is reasonable when the manual is available, the drain point is accessible, and the required parts are in hand. You need safe lifting equipment, proper waste storage, and the ability to verify torque and oil level.
DIY work also gives you control over the oil and filter. Keep the exact part numbers and specifications in the service record.
Use a shop when uncertainty creates risk
Use a shop if the plug is seized, the filter housing is unfamiliar, or the oil specification can’t be confirmed. Professional service also makes sense when the vehicle needs oil-pan removal, extraction, a rated lift, or diagnosis of low pressure.
If the engine is using large amounts of oil, ask the shop to identify whether the loss is external or internal. A quick-lube visit isn’t enough when the cause is a leak, fuel dilution, or bearing wear.
Use this final go or no-go check
| Check | Go only when |
|---|---|
| Oil | Viscosity, category, and approval match the manual |
| Filter | Part number, style, and seals match the engine |
| Capacity | Quantity matches the engine and filter setup |
| Drain plug | Seal and torque match the manufacturer’s procedure |
| Safety | Vehicle is supported and the work area is controlled |
| Startup | Pressure appears normally |
| Leaks | No fresh oil appears at the plug, filter, or housing |
If any important check remains uncertain, pause before driving. Tightening harder, adding another quart, or resetting the monitor won’t fix an unknown oil or mechanical fault.