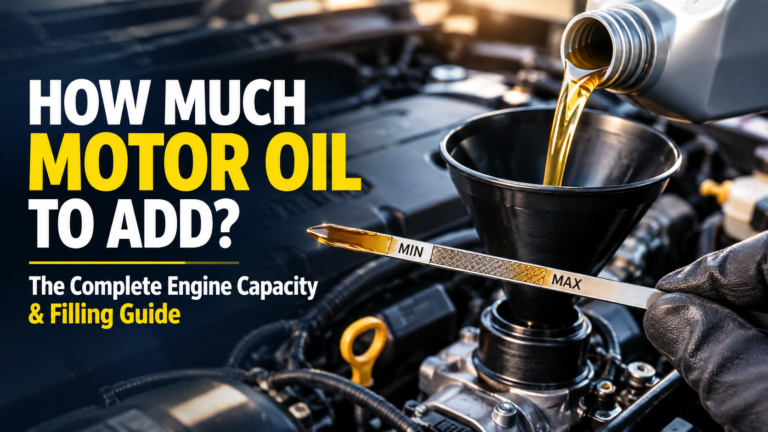
Where to Put Motor Oil: Best guide
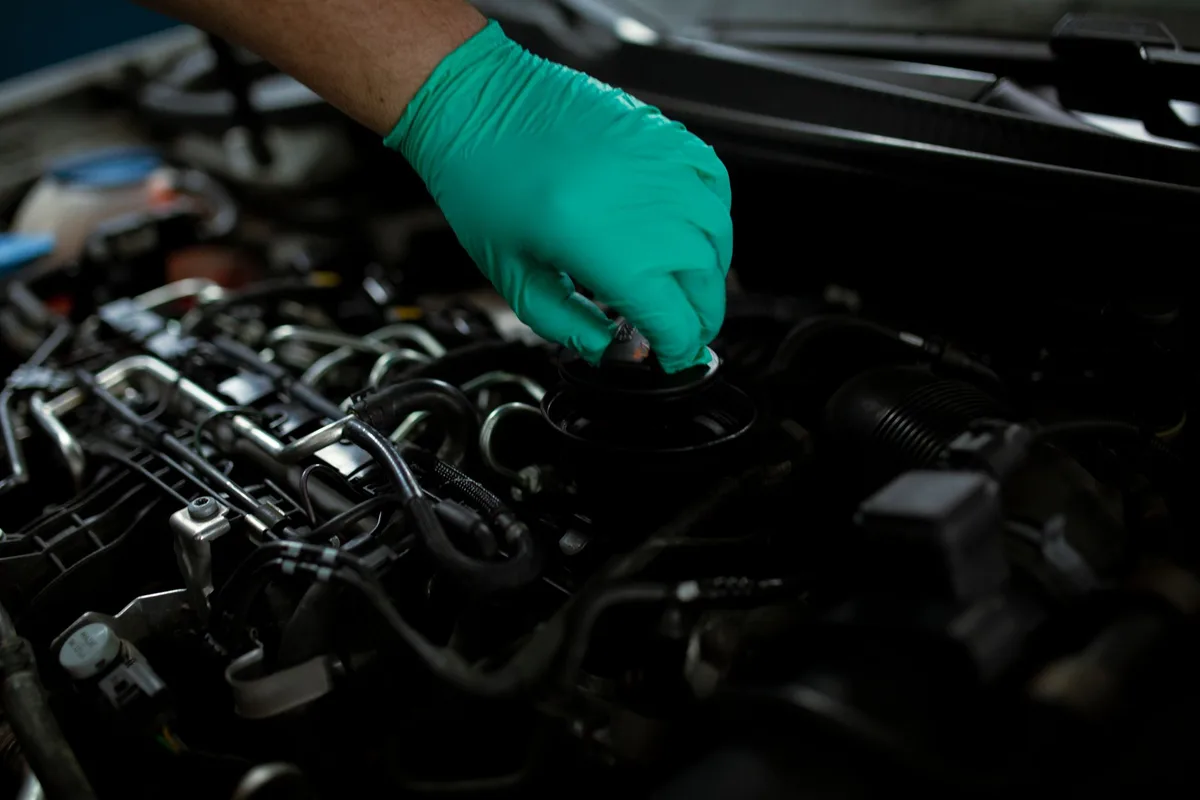
If you’re searching for where to put motor oil, use the opening marked for engine oil. On most cars, that’s the cap on the valve cover or upper engine. Never pour it into the dipstick tube, coolant tank, brake-fluid reservoir, or washer-fluid reservoir.
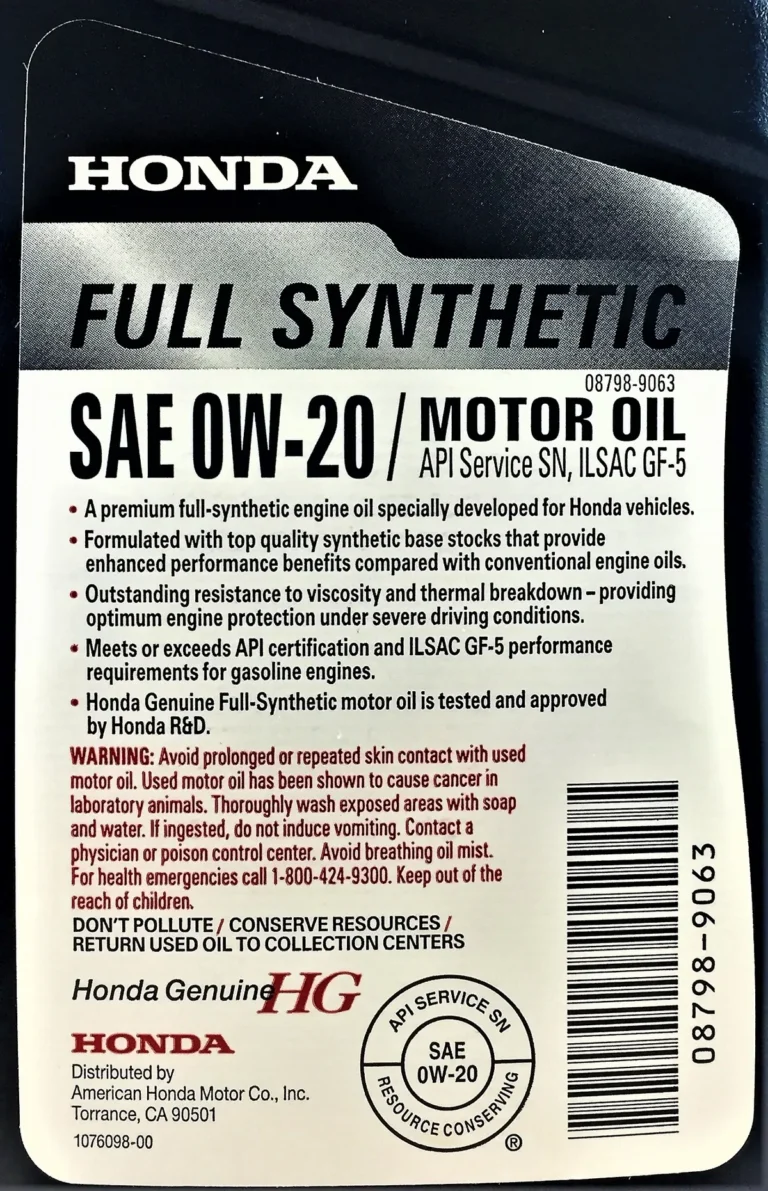
Before opening the cap, check the VIN-specific manual for the port, viscosity, oil approval, and capacity. SAE J300 defines common multigrade ratings such as 5W-30, but the manufacturer still decides which oil and quantity the engine needs. The quick answer gives you a fast way to spot the right port, with model-specific checks for less common layouts.
Where to Put Motor Oil
Quick Answer
Where to put motor oil? Use the cap marked for engine oil. Avoid the dipstick tube and every nearby fluid reservoir.
Most engines fill through a cap on the upper engine. Some use a remote port or a separate reservoir. Confirm the exact location in the owner’s manual.
Why the Wrong Fluid Port Can Cause Serious Problems
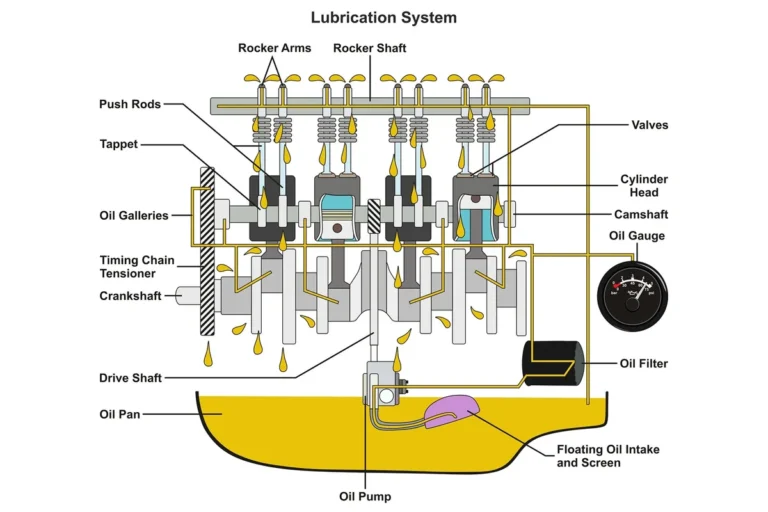
The engine-oil filler opening is the sealed route used to add oil to the crankcase or oil reservoir. The dipstick tube is a narrow passage used to measure the oil level. The two openings may sit within inches of each other.
Pouring oil into the coolant system can contaminate the cooling passages. Adding it to brake fluid can reduce braking performance. The result may be a much larger repair than the cost of one bottle of oil.
| Port or reservoir | Normal purpose | Risk from engine oil |
|---|---|---|
| Engine-oil filler | Adds oil to the lubrication system | Correct opening when confirmed |
| Dipstick tube | Measures oil in the sump or crankcase | Spills and inaccurate readings |
| Coolant reservoir | Holds coolant for the cooling system | Contamination, overheating, and pump damage |
| Radiator pressure cap | Pressurizes the cooling system | Not an oil-fill connection |
| Brake-fluid reservoir | Holds brake fluid for the braking system | Foaming, overheating, and possible loss of braking |
| Windshield-washer reservoir | Holds washer fluid | Clogged nozzles and pump damage |
| Power-steering reservoir | Holds hydraulic fluid | Foaming, restricted flow, and component wear |
| Transmission fill tube | Holds transmission fluid | Harsh shifts or internal transmission damage |
| DEF or AdBlue filler | Holds diesel exhaust fluid | Emissions-system contamination |
Cap color is not a fluid code
Cap colors aren’t universal. A black cap may cover engine oil on one vehicle and coolant on another. A yellow cap may mark brake fluid on one machine and engine oil on another.
Use color only as a supporting clue. The printed fluid name, symbol, filler-neck shape, and model-specific manual provide stronger evidence.
What should you do if oil enters the wrong reservoir?
Shut the engine off and don’t start it again for normal operation. Don’t add coolant, brake fluid, or another fluid to dilute the mistake.
Photograph the reservoir and its fluid level. Then contact the manufacturer or a qualified technician for the exact draining, flushing, bleeding, or replacement procedure. Running the engine can spread the contamination through the affected system.
Overfilling can damage an engine too
Excess oil can enter the crankcase breather and become aerated. Foaming can cause unstable oil pressure, excessive blow-by, oil consumption, and leaks.
A large overfill can also reach spark plugs in some direct-injection engines. It may contaminate the catalytic converter or other emissions components.
Underfilling is equally serious. When the oil level falls too low, bearings, camshafts, pistons, and turbochargers can lose their protective oil film. Those parts can overheat faster than engine coolant can remove that heat.
The correct level sits within the manufacturer’s specified range. Don’t fill an engine to its full stated capacity between services.
A low-level message and a pressure warning are different
A low-oil-level message tells you to inspect the oil quantity. A red oil-pressure warning means the lubrication system may not be maintaining enough pressure.
A low-level message can appear while the engine still has enough oil to circulate. An oil-pressure warning can appear because of a leak, pump failure, blockage, incorrect oil, or internal damage.
Treat the pressure warning as more urgent. Shut the engine off safely and investigate before driving.
Decision Tree: Which Port Takes Your Engine Oil?
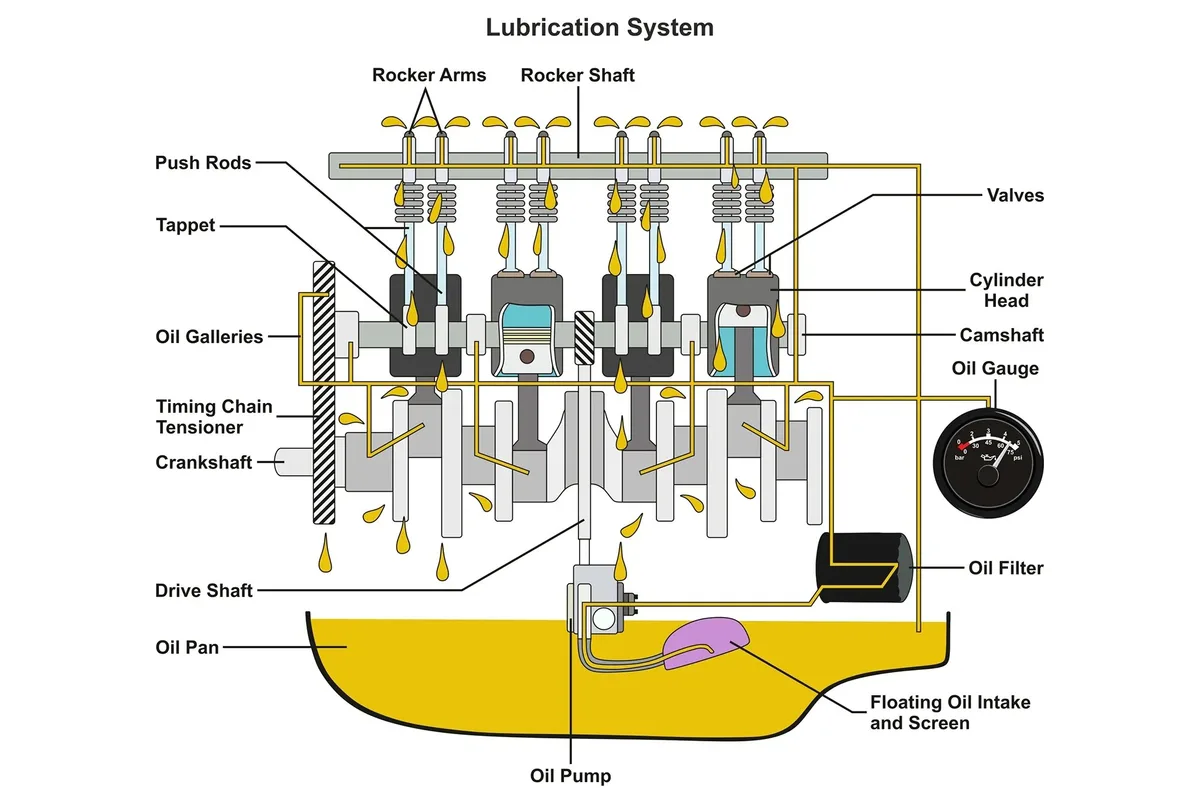
Start by identifying the exact year, make, model, engine, fuel type, and market version. A photo can narrow the search, but similar-looking engines can use different fill arrangements.
Then match what you see under the hood to the correct branch below. If nothing matches, treat the port as unknown until the manual confirms it.
| What you can identify | Correct action |
|---|---|
| A cap marked with an oil-can symbol or “engine oil” | Confirm it in the manual, then use that port |
| A loop-handled dipstick beside another opening | Use the separate opening, not the tube |
| A cap connected to a remote hose or line | Follow the manual’s remote-fill procedure |
| A separate tank with a sight glass | Use only its designated fill connection |
| A cap-mounted dipstick | Use the combined filling and reading procedure |
| No clear symbol or matching manual entry | Add nothing until the port is confirmed |
Where do you pour with a top-fill oil cap?
Pour through the cap marked for engine oil. The opening may be on the valve cover, intake manifold, rocker cover, or upper side of the engine.
A normal top-fill setup may include:
- A removable screw cap
- A hinged cap held by a clip
- A tethered cap
- A short oil fill neck
- A separate dipstick and tube
- An oil-can symbol without readable text
Check the manual if the engine has both a primary and secondary fill connection. Some designs include a service port that isn’t the normal place to add oil.
If the cap requires a quarter turn or a special release, don’t force it. A stuck or cross-threaded cap can split or distort the filler neck.
What should you do with a remote oil-fill port?
Use the remote opening only when the manual identifies it as the engine-oil fill point. The cap may sit on a fender, body panel, firewall, or structural bracket.
Remote ports often connect to the oil pan or reservoir through a hose or metal line. Clues include an oil-can symbol, a tether, a painted OIL label, or a matching entry in the engine-bay diagram.
Don’t insert a hose into an unidentified tube or fitting. It may be a vent, drain connection, sensor lead, pressure-test point, or cooling component.
If the cap is locked or the manual requires a special tool, use an authorized service location. Don’t remove body panels or hoses to reach a guessed connection.
What should you do with a separate oil reservoir?
Use the reservoir’s designated fill opening. A dry-sump system commonly stores most of its oil in a tank away from the crankcase.
The presence of a reservoir doesn’t tell you whether to fill the tank, the sump, or both. Some engines have a reservoir and a separate remote sump-fill connection.
Check the manual for:
- The correct fill point
- Cold and hot level marks
- The required oil specification
- Reservoir capacity
- Whether circulation or bleeding is required
- The engine speed and run time, if applicable
- The final settling time
A reservoir sight glass is a level indicator, not a filling port. Pouring through the glass or its drain fitting can contaminate the system and leave it incompletely filled.
What if the port can’t be identified?
Add nothing until the port is confirmed. Use the VIN, engine code, or equipment serial number to locate the exact manual.
Search for these terms within the manual:
- Engine oil
- Oil filler
- Filling engine oil
- Oil level
- Engine compartment
- Fluid identification
A dealer, authorized service center, or qualified technician can confirm an unusual layout. That check is usually faster than repairing a contaminated cooling, braking, transmission, or emissions system.
How to Tell the Oil Filler from the Dipstick and Nearby Reservoirs
The safest method combines symbols, shape, location, and the exact owner’s manual. Any single clue can mislead you on a modified or unusually packaged vehicle.
The oil filler adds oil to the lubrication system. The dipstick measures oil already in the sump or crankcase. A fluid reservoir stores coolant, brake fluid, washer fluid, or hydraulic fluid for another job.
| Visual clue | Most likely function | Correct response |
|---|---|---|
| Oil-can symbol on a cap | Oil filler or hydraulic reservoir | Check the printed fluid name and manual |
| Loop, ring, or T-handle | Dipstick handle | Use it to measure oil, not fill it |
| OIL or ENGINE OIL text | Oil fill or oil-level point | Confirm the model-specific location |
| Coolant temperature or pressure symbol | Cooling system | Don’t add engine oil |
| Brake symbol or DOT fluid text | Braking system | Keep engine oil out |
| Windshield or washer symbol | Washer-fluid system | Use washer fluid only |
| Clear sight glass | Level indicator | Read it, don’t pour through it |
| Unlabeled colored cap | Unknown | Don’t guess |
Start with the oil-can symbol
An oil-can pictogram with a droplet commonly appears on an engine-oil filler cap. It can also appear on a hydraulic-fluid reservoir.
Treat the symbol as a prompt to check the nearby text. Look for labels such as:
- ENGINE OIL
- OIL
- SAE 5W-30
- Use only the specified oil
- Open when the engine is cold
Some cap-mounted dipsticks include the same oil-can symbol. These are normal on motorcycles, generators, lawn equipment, and small engines.
Recognize the dipstick by its handle and tube
A conventional dipstick has a long metal or heat-resistant plastic rod. It ends in a loop, ring, or pull handle and slides into a narrow tube.
The dipstick tube normally has no marked filling opening at its upper end. If you see a bright metal tube with a loop handle, don’t pour through it.
Some engines use a sight glass instead. A few use an electronic oil-level sensor with no manual dipstick. The owner’s manual defines which system the engine uses.
Treat every nearby reservoir as a potential lookalike
Coolant reservoirs may have a pressure cap or a visible fluid range. The cap can warn that the system is hot and pressurized.
Brake-fluid reservoirs may carry a minimum and maximum mark. They may also show a brake symbol or DOT 3 or DOT 4 specification. Clear or amber fluid can resemble fresh engine oil.
Power-steering reservoirs may use an oil-can symbol. Check whether the required fluid is power-steering fluid, automatic-transmission fluid, or another approved hydraulic fluid.
Diesel vehicles may include a blue DEF or AdBlue cap. That opening belongs to the emissions system, not the engine lubrication system.
Check whether the dipstick is attached to the cap
A combined cap-and-dipstick lets one opening handle filling and level checks. The cap must be removed in the design’s specified way.
Some combined dipsticks use a bayonet fitting. Others screw into the filler neck before you pull them for a reading. Don’t guess from the handle shape.
Inspect the cap seal every time you remove it. A cracked, stretched, or hardened seal can let oil leak onto hot engine parts.
Don’t identify a sight glass as a filler
A sight glass may sit on the oil pan, engine housing, or dry-sump reservoir. It can show MIN, MAX, cold, hot, or acceptable operating marks.
Read the glass at the manufacturer’s specified temperature. Keep the engine off unless the manual explicitly requires a running check.
The distance between MIN and MAX isn’t the engine’s full capacity. It’s only the usable range shown by that instrument.
Don’t trust cap color by itself
Cap colors can change between model years and markets. Replacement caps may not match the original color.
Use the symbol and printed text first. Then compare the cap shape and filler-neck location with the manual. If the manual isn’t available, treat the port as unidentified.
Use photos and diagrams as supporting evidence
A clear engine-bay photo can help compare shapes and placement. It cannot safely identify a hidden port by itself.
Match the photo with the year, make, model, engine, fuel type, and market version. Several engines within one model range can use different fill arrangements.
An owner’s-manual diagram is stronger evidence than a generic photo. Read the surrounding caption too, because an arrow may point to a test port, drain, sensor, or service connection.
Check the Manual, Oil Viscosity, Specification, and Capacity
Finding the port solves only part of the job. The engine also needs the correct viscosity, performance specification, oil type, and quantity.
The owner’s manual should identify each item. It may also provide different instructions for a top-up, full service, cold level, and warm level.
Find the manual for the exact vehicle or equipment
Use the VIN or serial number whenever possible. A model year can include several engines, trims, emissions packages, and oil capacities.
Confirm:
- Manufacturer and model
- Model year
- Engine size and engine code
- Gasoline, diesel, hybrid, or electric configuration
- Trim or equipment package
- Country or market version
- Build or production date
As of 2026, electronic manuals are commonly available through manufacturer websites and owner apps. Printed copies may still sit in the glovebox or equipment compartment. A dealer can locate the correct revision using the VIN.
Understand what the viscosity number means
SAE J300 defines the common multigrade format used for engine-oil viscosity. In a grade such as 5W-30, the number before W relates to cold-start performance.
The number after W describes the oil’s viscosity at operating temperature. A 5W-30 oil must meet both the SAE 5W and SAE 30 requirements.
That grade doesn’t identify the oil’s performance category. It also doesn’t confirm compatibility with emissions systems, turbochargers, timing chains, or catalytic converters.
Use the exact viscosity listed by the manufacturer. If the manual allows alternatives, follow its temperature or operating conditions.
Confirm the required performance category
Viscosity describes how oil flows. The performance category indicates whether it meets an engine’s chemical and testing requirements.
| System | What it addresses | Typical use |
|---|---|---|
| SAE J300 | Cold and operating-temperature viscosity | Worldwide viscosity classification |
| API categories | Gasoline or diesel engine performance | Common in North America and other markets |
| ACEA sequences | European and UK engine performance requirements | Common European specifications |
| ILSAC GF series | Gasoline-engine performance | Used in some Asian markets |
| Manufacturer approval | A specific or superseded factory specification | Required when the manual names it |
A manual may specify API SP or the newer API SQ where applicable. It may instead name an ACEA sequence, an ILSAC category, or a manufacturer approval.
Don’t assume that one 5W-30 bottle works everywhere. A higher grade doesn’t automatically mean it has the required approval.
Choose the correct oil type
Engine oil may be conventional, synthetic blend, or full synthetic. The manual may specify the type, or it may allow any product that meets the listed viscosity and performance category.
Don’t choose by the word synthetic alone. Additive packages, base-stock type, and approval requirements can differ between products.
For a simple top-up, using the same approved oil as the last service is usually practical. If the previous oil is unknown, confirm the manual’s requirements before adding anything.
Convert capacity units correctly
A stated engine-oil capacity usually covers a complete drain-and-fill operation. It can include the sump, filter, oil cooler, galleries, and part of another housing.
| Measurement | Equivalent |
|---|---|
| 1 US quart | 0.946 liters |
| 1 US fluid ounce | 29.57 milliliters |
| 8 US fluid ounces | 1 US cup |
| 32 US fluid ounces | 1 US quart |
Use the unit printed in the manual. Convert it if your measuring container uses the other system.
A container marked in liters may not show small enough increments for a motorcycle or small engine. Use a clean measuring cup or bottle with a marked scale.
Don’t use engine displacement as the capacity
A 2.0-liter engine does not necessarily take 2.0 liters of oil. The sump design, filter, oil cooler, and lubrication layout change the required amount.
A dry-sump reservoir can have a separate working volume. A long-life system may circulate more oil than a conventional sump system.
Use the capacity listed for the exact model and engine. A generic estimate can leave the engine underfilled or overfilled.
Account for oil remaining after a drain
A complete change doesn’t remove every drop. Oil remains in the filter, galleries, cooler, hoses, and lower engine areas.
A new filter can also hold oil before installation. Add the service quantity stated in the procedure, then recheck the level after circulation.
If the manual gives only total capacity, follow its fill and level-check sequence. Don’t assume the engine is completely empty.
Follow the model-specific level procedure
Many manuals call for a level surface and an engine that is shut off. The engine may need to be cold, warm, or recently run.
A common dipstick sequence is:
- Position the vehicle as directed.
- Shut the engine off.
- Wait for the prescribed settling time.
- Pull the dipstick and wipe it.
- Reinsert it fully without locking it.
- Pull it again and read the level.
- Add the specified oil in small amounts.
- Recheck until the level is correct.
Some dipsticks use a locking tab or screw-in design. Their procedure can differ. Follow the exact manual.
Use the manufacturer’s oil-consumption limit
No single consumption rate fits every engine. Small sports-car engines, performance engines, and older designs can have different limits.
Use the manufacturer’s stated rate, test duration, and operating conditions. Record the mileage or engine hours between top-ups.
A large top-up soon after a service can point to an external leak, burned oil, or a filling error. Repeated additions don’t correct the underlying condition.
Keep a useful service record
Record the date, mileage, engine hours, and oil specification. Note the quantity added during a top-up.
For a full service, keep the invoice and part information. A clear history helps identify leaks, changing oil condition, and repeated servicing needs.
Prepare Before Opening the Oil Filler Port
Preparation prevents spills, wrong-fluid errors, and overfilling. Confirm the machine, manual, oil, and starting level before removing the cap.
What should you have ready?
You need the correct oil, a clean measuring tool, and a safe way to contain spills.
| Item | Purpose |
|---|---|
| Exact owner’s manual | Confirms the port, oil, capacity, and level method |
| Approved engine oil | Provides the required viscosity and performance category |
| Clean funnel | Controls the pour and reduces contamination |
| Graduated measuring container | Tracks small additions |
| Drip pan | Catches oil below the filler |
| Absorbent material | Contains small spills |
| Flashlight | Helps read symbols in a dark engine bay |
| Disposable gloves | Keeps oil off bare skin |
| Correct cap-removal tool | Handles a locked or quarter-turn cap |
Keep the funnel, measuring container, and oil bottle clean. Don’t use equipment that has held coolant, brake fluid, solvent, or hydraulic fluid.
A new bottle isn’t automatically the right bottle. Check the label before opening it.
Should the engine be cold or warm?
Use the temperature specified in the manual. Some engines are checked cold. Others require a warm engine or a timed shutdown.
Oil expands when warm. A level near MAX on a hot engine may fall into the proper range after cooling.
If the engine has just run, shut it off and wait for the manual’s settling period. This lets oil settle into the measured area.
Some dry-sump systems require a warm circulation step. Don’t substitute a cold top-up procedure for that sequence.
Establish the current oil level
Check the level before adding anything. It shows whether you need no oil, a small top-up, or a complete service.
For a conventional dipstick, follow the manual’s wiping and reinsertion sequence. For a sight glass, view it at eye level and use the specified temperature marks.
Record the result before filling. It prevents you from adding a full bottle to an engine that was already close to full.
| Starting level | Likely action |
|---|
What should the old oil look like?
Color alone cannot show whether engine oil is fit for service. A top-up may be reasonable when the oil is clean, recent, and correctly specified.
| Appearance or residue | What to check |
|---|---|
| Clear amber or light brown | Often normal |
| Dark brown | May be normal, depending on oil and service interval |
| Thick, gritty, or sludge-like | Contamination, overheating, or overdue service |
| Milky or creamy | Possible coolant contamination |
| Strong fuel odor or bubbles | Possible fuel dilution |
| Bright metal particles | Stop and inspect the oil and engine |
| Water droplets or a separate layer | Stop and find the source |
New oil can change how old oil looks. Don’t declare a problem from color alone, but don’t ignore clear signs of contamination.
Should you inspect the engine before filling?
Yes, especially if the engine has used oil or an unknown service history. Check the oil pan, filter, drain plug, and area beneath the machine.
Look for fresh wet oil. Don’t start the engine if oil is pooling near a hot exhaust component.
A clean sheet of cardboard beneath the vehicle can help locate the general leak path. Add absorbent material to narrow the source if needed.
What if a warning is already on?
A low-oil-level message may lead to a normal top-up. A red oil-pressure warning needs an immediate engine shutdown.
Check the level only after the vehicle is safely stopped. If the level is normal but the pressure warning remains, don’t keep adding oil as a test.
What if the filler cap is missing?
Replace it with the correct cap before normal driving. A missing cap can increase evaporation, admit dirt, and allow oil to leak from the opening.
Don’t use a cap from another reservoir just because it fits. A loose or incorrect plug can leak oil onto hot parts.
Ready-to-fill checklist
Proceed only when you can confirm each point.
- The exact machine and engine are identified.
- The manual confirms the fill port.
- The oil matches the specified viscosity and approval.
- The current level has been checked.
- The engine is positioned as directed.
- A drip pan and measuring container are ready.
- The correct cap is available.
- You know how to respond to a leak or warning.
How to Add Engine Oil Without Overfilling
Adding oil is a controlled measurement, not a matter of pouring until the bottle feels lighter. Use the confirmed port, add a known amount, and recheck before repeating.
What is the safest way to add oil?
Use the confirmed filler, a clean funnel, and small measured additions. Keep the engine off unless the manufacturer explicitly requires circulation.
- Confirm the vehicle or equipment and required oil.
- Check the existing level using the manual’s method.
- Remove the filler cap slowly.
- Inspect the cap, seal, and opening for damage or dirt.
- Place a clean funnel lightly in the opening.
- Add a measured amount of the approved oil.
- Pause for the prescribed settling or circulation time.
- Recheck the dipstick, sight glass, or reservoir level.
- Repeat in small amounts only if needed.
- Secure the cap and inspect for spills.
Don’t push a hose, screwdriver, or improvised tube past the opening. That can damage a valve, separate a connection, or send oil elsewhere.
How much oil should you add at once?
No fixed amount works for every engine. Small additions give you better control than pouring the full stated capacity.
For a larger engine, an initial addition of 2 to 4 US fluid ounces, or about 59 to 118 milliliters, can provide a manageable checkpoint. Small engines may need even less.
These amounts are measuring examples, not universal doses. The manual and current level determine the actual quantity.
Why should you recheck after each addition?
Oil can remain in the filter, galleries, cooler, and upper engine areas. A reading taken too soon may not show the settled level.
A dipstick tube can also hold oil on its walls. Let the system settle for the manual’s stated period before reading it.
If the level hasn’t moved after a reasonable settling period, stop. A blocked tube, wrong dipstick, incorrect port, or restricted passage may be present.
Should you add the whole listed capacity?
No, not between services. The listed capacity normally describes a complete drain-and-fill operation.
For a top-up, add only enough to move the current reading into the proper range. If the dipstick is already near MAX, adding a full bottle can cause overfill.
After a full service, follow the specified quantity and then recheck. Oil remaining in the engine means the final level may be lower than the total capacity.
What if oil doesn’t show on the dipstick?
Stop adding and investigate. Possible causes include a wrong port, blocked tube, incorrect dipstick, or improper reading position.
Other possibilities include a damaged dipstick, a reversed installation, a valve or passage restriction, or a system that uses a different level indicator.
Never solve a missing reading by adding more oil automatically. Confirm the port and tube first.
Can you use a hose to reach the filler?
Use a hose only when the filler design includes one. A remote port may have a fixed hose or service connection, but you shouldn’t create one from an unidentified tube.
Keep the hose clean and prevent it from slipping out. A loose hose can dump oil onto a hot engine or into an intake area.
Never insert a hose into a separate dipstick tube. It isn’t a normal filling route.
What if the filler cap won’t open?
Don’t pry it or use a wrench unless the manual calls for one. Caps can use a quarter-turn lock, push-and-turn closure, tether, or special tool.
Allow the filler neck to cool if needed. If the cap remains stuck, a qualified technician can inspect the cap, threads, and filler neck.
Forcing a cap can crack plastic or damage the sealing surface. That can create a leak after the service.
Is it safe to fill a warm engine?
It depends on the manual. Many top-ups are easier on a cool engine. Some special systems require a warm fill or circulation run.
Use heat-resistant gloves around hot components. Keep the funnel and measuring container away from the exhaust.
If the manual calls for a cold check, don’t substitute a warm reading. The oil level can change as the engine temperature changes.
Should the engine run while you fill it?
Usually, no. A conventional engine should be filled with the engine shut off and at rest.
A dry-sump or remote-reservoir system may require controlled running. Follow its exact speed, time, and operating-area instructions.
Starting a conventional engine during filling can make the dipstick reading unreliable. It can also leave the engine underfilled or aerated.
What if you overfill the engine?
Stop adding oil. Let the engine cool and repeat the correct level check before taking any corrective action.
If the level remains above the proper range, use the manufacturer’s drain or correction method. That may involve an authorized drain hose, drain plug, or technician’s measurement.
Don’t loosen a hot drain plug or remove the oil pan. Contact a qualified technician if the manual doesn’t provide a safe correction procedure.
What if you spill oil while filling?
Stop the pour and contain the spill. Place absorbent material beneath the filler neck and keep oil away from hot exhaust parts.
Don’t wash the spill toward a drain or spread it with a hose. Store oily absorbents in a closed container until proper disposal.
Check the Final Oil Level and Secure the Cap
The final check confirms both quantity and system condition. Read the level at the correct time, then install the cap as designed.
What is the correct final oil level?
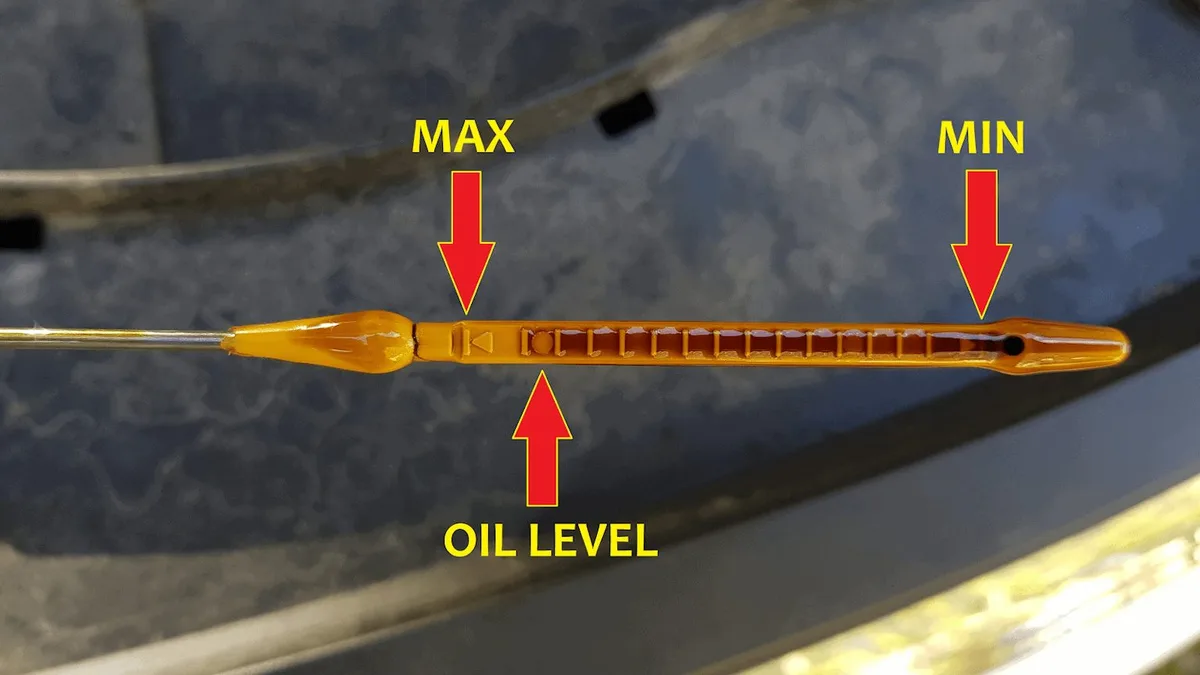
The correct level is whatever falls within the manufacturer’s proper range. That may mean between MIN and MAX marks, within a marked band, or below a full mark.
Don’t use the engine’s full oil capacity as the final target. The filter, cooler, galleries, and other components can hold part of the stated volume.
Remember that oil expands when warm. Use the manual’s cold or hot reading instructions.
How do you read a conventional dipstick correctly?
Read the dipstick from a clean, fully seated position. Pull it, wipe it, reinsert it fully without locking it, and pull it again.
Keep the dipstick upright while reading it. Don’t let oil run toward the tip before you reach the marks.
Keep the dipstick upright while reading. Don’t let oil run toward the tip before you reach the marks.
Some dipsticks have a locking tab. Don’t lock it when the manual says to insert it loosely. Others screw into the tube.
Those designs need a different reading sequence.
| Reading | What it usually means | Next step |
|---|
What if the dipstick is attached to the filler cap?
Use the combined cap-and-dipstick assembly exactly as the manual describes. This design is common on motorcycles, generators, lawn equipment, and small engines.
Some attached dipsticks use a bayonet fitting. Others must be screwed into the filler neck before you remove them for a reading. Don’t guess from the handle shape.
Check the cap seal each time you remove it. Replace a cracked, stretched, or missing seal with the correct replacement part. A loose cap can leak oil onto a hot engine.
How do you read a sight glass correctly?
Read the sight glass with the engine positioned and at the temperature specified in the manual. View the oil straight across at eye level.
A sight glass may show MIN, MAX, cold, hot, or acceptable operating marks. Don’t pour through the glass or its drain fitting. The sight glass measures the level.
It isn’t a normal filling connection.
If the oil is hard to see, clean the outside of the glass and check the lighting. Don’t use a sharp object or spray cleaner on the indicator.
How does oil temperature change the reading?
Oil expands when it warms and contracts when it cools. A warm reading can therefore differ from the cold reading required by the manual.
If the manual specifies a cold level, let the engine cool to that condition before checking. If it specifies a warm level, follow the prescribed run time and shutdown delay.
Don’t fill a cold engine to a warm MAX mark. The oil can rise above the proper range after circulation.
How should the filler cap be installed?
Install the correct cap and secure it according to its design. The cap must seal the opening without being cross-threaded or overtightened.
Wipe oil and dirt from the cap and filler neck first. Check the rubber seal or gasket for damage. Then seat the cap straight and lock, clip, or turn it if the design requires that step.
Some caps are hand-tight only. Others use a quarter turn or a short tightening movement. A loose cap can leak.
An overtightened cap can crack or distort the sealing surface.
What should you check after installing the cap?
Inspect the filler neck, cap, engine top, and area below the vehicle for fresh oil. A new wipe mark can show that the cap wasn’t fully seated.
After starting the engine, watch the oil-pressure warning and listen for unusual knocking, dragging, or rattling. Those sounds need investigation, even if the oil level looks correct.
A short drive can expose a leak that was hidden under old oil. If oil appears below the car, stop the engine and locate the source before adding more.
What if the level is still too high?
Don’t add more oil. Let the engine reach the temperature required by the manual and repeat the level check if the procedure allows it.
If it remains above the proper range, use the manufacturer’s drain or correction method. Keep the engine off during the correction unless the manual specifically directs otherwise.
A drain hose or drain plug may be available on some vehicles. Other engines require a technician to measure and remove oil through a service connection. Never loosen a hot drain plug or remove the oil pan by guesswork.
What if an oil-pressure warning appears after starting?
Shut the engine off as soon as you can do so safely. A pressure warning can indicate low oil, a leak, a pump fault, a blockage, incorrect oil, or a sensor problem.
Wait for the engine to cool, then check the level using the prescribed method. If the level is normal, the warning still needs diagnosis. Adding oil without finding the cause can leave the engine underfilled, overfilled, or mechanically damaged.
When is the fill complete?
| Final check | What to look for |
|---|---|
| Oil level | Within the manufacturer’s proper range |
| Filler cap | Correct cap seated and secured |
| Filler neck | No fresh oil around the opening |
| Underbody | No active drip or pooling |
| Warning display | No oil-pressure or oil-level fault |
| Service record | Date, mileage, hours, and oil details recorded |
If any item remains uncertain, stop and ask a qualified technician. A short delay is easier than repairing an engine that ran without proper lubrication.
Top-Up vs. Full Oil Change: Which Procedure Do You Need?
A top-up restores lost oil volume, while a full oil change removes used oil and replaces the filter when specified. Choose based on the service interval, oil condition, and engine condition.
Is a top-up or full oil change the right choice?
Use a top-up when the oil is correct, recent, and only slightly low. Use a full oil change when the service interval is due or the oil history is uncertain.
| Situation | Best next step | Why |
|---|---|---|
| Slightly low level after a recent service | Top-up | The oil condition and service history are sound |
| Level between the proper marks | No addition | The engine already has the required volume |
| Mileage, time, or engine hours are due | Full oil change | Scheduled service removes aged oil |
| Previous oil type is unknown | Full service | A top-up won’t remove unknown contaminants |
| Oil is milky, metallic, watery, or heavily contaminated | Inspection first | The cause may involve a serious engine fault |
| Engine repeatedly needs large additions | Investigate | Consumption or leakage may be present |
| Oil-pressure warning is active | Diagnose first | A top-up alone may not fix the problem |
| Wrong fluid was added | Follow the manufacturer’s correction procedure | Diluting the mistake can leave the system contaminated |
A top-up solves a simple quantity problem. It doesn’t replace a complete service when the oil has reached its service limit.
What does a top-up accomplish?
A top-up restores the engine’s oil volume. It can help prevent low-oil damage when the existing oil remains clean and suitable for more service.
A top-up doesn’t remove old oil, replace a filter, or remove metal, coolant, fuel, or sludge. It also won’t correct a worn oil pump.
Use the same approved viscosity and specification when possible. If the previous oil is unknown, confirm the manual’s requirements before adding anything.
Track the quantity added and the time or mileage between top-ups. A large top-up soon after a service can point to a leak, burned oil, or a previous filling error.
What does a full oil change accomplish?
A full oil change removes used oil and adds fresh oil that meets the manufacturer’s specification. It also allows inspection of the drain plug, filter, oil pan, and surrounding area.
A complete service normally includes:
- Warming the engine as directed by the manufacturer.
- Positioning the machine on level ground.
- Removing the oil drain plug.
- Inspecting the plug and sealing washer.
- Draining the oil into a suitable container.
- Replacing the oil filter when specified.
- Installing the drain plug to the specified torque.
- Adding the specified oil.
- Priming or circulating the oil as required.
- Rechecking the level at the prescribed temperature.
- Recording the service details.
Follow the manufacturer’s torque specification for the drain plug. Over-tightening can strip threads. Under-tightening can cause a leak.
How should you account for oil left after draining?
A drain doesn’t remove every drop. Oil remains in the filter, cooler, galleries, hoses, and lower engine areas.
A new filter can also hold oil before installation. Add the quantity specified for the service procedure, then circulate the oil and recheck the level.
If the manual gives only total capacity, use its fill and level-check sequence. Don’t assume the engine is completely empty.
For a dry-sump system, the listed capacity may apply to more than one reservoir. The manual may call for a separate tank fill and sump fill.
When is a full change better than repeated top-ups?
Choose a full change when the scheduled interval has arrived. That interval may be based on time, mileage, engine hours, or a combination of those factors.
A full service is also sensible when the previous oil type is unknown. It establishes a reliable record of the oil specification and starting level.
Choose inspection before a routine change when you see a milky residue, metal particles, fuel odor, or a separated liquid. Running a new oil through a damaged system won’t fix the source.
If the engine consumes oil faster than the manufacturer’s limit, investigate the cause. A full change can reset the level, but it won’t stop an external leak or internal oil burning.
Is an engine flush part of a normal oil change?
An engine flush isn’t automatically part of a routine oil change. Most engines should receive fresh oil through normal circulation.
Some manufacturers provide a cleaning procedure for specific conditions. Others warn against introducing solvents or large amounts of detergent into a finished engine.
A flush can move contamination into narrow passages. It can also loosen deposits that later lodge in restricted components. Use one only when the manufacturer provides a procedure for the exact engine.
Can a top-up be used after long storage?
Only if the manual allows it and the oil is still suitable. Long storage can allow moisture, fuel dilution, or seal leakage.
Check the oil’s appearance and level before starting the engine. If the condition is unknown, arrange a proper service rather than assuming fresh oil has displaced the old oil.
A pre-storage or post-storage procedure may include running the engine, changing the oil, replacing the filter, or checking for leaks. Follow the manufacturer’s sequence.
Special Cases: Motorcycles, Small Equipment, Generators, and Dry-Sump Systems
Special engines use the same basic rules, but their fill points and level methods differ. Confirm the exact machine before copying a car procedure.
How do you add oil to a motorcycle?
You add motorcycle oil through the crankcase, oil tank, or dry-sump reservoir specified for that model. The filler cap may also contain the dipstick.
Many motorcycles use a combined cap-and-dipstick. Others use a separate dipstick or a sight glass.
Use this sequence:
- Place the motorcycle upright on level ground.
- Follow the manual’s warm-up instructions.
- Shut the engine off and allow it to settle.
- Check the sight glass or cap-mounted dipstick.
- Add oil in small amounts.
- Recheck the level.
- Secure the cap and inspect for leaks.
Some motorcycles use a warm reading. Others need the machine upright and the engine recently run. Don’t use a cold reading when the manual calls for a warm one.
What if a motorcycle has separate engine and transmission oil?
Use each designated fill opening for its own fluid. Some motorcycles share one oil supply. Others have separate engine, gearbox, and final-drive systems.
The capacities and oil specifications can differ. Don’t combine separate quantities unless the manufacturer says the system is shared.
A final-drive drain plug is a service connection. It isn’t a normal top-up opening.
How do you refill a dry-sump motorcycle?
You refill the designated reservoir through its marked fill connection. A dry-sump system may run dry briefly after a drain because the pump and engine passages are empty.
Some manufacturers require the engine to run during filling. Others specify a timed fill with the engine stopped. Follow the exact sequence.
After adding oil, let the system return to the sump. Recheck the sight glass. A reservoir that looked full can drop as oil enters the engine passages.
Use the same approved viscosity and performance category specified for the system.
How do you add oil to a lawn mower and other small equipment?
You add oil through the crankcase filler near the top of the engine. A separate dipstick or integrated cap-and-dipstick shows the level.
Keep the machine upright and level. Check for a low-oil warning if one is fitted. Remove the cap slowly and inspect the seal.
Add oil in small amounts. Recheck the level before replacing the cap. Small engines can overfill quickly because their crankcase capacity is low.
Keep oil out of the air filter, breather, fuel tank, and exhaust opening. Excess oil can enter the intake or leave oily smoke.
What should I know about two-stroke engines?
A two-stroke engine may use oil mixed into the fuel. A premix model uses a specified two-stroke oil ratio in the fuel tank. An oil-injection model meters oil from a separate tank.
Some small two-stroke engines also have a separate crankcase fill. Follow the manual for the exact configuration.
Never pour crankcase oil into the fuel tank unless the manual calls for premixing. Never use automotive oil in a two-stroke engine unless its specification expressly allows it.
How do you add oil to a generator?
You add oil through the engine’s designated filler opening. The cap may sit on the valve cover, crankcase, or a remote panel.
Portable generators commonly use a top-mounted cap. Larger or standby units may use a remote connection.
Before filling:
- Confirm the generator model and engine code.
- Use the specified oil viscosity and category.
- Keep the generator upright and stable.
- Shut off the engine and disconnect loads.
- Allow hot components to cool enough to work around safely.
- Check the level using the manufacturer’s method.
- Add oil in small amounts.
- Recheck and secure the cap.
Don’t run a generator with the filler cap removed. Vibration can pull oil out through an open port.
Keep oil out of the fuel tank, air filter, and fuel-injection system. Fuel and oil contamination can create a fire or engine failure.
Why do generator oil levels differ by operating state?
Some generators require a level check before startup. Others specify a check after the engine has circulated oil for several minutes.
Follow the manual’s run time and shutdown delay. A reading taken at the wrong point can be high, low, or misleading.
A hot generator also expands its oil. Let it cool for the specified period before pulling a dipstick or reading a sight glass.
How do you refill a dry-sump reservoir?
You refill the designated dry-sump reservoir through its marked fill connection. Don’t pour through the sight glass, level switch, breather, or pump inlet.
Confirm the oil specification and reservoir capacity first. Some systems require a low-speed circulation run. Others specify a timed fill with the engine stopped.
Add oil slowly and stay within the operating band. If the sight glass is full, stop adding even if oil remains in the container.
After the specified running or settling period, shut the engine off. Let the oil return to the reservoir and read the final level.
What about marine engines?
You use the fill opening specified for the exact marine engine, stern drive, or outboard. Marine systems can use separate engine and gear-oil supplies.
A lower-unit drain is a service connection, not a normal fill port. Don’t pour engine oil into a gearbox unless that system shares oil and the manual allows it.
Marine engines may have an oil cooler or heat exchanger. Read the level with the boat positioned as directed, and follow the manual’s cold and hot procedures.
What about hybrids?
A hybrid with an engine still needs engine oil. Follow the combined powertrain’s manual and don’t assume every hybrid service point matches a gasoline-only vehicle.
Some hybrids have an engine oil fill under the hood. Some use a remote port. A gasoline-engine oil warning can appear even when the high-voltage system is switched off.
Keep away from orange high-voltage cables and connectors. Disconnecting or handling a high-voltage system requires qualified service procedures.
What should you do with an unfamiliar equipment port?
Stop and identify the engine by serial number or model code. Find the manufacturer’s service literature for that exact configuration.
Don’t remove a sealed fitting, inspection cover, or hose to reach a guessed port. It may be part of a vent, drain, sensor, or pressurized line.
A manufacturer or qualified repair specialist can confirm the filler without forcing the machine open.
Common Mistakes That Cause Overfill, Underfill, or Engine Damage
Most oil-fill mistakes come from rushing, guessing, or applying a generic car routine to a different engine. The identification step prevents nearly all of them.
Which mistake causes the most damage?
Putting engine oil into a reservoir used by another system causes the most cross-system damage. It can contaminate coolant, brake fluid, transmission fluid, or diesel exhaust fluid.
Other common mistakes include:
- Pouring oil into a dipstick tube.
- Trusting cap color instead of the manual.
- Assuming every 5W-30 oil has the same approval.
- Pouring full capacity during a small top-up.
- Reading the dipstick while the engine is running.
- Failing to wipe and reinsert a dipstick.
- Overfilling because oil hasn’t settled.
- Ignoring a fresh leak beneath the machine.
- Leaving the cap loose, cross-threaded, or off.
- Adding oil with a pressure warning active.
- Using a bottle cap or funnel to estimate quantity.
- Ignoring a difference between a top-up and full service.
Why is the dipstick tube not a filler?
A dipstick tube is an access passage for measuring oil. It may not connect to the oil pan through a filling connection.
Oil poured into the tube can spill around the seal or run onto the engine. It can also leave the next reading inaccurate.
A bent, blocked, or wrong dipstick can make the problem worse. Confirm the actual fill point before any further addition.
Why does cap color fail?
Cap colors aren’t a universal fluid code. The same color can appear on an oil cap, coolant cap, brake-fluid cap, or power-steering cap.
Manufacturers can change cap designs and replacement parts between model years. A replacement cap may not match the original color.
Use the oil-can symbol, printed text, filler-neck shape, and owner’s manual together. A manual match is stronger than a generic photo.
Why does the wrong viscosity matter?
Viscosity controls the oil film at different temperatures. Oil that’s too thin at operating temperature may not protect components under load.
Oil that’s too thick can increase drag and make circulation harder. Some engines also depend on specific formulations for timing chains, turbochargers, and variable valve timing.
The same SAE number doesn’t guarantee the same additive package. Use the exact viscosity and performance approval listed for the engine.
Why is reading the dipstick once unreliable?
Oil can cling to the dipstick, the tube, and the engine. A first reading can be high or low because the rod was pulled from a different condition.
Pull the dipstick, wipe it, insert it fully, and pull it again. Follow any locking or screw-in instructions from the manual.
A dirty or loose dipstick can also give a false reading. Replace it if the handle, tube, or seal is damaged.
Why is overfilling common?
Drivers may add oil for every warning, service reminder, or maintenance visit. The engine often hasn’t consumed the marked amount by that point.
Others add oil after a change because oil still coats the engine. Some stop only when the bottle is nearly empty.
Overfill can aerate the oil, increase blow-by, cause leaks, and raise oil pressure at the wrong time. It can also contaminate emissions components in some engines.
Stop at the proper range. Don’t use the full capacity as a top-up target.
Why does level checking need level ground?
A tilted engine lets oil pool toward one side. The dipstick or sight glass can show a reading that doesn’t reflect the true quantity.
Park on the level surface specified by the manual. For a motorcycle, use a stand that holds it upright. Keep a generator or small engine stable and level.
If no level surface is available, follow the manufacturer’s alternative procedure. Don’t invent a tilt correction.
What should you do after filling the wrong reservoir?
Shut the engine off and don’t start it for normal operation. Photograph the reservoir before moving the machine.
Contact the manufacturer or a qualified technician. The response may require draining, flushing, pressure bleeding, or replacing a component.
Adding a different fluid to dilute the mistake isn’t a reliable repair. It can leave contamination in the system and make diagnosis harder.
What should you do if the filler cap doesn’t fit?
Stop if the cap must be forced, sits loosely, or needs unusual tools. A foreign cap can enter another connection or fail to hold oil.
Check the cap part number and the filler-neck drawing in the service information. If the correct cap isn’t available, have the opening inspected.
A cap that is slightly tight can sometimes be opened with controlled hand force. A seized or mismatched cap needs care.
What warning signs show a fill problem?
Fresh oil around the filler cap can point to overfill, a loose cap, or a failed seal. A high dipstick reading confirms overfill more directly.
| Warning sign | First checks |
|---|---|
| Blue smoke after filling | Excess oil, oil entering the intake, or a worn engine |
| Oil-pressure warning | Level, leaks, pump, blockage, or sensor |
| Oil smell inside the cabin | External leak near an air intake or recirculation system |
| Wet oil below the vehicle | Drain plug, filter, oil pan, or cover gasket |
| Level rising without additions | Wrong reading, wrong dipstick, or a fuel-system issue |
| Level falling after a change | Loose drain plug, filter leak, or worn plug seal |
| Milky oil | Possible coolant contamination |
| Fuel odor in oil | Fuel dilution or a fuel-system fault |
| Immediate low-level message | Wrong reading procedure, wrong port, or sensor issue |
These signs call for diagnosis rather than another bottle of oil.
What to Do When a Low-Oil or Oil-Pressure Warning Appears
A low-oil message calls for a careful level check, while an oil-pressure warning calls for immediate engine shutdown. They aren’t interchangeable.
Should you keep driving with a low-oil warning?
No. Pull over somewhere safe, shut the engine off, and check the level as the manufacturer directs. A small, correct top-up may solve a simple low-volume condition.
If the warning returns, the level keeps falling, or it appears soon after a proper service, investigate the cause. Don’t rely on a dashboard gauge to decide whether the engine is safe.
Is a low-oil message different from an oil-pressure warning?
Yes. A low-level message tells you the oil quantity may be low. A pressure warning means the lubrication system may not be maintaining enough pressure.
A low-level message can appear while the engine still circulates enough oil. A pressure warning can result from a failed pump, blocked pickup, severe leak, wrong oil, or internal damage.
Shut the engine off promptly if the pressure warning appears.
What should I do if the red oil-can warning appears?
Shut the engine off as soon as you can do so safely. Don’t continue driving, climb a hill, or make an extended attempt to reach a shop.
After the engine cools, check the level using the prescribed method. If the level is dangerously low, assess the cause before adding oil.
A normal reading after the warning doesn’t prove the lubrication fault is fixed. The pump, sensor, or internal engine condition may still need inspection.
What if the oil level is normal but pressure remains low?
Don’t add oil simply to test the warning. A normal static level can exist while the pump is not operating or while oil is escaping faster than it returns.
Possible causes include:
- A damaged or failing oil pump.
- A relief valve stuck open.
- A blocked pickup or gallery.
- Aeration from an incorrect level.
- A major leak.
- A viscosity or specification mismatch.
- A pressure-sensor fault.
- Bearing or internal engine damage.
A technician can compare live oil pressure with the manufacturer’s specification.
What if the oil level is low?
Check for a visible leak before adding oil. Inspect the oil pan, drain plug, filter, filter housing, valve-cover area, and front crankcase seal.
Then use the correct oil to bring the level into the proper range. Add it in small amounts and recheck.
If a large amount disappeared within days, assume a leak or oil consumption until proven otherwise. A pressure warning, knocking sound, or metal in the oil strengthens the need for an inspection.
What if the level is too high?
Don’t start the engine. Excess oil can be aerated and can enter the breather or intake system.
Let the engine cool and repeat the correct level check. If the reading remains high, follow the manufacturer’s drain or correction procedure.
What does an oil-life reminder mean?
An oil-life reminder usually tracks time, mileage, engine hours, and driving conditions. It doesn’t directly measure the oil level or confirm the oil’s condition.
Use it to schedule service according to the manufacturer’s procedure. Continue checking the oil level at the stated interval.
Some systems estimate oil life from operating conditions. They aren’t laboratory tests of the oil. An oil-life reminder can’t identify a leak or oil-pressure fault.
What should you inspect after a top-up?
Start the engine only after the cap is secure and the level is correct. Watch the oil-pressure indication and listen for unusual sounds.
Then inspect below the vehicle after a short drive. Oil can spray from a damaged filter housing, pump cover, front crankcase seal, or drain plug.
A small leak may remain hidden under old oil until the level falls. If fresh oil appears below the machine, find the source before adding another bottle.
When should the vehicle be towed?
Tow the vehicle when the manual instructs it, the pressure warning comes with mechanical symptoms, or the engine has lost its oil.
A burning oil smell, loud knocking, metallic noise, smoke, or rapidly falling oil level warrants stopping the engine. Don’t test those symptoms by driving farther.
Motorcycles and other compact engines also need transport when a pressure fault or major leak appears. A trailer or qualified transport service avoids stressing an engine that may already lack lubrication.
When should you seek professional help?
Seek help when the warning returns after a correct fill. Professional diagnosis is also appropriate when the oil contains metal, coolant, water, or fuel.
Use a technician when the engine consumes oil faster than the manufacturer’s limit, leaks during normal driving, or shows pressure trouble.
A remote-reservoir system that won’t circulate or hold pressure also needs diagnosis. Bring the manual, service records, warning details, and the amount added.
Safety / Spill Prevention / Used-Oil Disposal
Used engine oil can ignite when it reaches a hot exhaust surface. A hot filler neck can injure skin before any mechanical problem appears. Work on level ground with the engine off, the hood supported, and the cooling system depressurized.
What should you do before opening the cap?
The engine should be off, stable, and positioned as the manufacturer’s procedure requires. Some systems call for a cold engine. Dry-sump systems may require a warm circulation step.
If the engine is warm, use heat-resistant gloves and keep the funnel clear of exhaust parts.
Secure the hood before reaching into the engine bay. Don’t open a coolant pressure cap to cool the engine. Place the drip pan first, then remove the oil cap slowly.
Which engine-bay hazards need the most attention?
Hot surfaces, moving parts, and pressurized fluids cause most fill-related injuries. A cooling fan can start without warning, even when the ignition is off.
Stay clear of belts, pulleys, hot exhaust, and electrical connectors. Don’t reach across a fan blade or place clothing near moving parts.
Used oil can accumulate on an exhaust component. Don’t start the engine to test whether a spill will burn. Let the area cool and contain the oil.
Keep cigarettes, flames, and fuel-burning heaters away from oily tools and containers.
How do I contain a spill without spreading it?
Contain the spill at the source and keep it away from drains, soil, and hot components. Don’t wash oil toward a storm drain with a hose.
| Spill location | What to do |
|---|---|
| Around the filler neck | Stop the pour and wipe it with absorbent material |
| On the valve cover | Let it seep into a drip pan and inspect the seal |
| Beneath the vehicle | Place cardboard or a drip pan under the leak |
| Near a hot exhaust part | Don’t start the engine. Let it cool first. |
| On pavement or grass | Block runoff and collect the oil |
| In a drain or storm grate | Stop the leak and contact the local environmental authority |
Change absorbent material before it becomes saturated. Oily material can hold heat and should never be left in a loose pile.
If oil reaches a coolant, brake-fluid, transmission, or emissions reservoir, don’t try to dilute it. Follow the model-specific correction procedure.
How should used oil be stored?
Store used oil in a sealed, labeled container that cannot leak. Keep it upright and away from heat, ignition sources, children, and animals.
Don’t use a bottle that held water, food, coolant, brake fluid, or solvent. Keep the lid closed whenever the container is moved.
Label the container if your local program requires it. Don’t mix used oil with gasoline, antifreeze, or solvent parts cleaner.
A drip pan is temporary collection equipment. Transfer the oil into an approved container before moving the vehicle.
How should used oil be recycled or disposed of?
Recycle used oil through a permitted local collection program. The EPA’s used-oil guidance explains why it should be kept out of soil, drains, and waterways.
Service stations, municipal collection sites, household hazardous-waste facilities, and approved recycling centers may accept it. Their rules differ, so check the local authority first.
Never pour used oil onto soil, pavement, grass, a storm drain, or a sink. Don’t burn it in a fire pit, furnace, or engine.
What should I do with oily rags and gloves?
Place oily rags, gloves, pads, and filters in a closed container or approved bag. Keep them away from hot exhaust parts until disposal.
Small amounts of oil on absorbent material can create a fire hazard. Don’t leave loose oily rags beside the engine or under a vehicle.
A clean empty bottle and a bottle with oily residue may fall under different local rules. Don’t reuse either container for water or household liquids.
What if oil reaches a hot engine part?
Stop the engine and don’t start it again to see whether the oil burns. Hot oil can lodge in a heat shield, exhaust manifold, catalytic converter, or turbocharger area.
If the spill is small and the part is cool enough to approach, place absorbent material beneath it and wipe the surrounding area. If oil is pooling inside an exhaust or turbo housing, arrange inspection.
A fresh oil smell after filling can also come from a loose cap, an overfilled crankcase, or a leaking front crankcase seal. Diagnose the source instead of adding oil again.
What legal and environmental rules apply?
In the US, used oil is managed under federal rules, with state and local requirements that may be stricter. Never discharge liquid oil into a sewer, storm drain, waterway, or open ground.
A small contained spill may be manageable with absorbent material. A spill that reaches soil or water may require reporting under local rules.
Contact the local fire department or environmental authority when the quantity or location is uncertain. Keep collection receipts when your local program provides them.
What should you check before driving?
| Safety check | Safe result |
|---|---|
| Oil level | Within the manufacturer’s range |
| Filler cap | Correct cap fitted and secured |
| Filler neck | No fresh oil around the opening |
| Underbody | No active drip or pooling |
| Warning display | No pressure or level fault |
| Spill response | Oily material contained safely |
| Service record | Date, mileage, hours, and oil details recorded |
If any item remains uncertain, don’t drive. A second check is easier than repairing an engine that ran without proper lubrication.
Final Decision Guide: Fill, Stop, Recheck, and Record
Use this guide after matching the machine, the manual, and the required oil. The right action isn’t always to add oil. Sometimes the safest decision is to stop and diagnose a warning, leak, or wrong-fluid problem.
What should happen before you decide to add oil?
First decide whether the engine is safe to inspect and whether the oil level is truly low. A warning, contaminated oil, or active leak changes the procedure.
- If a red pressure warning, knocking, smoke, or major leak is present, shut the engine off. Arrange diagnosis or towing.
- If only a low-level message is present, park on level ground and check the level with the engine off.
- If the service interval is due or the oil history is unknown, arrange a complete oil change.
- If the oil is correct and recent, but slightly low, perform a measured top-up.
- If the port, viscosity, or oil approval is uncertain, add nothing.
This order prevents a top-up from hiding a leak or contaminating another system.
Which branch fits your situation?
Match the current condition to the action before opening the cap. The same engine can need different treatment depending on its history and warning status.
| Current condition | Decision | Next action |
|---|---|---|
| Level is between the proper marks | No addition | Recheck at the next interval |
| Level is slightly below the range | Top-up | Use approved oil in measured amounts |
| Level is at or below MIN | Top-up and inspect | Check for leaks and let the oil settle |
| Service time, mileage, or hours are due | Full oil change | Replace oil and filter as specified |
| Previous oil type is unknown | Full service | Confirm the specification first |
| Level falls soon after service | Investigation | Don’t keep replacing oil without finding the cause |
| Milky, metallic, watery, or fuel-diluted oil | Stop | Inspect before normal use |
| Pressure warning is active | Stop | Don’t drive or run the engine to test it |
| Fill port can’t be confirmed | No addition | Use the exact manual, dealer, or technician |
| Dry-sump or remote-reservoir system | Special procedure | Follow its circulation and filling instructions |
A proper range is more useful than a single maximum mark. Stay within the range defined for that engine.
What is the shortest safe decision tree?
Use this five-step path whenever you’re unsure whether to top up, change the oil, or stop.
- Is the port confirmed? If no, check the VIN-specific manual or ask a technician. If yes, continue.
- Is there a pressure warning or contaminated oil? If yes, stop and diagnose it. If no, continue.
- Is scheduled service due or unknown? If yes, perform a full oil change. If no, continue.
- Is the level low with correct, serviceable oil? If yes, add measured amounts. If no, don’t add oil just because mileage has accumulated.
- Is the final level correct, the cap secure, and no leak present? If yes, record the service. If no, stop and recheck.
This works for a car, motorcycle, generator, or mower. The manual controls the details.
How much oil should the final fill contain?
Add only enough to move the current level into the manufacturer’s proper range. Use the manual’s specified quantity when it gives one.
After a full drain, the listed capacity may include oil remaining in the filter, cooler, galleries, and sump. Pouring every listed quart or liter into the filler can leave the engine overfilled.
For a top-up, measure from the current reading. Add a small amount, wait, and read the indicator again. If the level hasn’t moved, investigate the port or system before adding more.
| Reading before filling | Amount to add |
|---|---|
| Within the proper marks | Usually none |
| Slightly below the range | A small measured amount |
| At or below MIN | Enough to reach the range, added gradually |
| At or above MAX | None |
| Reading can’t be trusted | None until the port and indicator are confirmed |
| After a full drain | Manual’s service quantity, followed by a level check |
Small measuring references can help:
| Approximate addition | Metric equivalent |
|---|---|
| 2 US fluid ounces | 59 milliliters |
| 4 US fluid ounces | 118 milliliters |
| 8 US fluid ounces | 236 milliliters |
| 250 milliliters | About 8.5 US fluid ounces |
These are measuring references, not universal doses. A small engine may need less. A dry-sump reservoir may need a controlled fill.
How do you complete the final fill without losing control?
Complete the fill in a measured sequence, then verify the result before driving. Don’t treat full capacity as a target.
- Confirm the exact machine and approved oil.
- Position the engine as the manual requires.
- Check the existing dipstick, sight glass, or reservoir level.
- Inspect the filler opening and cap.
- Add a measured amount through the confirmed port.
- Allow the oil to settle or circulate for the stated time.
- Recheck the level using the manufacturer’s method.
- Repeat in small amounts only if needed.
- Secure the correct cap.
- Inspect for spills and record the amount added.
If the manual calls for priming, circulation, or bleeding, place that step before the final level check. Don’t improvise a running fill for a conventional engine.
What if the level changes after the final reading?
Repeat the check after the specified settling time. Oil can coat filters, galleries, and upper engine surfaces before settling into the measured area.
| What changes | What it may mean |
|---|---|
| Level rises without added oil | Wrong dipstick, wrong port, or fluid movement in a special system |
| Level falls after filling | Leak, drain-plug issue, filter leak, or oil consumption |
| Level sits above MAX | Overfill, wrong reading position, or wrong dipstick |
| No oil appears on the dipstick | Wrong port, blocked tube, or incorrect dipstick |
| Level changes with temperature | Normal thermal expansion when the manual allows it |
If the level falls quickly, inspect the drain plug, filter, oil pan, and filter housing. Don’t keep topping up a leak.
What if the vehicle uses a remote-fill or dry-sump system?
Use the remote connection or reservoir only as the manual describes. The final reading may depend on oil circulating through the engine.
For a remote filler, confirm the cap, hose, and marked connection before opening it. Don’t substitute a nearby port because the remote cap is hard to reach.
For a dry-sump engine, fill the designated reservoir to the specified level. Run or bleed the system only as directed. Then let the oil return and recheck the reservoir.
For a cap-mounted dipstick, use the combined removal, wiping, reading, and refitting sequence. A loose or wrong cap can make a simple top-up leak.
For a sight glass, read it at the specified temperature. Never pour through the sight glass or its drain fitting.
What should you record after filling?
Record enough information to make the next level check meaningful. A service log helps reveal leaks, repeated consumption, and changing oil condition.
| Record field | What to write |
|---|---|
| Date | Full service date |
| Mileage or hours | Odometer or engine-hour reading |
| Oil | Viscosity, category, and oil type |
| Amount | Quantity added or replaced |
| Final level | Cold, hot, MIN, MAX, or sight-glass result |
| Condition | No leak, warning, contamination, or service needed |
If the engine needs frequent top-ups, record the amount and interval. A pattern of large additions deserves investigation.
When is the job complete?
The job is complete when the level is correct, the cap is secure, and no fresh leak or warning is present. Complete the service record before moving the machine.
Use this final check:
- The exact fill port was confirmed.
- The correct oil specification was used.
- The level was checked at the prescribed temperature.
- The correct cap is seated and secured.
- No oil is dripping from the filler, filter, drain plug, or oil pan.
- No pressure or low-level warning appears.
- Used oil and oily absorbents are contained safely.
If you can’t answer every point confidently, stop and ask a qualified technician. A short delay beats carrying a lubrication problem into normal driving.
Frequently Asked Questions
Can I pour engine oil into the dipstick tube?
No, not on a conventional engine. The dipstick tube is a measuring passage, and pouring through it can spill oil or make the reading inaccurate. Some motorcycles and small engines combine the filler and dipstick in one cap.
In that case, follow the manual’s removal and reading method. Never force oil into a separate dipstick tube.
Is the engine-oil cap always black?
No. Cap colors are not a universal fluid code. Black, yellow, blue, red, and other colors appear on different systems across models.
Look for an oil-can symbol, read the label, and match the location with the exact owner’s manual. A coolant or brake-fluid cap should never receive engine oil, even if its color looks convenient.
Where do I put oil in a motorcycle or small engine?
Use the filler opening on the crankcase, oil tank, or dry-sump reservoir specified for that machine. Many motorcycles and small engines use a cap-mounted dipstick. Keep the equipment upright and level, check the starting level, add small amounts, and recheck before securing the cap.
How much oil should I add after an oil change?
Add the amount specified for the exact service procedure, then recheck the level. The listed capacity may include oil left in the filter, cooler, galleries, and sump, so pouring the full number blindly can overfill. For a top-up, add only enough to move the current reading into the proper range.
Can I use any 5W-30 oil?
Not by itself. SAE 5W-30 describes viscosity, but the oil must also meet the manufacturer’s performance category or approval. API, ACEA, and ILSAC requirements differ by engine and market.
Use the exact specification in the manual. A bottle with the right viscosity but the wrong approval may not provide the required protection.
What if I put engine oil in the wrong reservoir?
Stop the engine and don’t start or drive it. Do not dilute the mistake with coolant, brake fluid, or another fluid. Photograph the reservoir and contact the manufacturer or a qualified technician for the model-specific draining, flushing, or replacement procedure.
Running the engine can spread the contamination and turn a simple correction into a larger repair.