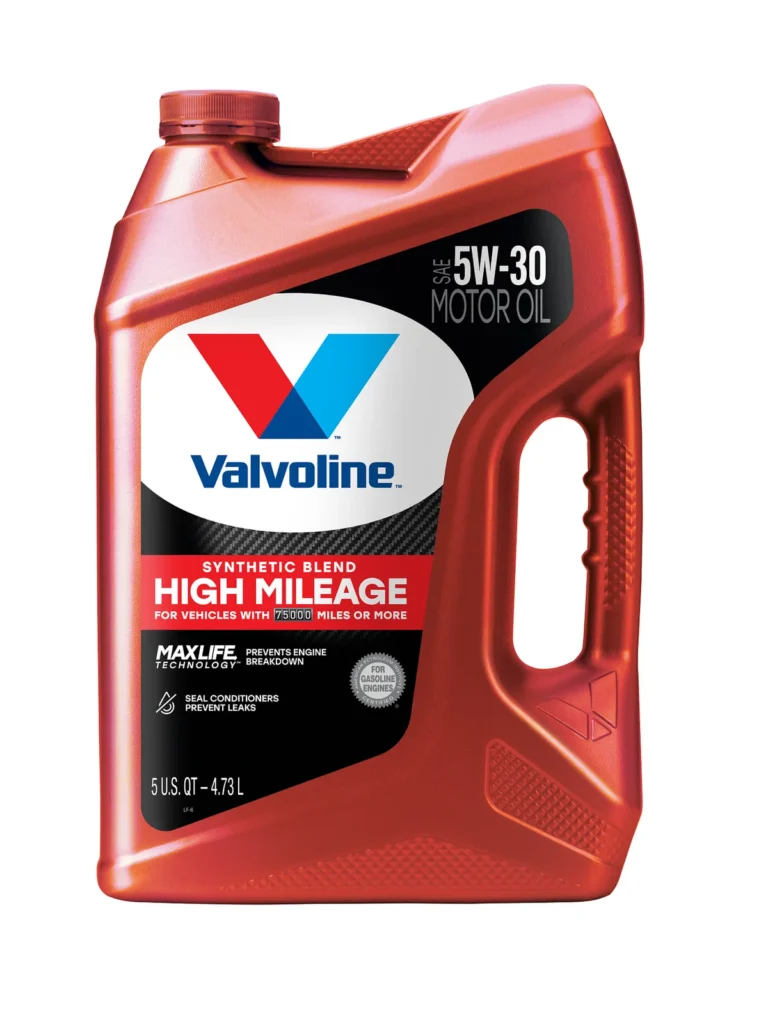
To open an engine oil bottle, hold it upright, twist the cap counterclockwise, break any tamper seal, and remove the inner seal if present before pouring.
If you are topping off your car’s engine oil in an American driveway or garage, opening the bottle is usually a simple task. Most motor oil bottles have a screw cap and a tamper-evident ring. Some also have an inner foil seal or plastic liner that keeps the oil sealed until use. The exact design depends on the brand and bottle size.
Start with a clean bottle and a stable surface. Check the cap before twisting it, since some packages use a pull tab, a safety ring, or a separate inner seal. You do not need a special tool for most bottles, and a little care can prevent oil from spilling onto your hands, clothing, or driveway.
This guide explains how to open a new engine oil bottle, remove a stubborn cap, handle different seals, and pour oil without making a mess. It also covers what to do if the bottle leaks, the cap breaks, or you are unsure whether the oil is suitable for your vehicle.
Source: preggiepals.com
What You Need Before Opening an Engine Oil Bottle
You usually need only your hands and a clean place to set the bottle. A few simple items can make the job easier, especially if the cap is tight or you plan to add oil to your car right away.
Before opening the bottle, check that the package is intact. Look for a damaged cap, a broken safety ring, a leaking seam, or signs that someone has already opened it. If the seal looks disturbed or the oil appears contaminated, choose an intact bottle instead.
Source: preggiepals.com
A clean work area
Use a level surface away from dirt, dust, and loose debris. A stable place helps keep the bottle upright while you remove the cap.
A clean cloth or rubber grip
Use a dry cloth or rubber jar-opening grip for better traction if your hands slip on the cap.
A clean funnel
A funnel is useful when pouring oil into the engine’s oil filler opening. Make sure it is clean and free of water, dirt, and other fluids.
Your vehicle owner’s manual
Check the required oil grade, specification, and fill procedure before adding oil. A bottle can open correctly while still containing the wrong oil for your engine.
Check the Bottle Type
Most engine oil sold in US auto parts stores, big-box retailers, and gas stations comes in plastic bottles with screw caps. Larger containers may have wider caps or molded handles, while smaller bottles may use narrower openings. The basic opening process is similar, but the seal beneath the cap can differ.
Look at the cap and the neck of the bottle. A visible plastic ring usually indicates a tamper-evident closure. A foil or plastic liner may sit directly beneath the cap, while a pull-tab design may require you to lift a small tab rather than twist the entire closure.
Standard screw cap
Twists off by hand, usually counterclockwise.
Tamper-evident cap
Has a ring that separates from the cap or remains around the bottle neck after opening.
Inner-sealed bottle
Has a foil or plastic membrane beneath the cap that must be removed or opened before pouring.
How to Open an Engine Oil Bottle Step by Step
The safest way to open a typical engine oil bottle is to hold it steady, loosen the cap by hand, and inspect the opening before pouring. Do not rush the process. A few seconds spent checking the seal can help keep dirt out of the oil and prevent spills.
These steps apply to most new plastic motor oil bottles with screw caps. If the package has different opening instructions, follow those instructions instead.
Source: preggiepals.com
Step 1: Place the bottle upright
Set the bottle on a level, stable surface. Keep it away from the edge of a workbench, shelf, or vehicle body.
Step 2: Inspect the cap
Check for a safety ring, pull tab, visible seal, or signs of damage. Make sure the bottle is not leaking.
Step 3: Grip the bottle firmly
Hold the body of the bottle with one hand. Keep your fingers away from the cap’s edge if the plastic has sharp damage.
Step 4: Turn the cap counterclockwise
Look down at the cap and turn it to the left. Use steady pressure instead of sudden force.
Step 5: Remove the cap
Once the threads release, lift the cap away. If the tamper-evident ring separates, check that no loose plastic pieces have fallen into the bottle.
Step 6: Check for an inner seal
Look inside the bottle opening. If a foil or plastic membrane covers it, remove it using the designed tab or method. Do not pour through an intact seal.
Step 7: Prepare to pour
Inspect the opening for loose packaging fragments. Fit a clean funnel if needed, then pour slowly when you are ready to add oil.
Which Way Do You Turn an Engine Oil Cap?
Most engine oil bottle caps use standard right-hand threads. When you look down at the cap, turn it counterclockwise to loosen it and clockwise to tighten it. A simple reminder is left to loosen and right to tighten.
If the cap does not move, stop and check its design. A safety feature or pull tab may need to be released first. Forcing the cap can damage the threads, crack the neck, or make the bottle harder to handle.
To open
Turn counterclockwise when viewed from above.
To close
Turn clockwise until the cap is secure. Avoid overtightening.
How to Remove an Inner Foil Seal
Some bottles have a thin membrane beneath the cap. If the membrane has a pull tab, lift the tab and peel the seal away slowly. Keep the bottle upright so oil does not run onto the cap or your hands.
If the seal has no tab, inspect the package for opening instructions. Do not assume every seal is meant to be punctured. If the manufacturer provides no clear method, contact the seller or manufacturer rather than pushing a sharp object into the opening.
Remove the whole seal when designed to do so
A loose membrane can obstruct pouring or fall into the bottle.
Keep the opening clean
Do not touch the inside of the bottle neck or allow dirt to fall into the oil.
How to Open a Stuck or Tight Engine Oil Bottle Cap
A tight cap does not always mean the bottle is defective. It may have a firm factory seal, slippery packaging, or a cap that was tightened securely during packing. Start with simple methods that improve your grip rather than reaching for a knife or pliers.
Keep the bottle upright throughout the process. If oil is already leaking around the cap, place the bottle in a tray or another suitable container before attempting to loosen it.
Source: preggiepals.com
Dry your hands and the cap
Oil or moisture can make the cap slippery. Wipe the outside with a clean, dry cloth before trying again.
Use a rubber grip
A rubber jar grip can help you turn the cap without squeezing the bottle too hard.
Apply steady pressure
Hold the bottle body securely and turn the cap in a smooth motion. Avoid jerking or twisting the bottle itself.
Check for a safety feature
Look for a tab, locking ring, or unusual closure that may need a specific release action.
Stop if the package begins to crack
A cracked neck or damaged cap can cause a sudden spill. Set the bottle down and seek a replacement if needed.
Should You Use Pliers to Open the Cap?
Hand pressure is the better first choice. Pliers can crush a plastic cap, deform the threads, or crack the bottle neck. They may also cause your hand to slip when the cap suddenly releases.
If a rubber grip does not work, check the manufacturer’s instructions or ask the seller for help. Do not heat the cap with a flame, pour boiling water over it, or cut around the bottle neck. Heat and sharp tools can damage the packaging and create a spill or injury risk.
Avoid sharp knives
Cutting around a cap or seal can injure your hand and send plastic fragments into the oil.
Avoid excessive force
Stop if the cap deforms or the bottle makes cracking sounds.
What If the Cap Turns but Will Not Come Off?
The cap may have damaged threads, a broken safety ring, or a seal that still connects it to the bottle. Stop turning if the cap spins freely without rising or releasing.
Inspect the closure without pulling hard. If the cap or neck is damaged, do not use a tool to pry it open over an exposed engine or near a hot surface. Return the bottle or ask the manufacturer how to handle the defective package.
Cap spins freely
The threads or cap may be damaged. Avoid forcing it.
Cap is cracked
Replace the bottle if the closure cannot be removed safely.
Seal remains attached
Check whether the package uses a pull tab or another opening method.
How to Open Different Types of Motor Oil Containers
Not every motor oil container opens in the same way. Bottle size, cap design, and the type of seal can change the steps you need to follow. Identifying the closure first is often faster than trying to force it open.
Use the table below to identify common package designs and the best first action. It describes typical designs rather than every brand or product.
Source: preggiepals.com
Common Engine Oil Bottle Closures
The safest method depends on the closure. If the cap has a molded grip, use it. If the bottle has a tamper ring or inner membrane, check those parts before pouring.
How to Pour Engine Oil After Opening the Bottle
Once the bottle is open, pour slowly and keep the oil away from the outside of the engine. Opening the bottle is only the first step; the next task is adding the correct oil in the correct amount. A clean funnel can make this easier, especially when the filler opening is narrow or set deep inside the engine bay.
Before pouring, park the vehicle on a level surface and follow the owner’s manual for checking or adding oil. If the engine has been running, let it cool as directed by the manufacturer. Never reach near moving belts, fans, or other engine parts while the engine is running.
Source: preggiepals.com
Step 1: Find the correct oil filler opening
Use the owner’s manual to identify the engine oil filler cap. Do not confuse it with the coolant reservoir, brake fluid reservoir, or another service opening.
Step 2: Clean the area
Wipe away loose dust around the filler cap before removing it. This helps prevent debris from entering the engine.
Step 3: Insert a clean funnel
Make sure the funnel is suitable for engine oil and has no dirt, water, fuel, or other fluid residue.
Step 4: Pour a small amount at a time
Use a controlled flow rather than emptying the whole bottle at once. Pause between additions so you can check the oil level.
Step 5: Check the oil level correctly
Follow the vehicle’s procedure for using the dipstick or electronic oil-level display. Do not rely only on how much oil remains in the bottle.
Step 6: Secure the filler cap
Replace the engine’s oil filler cap and tighten it as directed by the manufacturer. Wipe away any oil spilled on the engine exterior.
How Much Oil Should You Pour?
The correct amount depends on the engine, its current oil level, and whether you are topping off or filling after an oil change. A bottle’s full volume does not tell you how much your vehicle needs.
For a top-up, add a small amount, wait briefly for the oil to drain into the sump, and check the level using the method in your owner’s manual. Repeat as needed without exceeding the maximum mark. If the level is already at the proper mark, do not add more oil.
If the dipstick reads below the minimum mark
Add the specified oil in small increments and recheck the level. If the dipstick is dry or the engine has a low-oil warning, consult the manual before driving.
If the level is between the marks
Check the manufacturer’s guidance. You may not need to add oil unless the level is near the lower limit or the manual advises a top-up.
If the level is above the maximum mark
Do not add more. Excess oil can cause engine problems, and an overfilled engine may need professional attention.
What If Oil Spills While You Pour?
Stop pouring as soon as you notice a spill. Wipe accessible oil from cool exterior surfaces with an absorbent cloth, and keep the oil away from belts, electrical connectors, and hot exhaust parts. Do not touch hot engine components.
If oil reaches a hot exhaust surface, produces smoke, or creates a strong burning smell, turn the engine off when safe and allow it to cool. Investigate the source before restarting. Collect used absorbent material and oily waste for proper disposal rather than washing oil into a storm drain.
Small spill on a cool surface
Absorb it with a suitable cloth or spill material and clean the area according to the product instructions.
Oil on hot engine parts
Do not wipe the hot parts by hand. Let them cool and inspect the area before running the engine again.
Large spill on the ground
Contain the spill with absorbent material and follow local rules for oily waste. Keep it out of drains and waterways.
Engine Oil Bottle Safety and Storage
Handle engine oil with care even when the bottle is new. Motor oil can irritate skin, make floors slippery, and harm the environment if spilled or poured into drains. Keep it away from children and pets, and avoid prolonged contact with your skin.
Read the bottle label and any safety information supplied with the oil. Work in a well-ventilated area, keep the oil away from flames, and never use a container that has been damaged or contaminated.
Source: preggiepals.com
Keep oil away from children and pets
Store the bottle in a secure place where it cannot be knocked over or mistaken for a drink.
Avoid skin and eye contact
Use suitable gloves if needed, wash your hands after handling oil, and follow the product label if contact occurs.
Do not mix oils without a reason
Use the grade and specification required by your vehicle. If you are unsure whether two oils are suitable together, check the owner’s manual or ask a qualified service professional.
Close the bottle after use
Replace the cap securely to reduce the chance of leaks and contamination. Keep the bottle upright in a cool, dry storage area.
Dispose of used oil properly
Take used engine oil to an appropriate collection or recycling facility. Never pour it onto soil, into a household drain, or into a storm sewer.
Can You Reuse an Opened Engine Oil Bottle?
You can often keep unused oil in its original bottle if the oil remains clean and the cap can be secured properly. Keep the label readable so you can identify the oil grade and product specification later.
Store the bottle upright and away from heat, moisture, dust, and direct sunlight. Follow any storage guidance on the label. If water, dirt, or another fluid may have entered the bottle, do not assume the oil is still suitable for your engine.
Keep the original container
The original label helps identify the oil and its intended specifications.
Secure the cap
A closed cap helps reduce contamination and leaks, though it does not make an already contaminated oil safe to use.
Inspect before reuse
Check for a damaged bottle, loose debris, water contamination, or an unclear product identity.
How to Handle an Unknown or Damaged Bottle
Do not use oil from a bottle with an unknown history, a badly damaged seal, or signs of contamination. The oil’s appearance alone cannot confirm that it meets the needs of your engine.
If the bottle leaked during transport, its cap is broken, or the seal appears to have been tampered with, contact the retailer or manufacturer. A replacement is preferable to risking damage from unsuitable or contaminated oil.
Seal appears broken before purchase
Choose an intact bottle or ask the retailer to inspect the package.
Oil has visible debris or water
Do not pour it into the engine. Seek advice from the seller or manufacturer.
Product label is missing
Do not guess the grade or specification from the bottle color or cap design.
Common Mistakes When Opening an Engine Oil Bottle
Most problems happen when someone rushes, forces a cap, or overlooks the seal. A standard bottle is simple to open, but a damaged package can turn a quick task into a spill or contamination problem.
Avoid these common mistakes to keep the oil clean and make the next step easier.
Source: preggiepals.com
Twisting the wrong way
Most caps loosen counterclockwise when viewed from above. If the cap will not move, inspect the design rather than using more force.
Ignoring the tamper-evident ring
A ring that separates during opening is usually part of the closure design. Check that it does not leave loose fragments near the opening.
Leaving an inner seal in place
An intact seal can block the opening and may cause a spill if someone tries to pour through it.
Using a dirty tool
A contaminated knife, screwdriver, funnel, or cloth can introduce debris or another fluid into the oil.
Squeezing the bottle too hard
Excessive pressure can deform the container and push oil out suddenly when the cap releases.
Pouring too quickly
A fast stream can overflow a narrow filler opening. Use a funnel and a controlled flow.
Adding oil without checking the specification
The correct viscosity and required performance specification matter more than whether the bottle opens easily.
Overfilling the engine
Do not empty the bottle simply because it is open. Check the oil level as you add oil.
How to Know You Opened the Bottle Correctly
A correctly opened bottle has a cap that comes away without damaging the neck, an opening free of loose packaging pieces, and an inner seal removed or opened as intended. The oil should remain free of visible debris from the opening process.
If the bottle neck is cracked, the cap threads are damaged, or fragments may have fallen into the oil, stop and assess the package before using it. Do not pour questionable oil into your engine just to avoid wasting a bottle.
The cap is fully removed
The opening is accessible and the cap has not broken apart.
The seal is handled correctly
Any inner membrane has been removed or opened according to the package design.
The oil remains clean
No visible plastic pieces, dirt, water, or other contaminants have entered the container.
Frequently Asked Questions
Q
Do all engine oil bottles open counterclockwise?
Most engine oil bottles use standard screw caps that loosen counterclockwise when viewed from above. Some packages have safety features or pull tabs that must be released first. Check the cap design and follow the package instructions if the closure works differently.
Q
How do I open an engine oil bottle without a tool?
Place the bottle upright, hold its body firmly, and turn the cap counterclockwise with your hand. If your grip slips, dry the cap and your hands. A clean rubber grip or dry cloth can help, but most standard caps do not require a special tool.
Q
Can I puncture the seal under an engine oil cap?
Do not puncture the seal unless the package instructions specifically call for that method. Many seals are designed to peel away using a tab or another built-in feature. A sharp tool can injure your hand, damage the bottle, or leave fragments in the oil.
Q
Why will my engine oil bottle cap not open?
The cap may be tight, slippery, locked by a safety feature, or damaged. Dry the cap, use a rubber grip, and check for a pull tab or unusual closure. Stop if the plastic begins to crack or the cap spins without releasing. Contact the retailer or manufacturer if the package appears defective.
Q
Should I remove the plastic ring around the engine oil cap?
The plastic ring on many motor oil bottles is a tamper-evident feature. It normally separates from the cap as you unscrew it and may remain around the bottle neck. Do not confuse it with a separate inner seal, and check that loose pieces do not fall into the oil.
Q
Can I add engine oil straight from the bottle without a funnel?
Yes, if the bottle opening and the engine filler opening allow you to pour cleanly. However, a clean funnel often reduces spills, especially in a crowded engine bay. Pour slowly, keep dirt away from the filler opening, and check the oil level before adding more.
Q
How long can I keep an opened engine oil bottle?
The storage life depends on the oil formulation, packaging condition, and storage environment. Keep unused oil in its original, tightly closed bottle and follow the manufacturer’s storage guidance. Do not use oil if it may have been contaminated or if its identity and condition are uncertain.
Q
What should I do if I spill engine oil while opening the bottle?
Set the bottle upright and absorb the spill with suitable material. Keep oil away from hot engine parts, drains, and soil. Clean the affected area safely, and dispose of oily absorbents according to local waste rules. If oil reaches hot exhaust parts and causes smoke, turn off the engine when safe and let the area cool before inspection.
✦ Wrapping Up
Conclusion
Learning how to open an engine oil bottle takes only a few simple steps. Hold the bottle upright, turn the cap counterclockwise, check the tamper-evident ring, and remove any inner seal according to the package design. If the cap is stuck, improve your grip before trying anything stronger.
Once the bottle is open, keep the oil clean and use it only if its grade and specification match your vehicle’s needs. Pour slowly, check the oil level as directed in the owner’s manual, and close the bottle securely after use. If the package is cracked, leaking, or possibly contaminated, replace it rather than taking a risk.
💡 Key Takeaway
Set the bottle on a stable surface, inspect the cap and seal, twist counterclockwise, and check your vehicle’s oil requirements before pouring.
If you’ve ever picked up a quart of “full synthetic” and wondered what is synthetic motor oil made from, you’re not alone. The bottle screams “engineered in a…
If you’re trying to work out how much motor oil your engine needs, the answer is in the vehicle’s oilcapacity specification. Engine size alone can mislead…
You open the hood, pull the dipstick, and wonder if you grabbed the right can. Maybe you’re in the parts store, staring at two aisles: “Motor Oil” and “Engine…