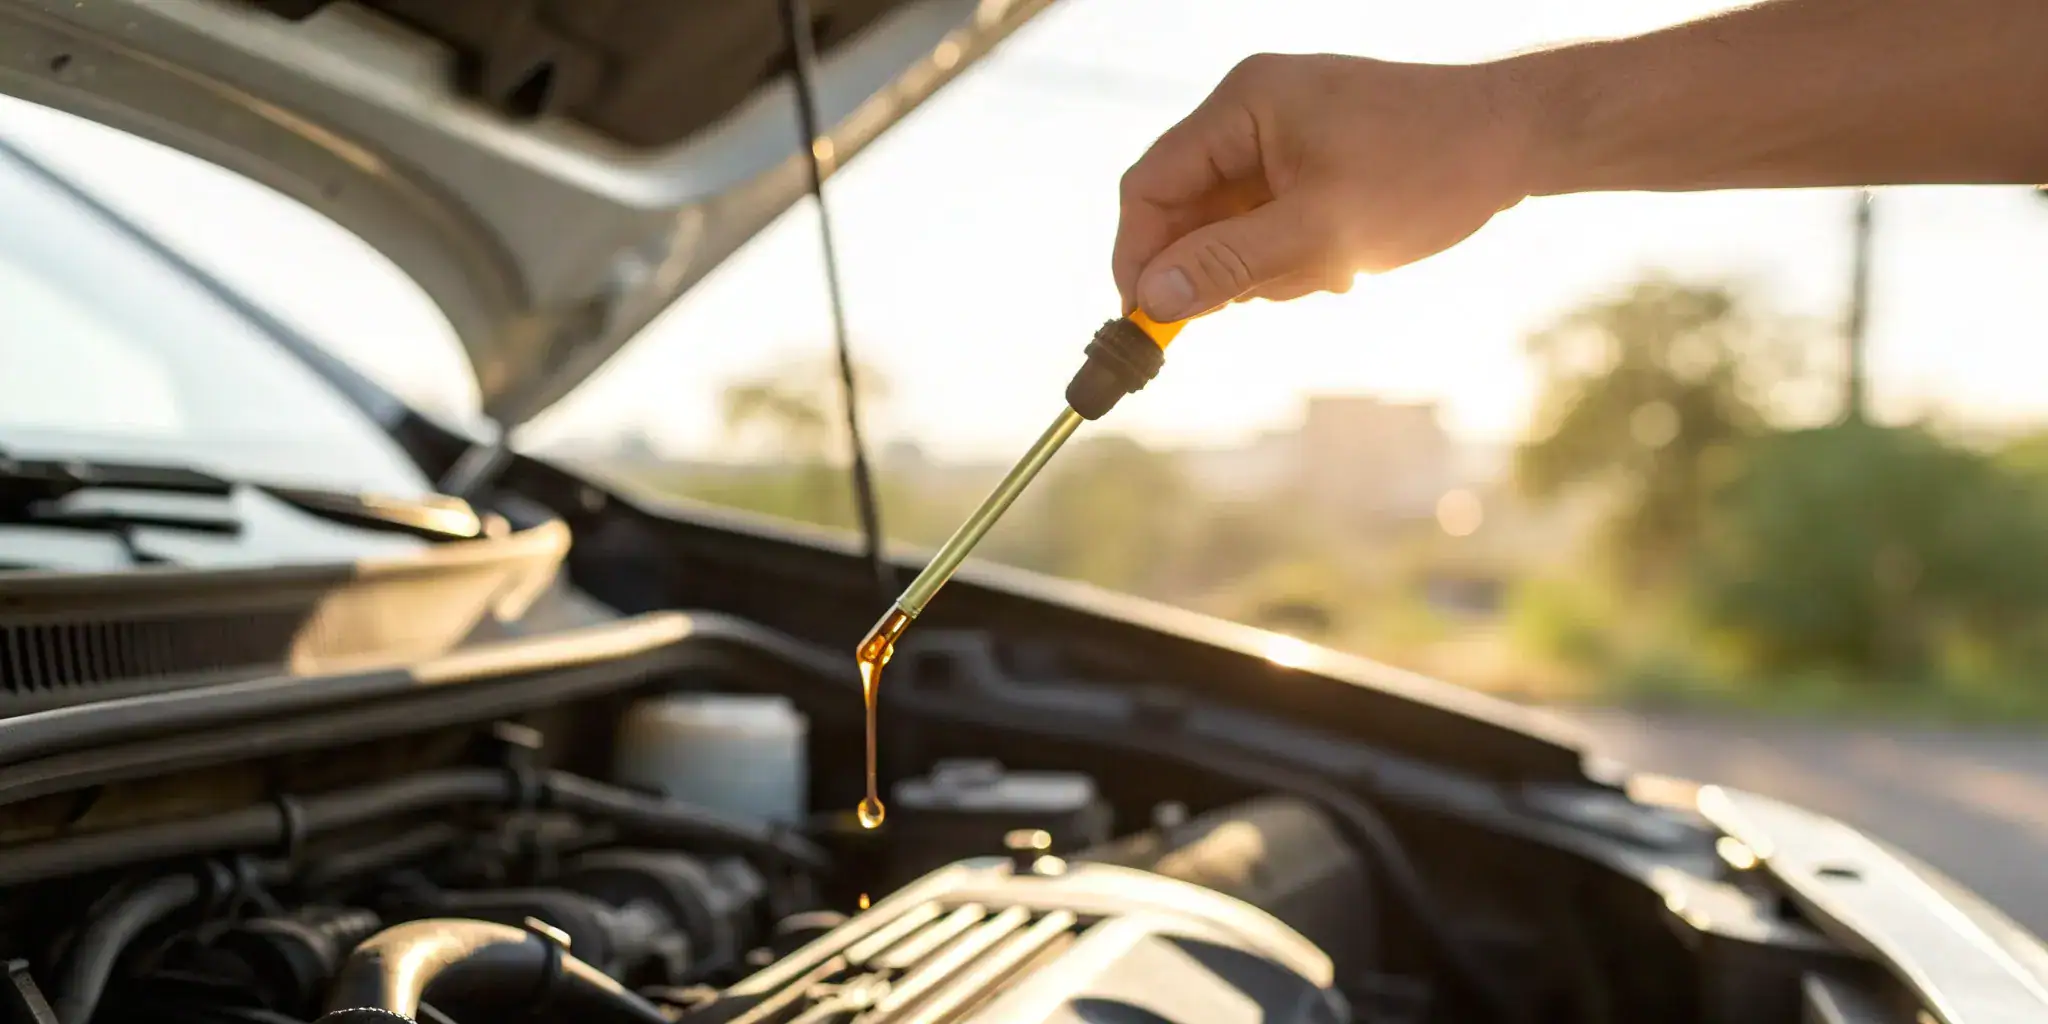
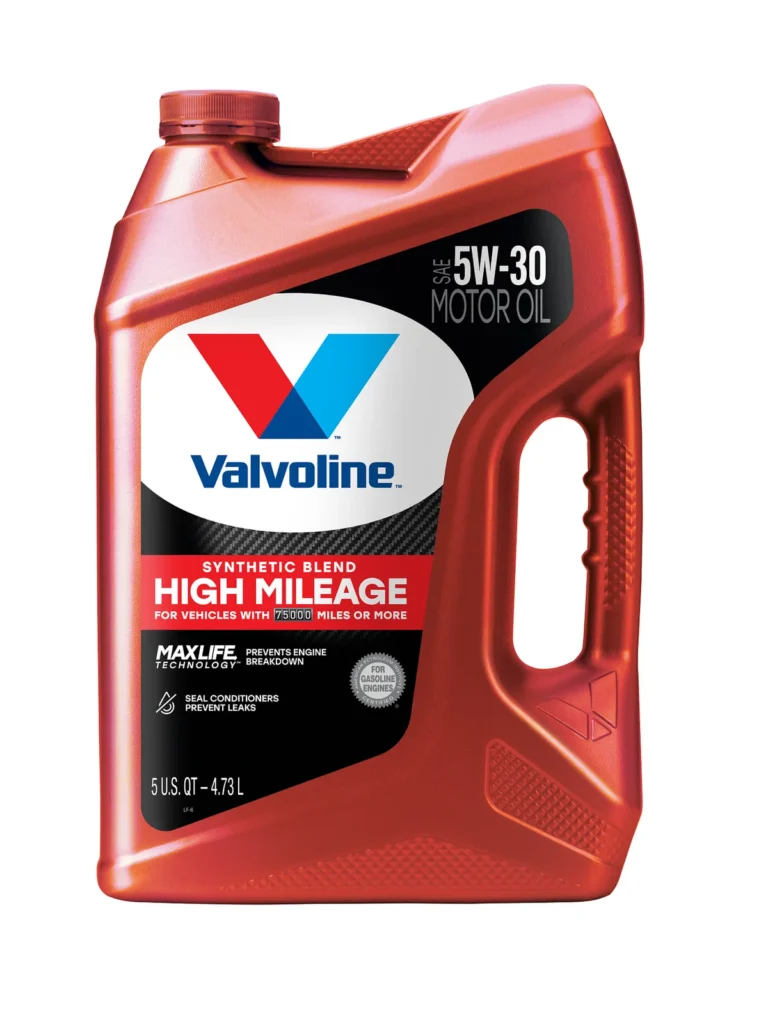
To measure engine oil, park on level ground, switch off the engine, wait for the oil to settle, and read the dipstick between its MIN and MAX marks. Add the correct oil in small amounts if the level is low.
For drivers across the United States, checking engine oil is a simple task that can help prevent costly engine damage. Whether you drive through busy streets in New York, commute on California highways, or travel long distances across Texas, your engine needs the right amount of oil to run well. You can check most gasoline cars in just a few minutes with the dipstick supplied by the vehicle maker.
The main goal is to measure the oil level accurately, not simply to see whether oil is present. Too little oil can reduce lubrication and raise the risk of engine wear. Too much oil can also cause trouble, so the correct level matters. I will explain how to prepare the car, read the dipstick, use an electronic oil-level system, and add oil without guessing.
The correct procedure depends on your vehicle. Some cars require a cold engine, while others call for a warm engine followed by a specific waiting period. Your owner’s manual takes priority over general advice, especially for cars with electronic gauges or no traditional dipstick.
Source: hitchesguide.com
What Does Measuring Engine Oil Mean?
Measuring engine oil means checking how much lubricating oil is in the engine’s oil pan or sump. The oil pump moves this oil through the engine to help reduce friction, carry away heat, and protect moving parts. A correct oil level helps the lubrication system work as designed.
The dipstick or electronic oil-level system tells you whether the amount of oil falls within the range approved by the vehicle manufacturer. It does not usually tell you the exact total number of quarts inside the engine. For that figure, you need the vehicle’s service information and the specified oil capacity.
Oil level and oil condition are two different things. A dipstick can show that the engine has enough oil, but it cannot fully reveal whether the oil has lost its useful properties or contains harmful contaminants. Regular checks and oil changes serve different purposes.
Source: freepik.com
Oil level
The amount of oil available in the engine’s lubrication system, measured against the dipstick marks or an electronic gauge.
Oil capacity
The specified quantity needed to fill the engine under a stated service condition. Capacity may differ depending on whether the oil filter is also replaced.
Oil condition
The state of the oil, including its age, contamination, and ability to provide proper lubrication. A normal-looking level does not guarantee good oil condition.
Why the Correct Oil Level Matters
Engine oil forms a protective film between moving parts. If the level becomes too low, the oil pump may not maintain a steady oil supply under some operating conditions. That can increase friction, heat, and wear.
Overfilling is not a safe way to add extra protection. Too much oil can be churned by rotating engine parts, which may cause foaming or other lubrication problems. Depending on the engine design and the amount of excess oil, it may also affect seals, emissions equipment, or engine operation.
Low oil
May reduce lubrication and can lead to severe damage if the engine loses adequate oil pressure.
Correct oil
Keeps the level within the manufacturer-approved range and supports normal lubrication.
Excess oil
May cause mechanical or emissions-related problems and should be corrected according to the service instructions.
What You Need Before Measuring Engine Oil
You need very little equipment to measure engine oil in a car with a traditional dipstick. The most important items are a clean cloth or paper towel, a level parking area, and the correct instructions for your vehicle. If you find that the oil is low, you may also need the approved engine oil and a clean funnel.
Before opening the hood, park away from traffic and set the parking brake. If the engine is warm, watch for hot components and avoid touching exhaust parts. Never reach near moving belts or fans while the engine is running.
Source: taftindependent.com
Clean cloth or paper towel
Wipes away old oil so the dipstick can show a fresh and readable measurement.
Owner’s manual
Identifies the dipstick, required oil specification, measurement conditions, and correct filling method.
Approved engine oil
Use only oil that meets the viscosity and performance requirements listed for your specific engine.
Funnel
Helps prevent spills when adding oil through the engine’s designated filler opening.
Find the Dipstick and Oil Filler Cap
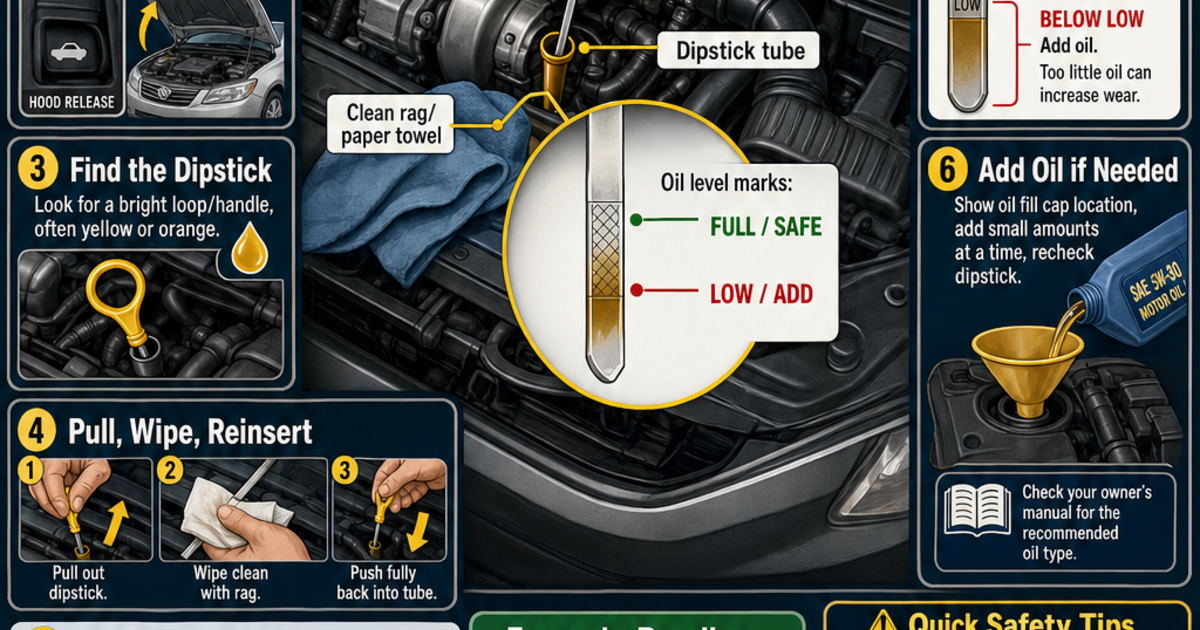
Open the hood and look for the engine oil dipstick. On many vehicles, it has a brightly colored handle, although its shape and location vary. Do not confuse it with the transmission dipstick on vehicles that have one.
The oil filler cap is usually marked with an oil-can symbol or wording that identifies engine oil. The dipstick measures the current level, while the filler opening is where you add oil. Consult the owner’s manual if either part is hard to identify.
Dipstick
A metal or flexible measuring strip that reaches into the engine’s oil reservoir.
Oil filler cap
The cap covering the opening used to add engine oil.
How to Measure Engine Oil With a Dipstick
The most reliable way to measure engine oil on a vehicle with a traditional dipstick is to follow the manufacturer’s procedure and read the clean dipstick after inserting it fully. The steps below apply to many gasoline-powered passenger cars, but some vehicles have special requirements.
Some manuals call for checking the oil when the engine is cold. Others specify warming the engine, switching it off, and waiting for a set time. Follow the exact instructions for your vehicle rather than assuming that every engine must be checked under the same conditions.
Source: livephysics.com
Step 1: Park on level ground
Choose a flat driveway, parking lot, or garage floor. A slope can shift oil within the engine and make the reading less accurate.
Step 2: Prepare the engine
Switch off the engine and follow the manual’s instructions for engine temperature and settling time. Keep the vehicle secure and wait until it is safe to work near the engine.
Step 3: Remove the dipstick
Pull the dipstick straight out by its handle. Avoid touching hot components around it.
Step 4: Wipe the dipstick clean
Use a clean, lint-free cloth or paper towel to remove the oil from the entire measuring area.
Step 5: Insert it fully
Push the dipstick back into its tube until it reaches its normal seated position. A partly inserted dipstick can give a false reading.
Step 6: Pull it out again
Remove the dipstick smoothly and keep it level enough to prevent oil from running across the marks.
Step 7: Read the oil level
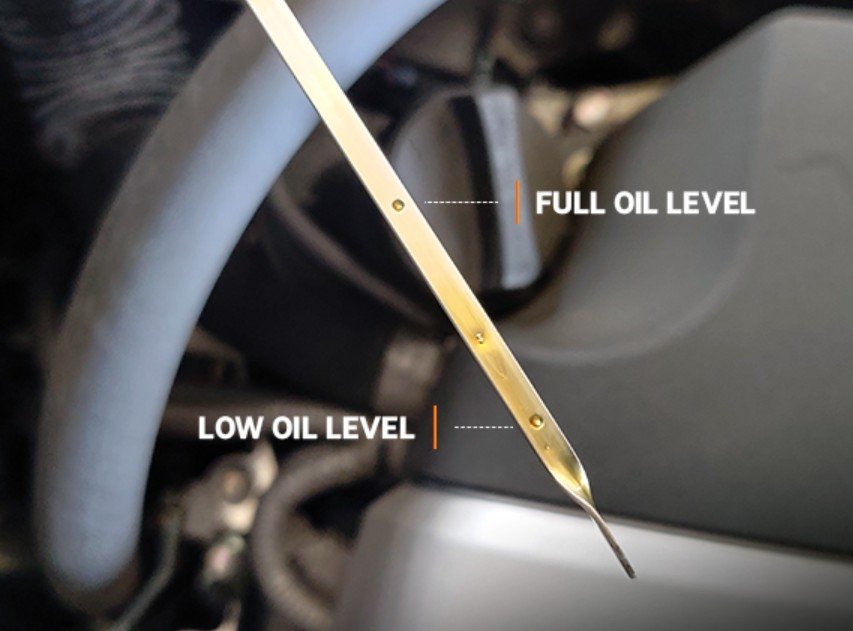
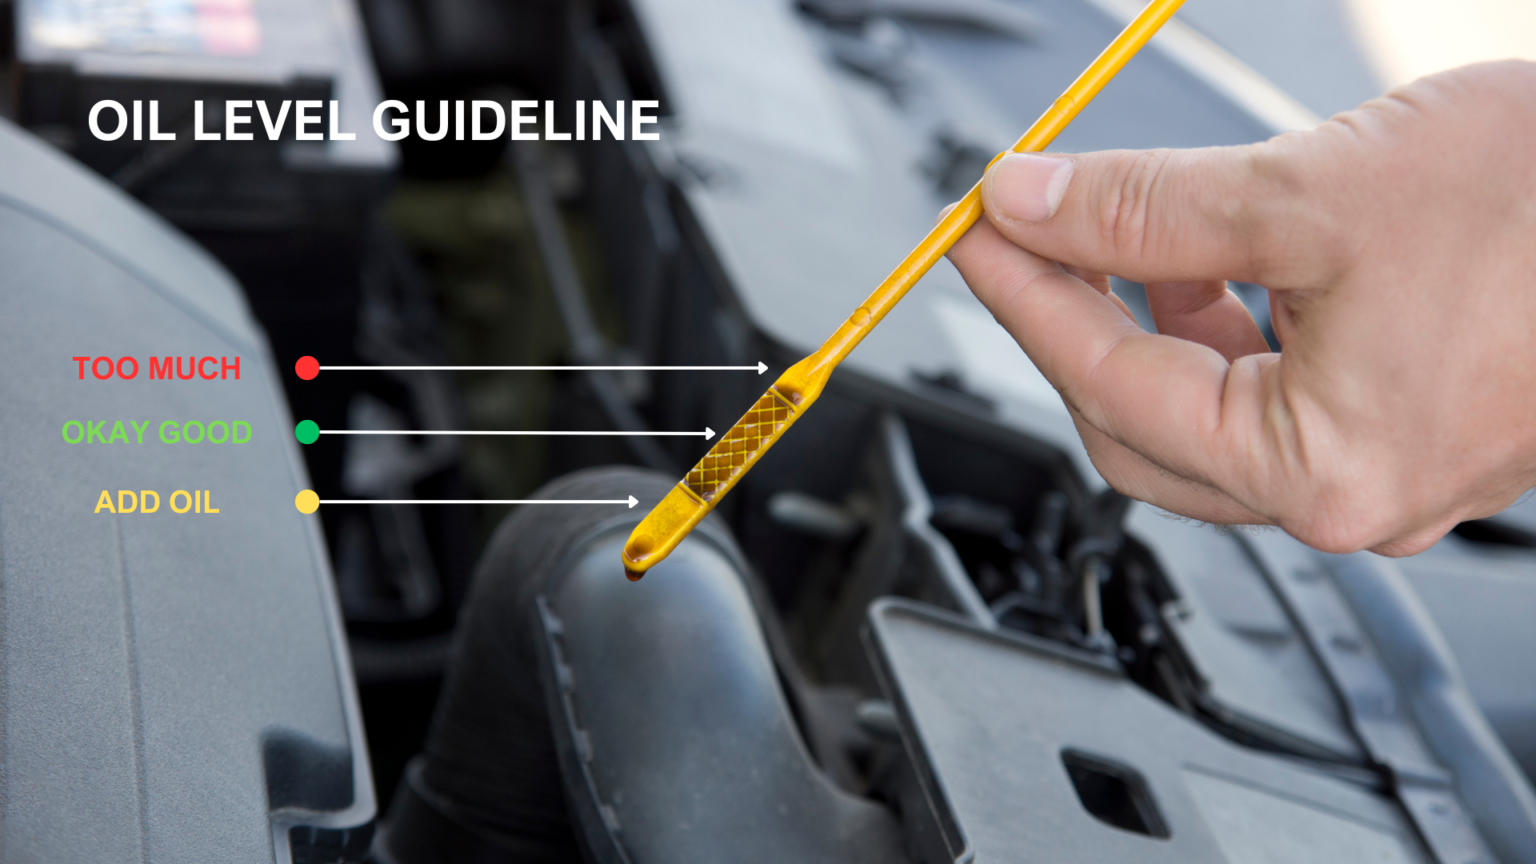
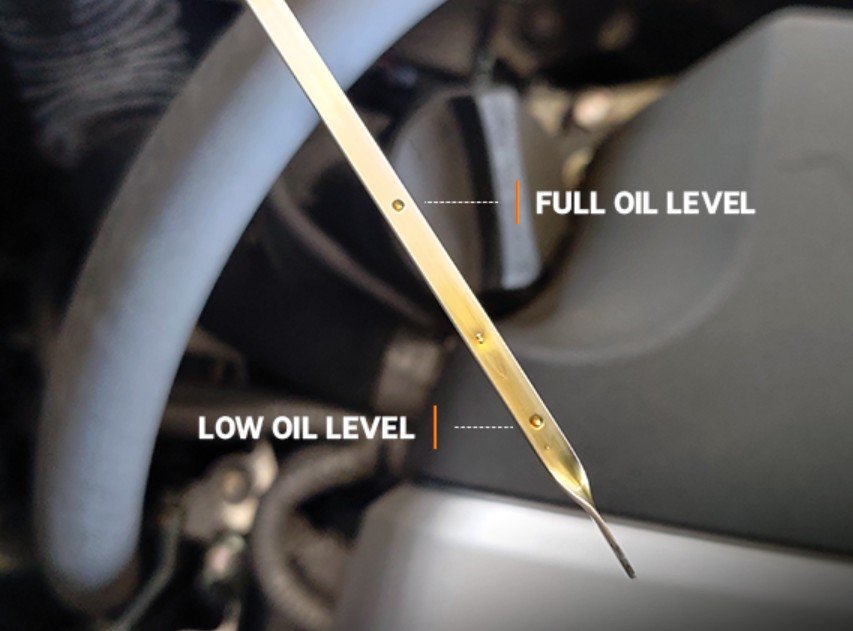
Find the wet line on the marked section. Compare it with the MIN and MAX marks, or the equivalent holes, dots, or crosshatched area.
Step 8: Repeat if needed
If oil has smeared along the strip or the result is unclear, wipe it clean and repeat the measurement. Use a consistent reading before deciding whether to add oil.
How to Read the Minimum and Maximum Marks
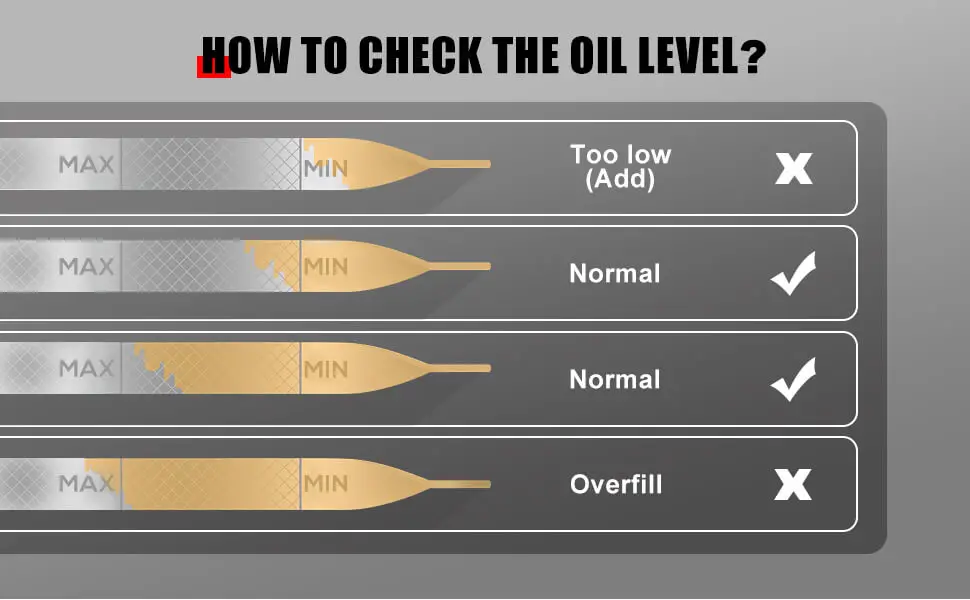
The lower mark usually represents the minimum acceptable level, while the upper mark represents the maximum. A reading between these marks is generally within the indicated range, provided you followed the correct checking procedure.
If the oil reaches the upper mark without going above it, do not add more just to fill the engine beyond that point. If the level sits close to the lower mark, consult the manual to determine how much oil to add. The correct amount between the marks varies by engine.
Below MIN
The level is below the marked range. Add the specified oil carefully if the manual permits, then recheck. If an oil-pressure warning is on, shut the engine off and do not restart until the problem is addressed.
Between MIN and MAX
The level is generally within the acceptable range. Keep monitoring it and follow the vehicle’s oil-change schedule.
At MAX
The level is at the upper limit. Do not add more oil.
Above MAX
The engine may be overfilled, or the reading may be inaccurate. Repeat the measurement under the specified conditions and arrange for excess oil to be removed if the high level is confirmed.
What a Correct Dipstick Reading Looks Like
A clear reading shows a distinct wet line within the marked range. The oil may appear amber, brown, or dark brown depending on its age and use. Color alone does not tell you whether the quantity is correct.
If oil coats both sides of the dipstick unevenly, look for the clearest boundary and repeat the check. Oil can smear against the tube as you pull the dipstick out. A second consistent reading is more useful than guessing from a streak.
Clear wet line
Use the point where the continuous oil film ends as the reading, provided it is not distorted by smearing.
Oil streaks above the line
Wipe the dipstick and repeat the test to separate the true level from oil dragged along the strip.
How to Measure Engine Oil Without a Dipstick
Some newer vehicles use an electronic oil-level sensor and display the result on the dashboard or infotainment screen. If your car has no traditional dipstick, use the vehicle’s built-in measurement procedure rather than trying to estimate the level by removing another component.
The display may require the engine to be warm, the car to be parked on level ground, and the ignition or engine to be in a specific state. Some systems take time to calculate a reading. The exact sequence varies by make, model, engine, and model year.
Source: vehicleindoor.com
Step 1: Check the owner’s manual
Find the section on electronic engine oil-level measurement and follow the stated temperature and parking conditions.
Step 2: Prepare the vehicle
Park on level ground and place the vehicle in the required state, such as engine off or idling, as directed by the manufacturer.
Step 3: Open the correct display
Use the dashboard controls or infotainment menu to locate the engine oil-level function.
Step 4: Wait for the reading
Allow the system to finish its measurement. Do not interpret a pending or unavailable message as proof that the level is correct.
Step 5: Follow the result
If the display requests oil, add only the specified type and amount. If the system reports a fault or an excessive level, follow the service instructions.
What If the Electronic Gauge Will Not Give a Reading?
An electronic gauge may refuse to display a result when the engine temperature, vehicle position, or operating state is outside the required conditions. It may also need time to complete its calculation. Check the manual before assuming the sensor has failed.
If the display remains unavailable after you follow the correct procedure, arrange a service check. Do not add oil blindly, because the engine may already contain enough oil. If an oil-pressure warning appears, treat it as a separate urgent issue rather than waiting for the level display.
Measurement conditions are not met
Repeat the procedure under the specified temperature, parking, and engine conditions.
Sensor or system fault
Have the vehicle checked if the system repeatedly fails or shows an error.
Oil-pressure warning
Stop the engine safely. A level display problem does not make an oil-pressure warning safe to ignore.
How Much Engine Oil Should You Add?
The amount of oil you should add depends on the reading, the engine design, and the manufacturer’s instructions. Never assume that every engine needs one quart when the dipstick is low. The gap between the minimum and maximum marks represents a different amount in different vehicles.
If the dipstick is below the minimum mark, add the approved engine oil in small amounts and measure again. If the level is only slightly low, a small addition may be enough. When the level is far below the marks, check the manual for the specified amount and investigate why the oil is low.
A common mistake is pouring in a full container without measuring. The engine might need less than the container holds. Add slowly, allow the oil to settle as required, and stop once the reading reaches the approved range.
Source: mobilecarcare.com
Use the correct specification
Check the required viscosity grade, such as SAE 0W-20 or SAE 5W-30, and any performance standard stated in the owner’s manual. These examples are not interchangeable recommendations for every vehicle.
Add oil in small amounts
Pour a modest amount through the oil filler opening, then recheck the level before adding more. Follow any specific quantity guidance in the manual.
Avoid filling past MAX
Stop when the level is within the marked range. If you overshoot the upper mark, correct the excess rather than driving with a confirmed overfill.
Investigate repeated oil loss
If the level keeps falling between checks, look for signs of a leak and arrange an inspection to identify the cause.
Can You Calculate the Amount From the Dipstick?
You can calculate an estimated amount only when you know how much oil corresponds to the distance between the marks for your specific engine. The dipstick is mainly a level indicator, not a universal measuring cup. Its marks do not represent the same volume in every vehicle.
For example, suppose the owner’s manual states that the distance between MIN and MAX represents 1 quart. If the oil is at MIN, about 1 quart would bring it toward MAX under the stated measurement conditions. This is a hypothetical example, not a rule for all cars.
If your manual does not provide the amount represented by the marks, add a small amount, recheck, and repeat as needed. For a level that is far below the marked range, consult the service information or a qualified mechanic rather than estimating a large refill.
Known mark capacity
Use the documented amount as a guide, while checking the dipstick between additions.
Unknown mark capacity
Add cautiously and remeasure instead of applying a universal quart-per-mark assumption.
How to Measure Oil When Filling After an Oil Change
When refilling after an oil change, use the engine’s specified service capacity as a starting point, not an instruction to pour in an entire stated quantity without checking. Capacity can differ depending on whether the oil filter is replaced and whether the engine has been drained under the prescribed conditions.
Add the recommended quantity according to the service procedure, secure the filler cap and dipstick, and follow the manual’s instructions for running the engine and waiting before the final check. If the vehicle requires a particular priming or electronic measurement procedure, follow it exactly.
Check for leaks around the drain plug and oil filter when the procedure permits. If the level is too high or too low after the final measurement, correct it before normal driving.
Before refilling
Confirm the correct service capacity and oil specification for the exact engine.
After refilling
Complete the specified final level check and inspect for leaks.
When Should You Measure Engine Oil?
Check engine oil at the interval recommended by your owner’s manual. Many drivers include a level check in their routine maintenance, particularly before a long road trip. How often you need to check it depends on the vehicle, its oil consumption, driving conditions, age, and service history.
A vehicle that uses oil between changes may need more frequent checks than one that consistently holds its level. Older engines, long highway trips, heavy loads, and some severe driving conditions can make monitoring more important. Your manual and any advice based on the vehicle’s actual condition should guide the schedule.
You should also check the level when an oil warning appears, after noticing a leak, or when you suspect the engine is using more oil than usual. However, a warning light that indicates low oil pressure requires immediate attention. Measuring the level should not delay shutting down an engine that may be losing lubrication.
Source: storage.googleapis.com
Before a long trip
Verify the level before setting out, especially if the journey will involve extended highway driving or heavy loads.
During routine maintenance
Check the level at the interval specified in the manual and note any repeated drop.
After an oil change
Confirm the final level using the prescribed procedure and check for leaks.
When a warning appears
Identify whether the warning refers to oil level or oil pressure. Stop safely and follow the vehicle’s instructions.
Does Engine Temperature Affect the Measurement?
Yes. Engine temperature and the time allowed for oil to settle can affect the reading. After shutdown, some oil drains back into the oil pan, so a reading taken immediately may differ from one taken after the specified wait.
There is no single waiting period that applies to every vehicle. Follow the manual’s cold-engine or warm-engine procedure, including any stated delay. Consistency matters because comparing readings taken under different conditions can make a normal change look like oil loss.
Cold-engine procedure
Use it when the manual specifies a cold check, often after the vehicle has been parked long enough for oil to settle.
Warm-engine procedure
Use the required operating temperature and shutdown delay stated by the manufacturer.
Common Mistakes When Measuring Engine Oil
Most inaccurate readings come from poor preparation, a dirty dipstick, or failure to follow the vehicle’s measurement instructions. A small mistake can lead to unnecessary topping up or an engine that remains underfilled. Use the same careful method each time.
Source: hitchesguide.com
Parking on a slope
A tilted vehicle can produce an inaccurate reading. Move to a level surface before checking.
Reading without wiping the dipstick
Oil left from a previous reading can hide the true level. Wipe the measuring area clean before inserting it again.
Failing to insert the dipstick fully
A dipstick that is not seated correctly may give a misleading result. Push it fully into the tube.
Checking too soon after shutdown
Oil may not have settled according to the manufacturer’s procedure. Wait for the specified period.
Assuming every car uses the same oil
Oil viscosity and performance requirements vary. Confirm the specification for the exact engine.
Adding a large amount at once
Large additions increase the chance of overfilling. Add small amounts and measure again.
Ignoring repeated low readings
Frequent oil loss may indicate a leak or internal oil consumption. Track the level and arrange an inspection.
Confusing the oil light with the level gauge
An oil-pressure warning can indicate a serious lubrication problem even when the dipstick shows an acceptable level. Stop the engine safely.
How to Get a More Reliable Reading
Use a repeatable routine. Park in the same level location when practical, follow the same temperature procedure, and allow the required settling time. Record the reading if you are monitoring possible oil consumption.
If repeated readings disagree, wipe and reinsert the dipstick, check that it is fully seated, and repeat the measurement. If the result remains unclear, consult the owner’s manual or ask a mechanic to verify the level.
Repeat the measurement
Take another clean reading before adding oil when the first result is unclear.
Keep a simple record
Note the date, mileage, level, and any oil added so you can identify a pattern over time.
What to Do If the Oil Level Looks Wrong
If the dipstick shows an unusually low or high level, first confirm that the car is on level ground and that you followed the correct checking procedure. Repeat the measurement before taking action unless a warning or symptom requires you to stop immediately.
A low reading may result from normal oil consumption, a leak, an incomplete refill, or an inaccurate measurement. A high reading can result from overfilling, inconsistent checking conditions, or fluid entering the oil. The reading alone may not identify the cause.
Source: freepik.com
If the oil is below MIN
If there is no urgent oil-pressure warning and the manual permits topping up, add the specified oil in small amounts and recheck. If the dipstick is dry or the level is far below the range, avoid starting or driving until you establish whether it is safe.
If the oil is above MAX
Repeat the check under the correct conditions. If the level remains high, have excess oil removed before normal driving.
If the oil looks milky
Milky or creamy oil may indicate moisture or coolant contamination, although small amounts of residue under the filler cap can sometimes have other causes. Seek professional diagnosis if the dipstick oil itself looks abnormal.
If the level keeps dropping
Check for visible leaks only when safe and arrange an inspection. Oil can also be consumed internally without leaving a clear puddle.
If the red oil-pressure light appears
Pull over safely and shut off the engine as soon as practical. Do not continue driving merely because the dipstick level looks normal. Arrange roadside assistance or professional diagnosis.
Can You Drive With Low Engine Oil?
Whether you can drive depends on how low the level is, the vehicle’s instructions, and whether there are warning lights or symptoms. A level slightly below the recommended range still needs correction, but a dry dipstick, a major leak, unusual engine noise, or an oil-pressure warning calls for much greater caution.
Do not use continued driving as a test. If the oil-pressure warning remains on, the engine makes new knocking or grinding sounds, or oil is leaking heavily, switch the engine off safely and arrange professional help. Adding oil may not solve a failed oil pump, blocked oil passage, or another pressure problem.
No urgent warning and a modestly low level
Follow the manual’s top-up procedure, recheck the level, and investigate repeated loss.
Oil-pressure warning or severe symptoms
Stop the engine safely and do not restart until the cause has been assessed.
How to Measure Engine Oil in Different Vehicles
The basic goal stays the same across vehicles, but the method can differ. Cars, trucks, motorcycles, and small engines may use different dipstick designs, oil reservoirs, and measurement conditions. Follow the manual for the exact engine rather than applying a car procedure to every machine.
Source: fexnovo.com
Passenger cars and SUVs
Many use a conventional dipstick, while some use an electronic oil-level system. Follow the specified engine temperature and waiting time.
Pickup trucks and larger vehicles
Use the vehicle-specific dipstick and service information. Engine oil capacity and checking procedures can differ from those of smaller passenger cars.
Motorcycles
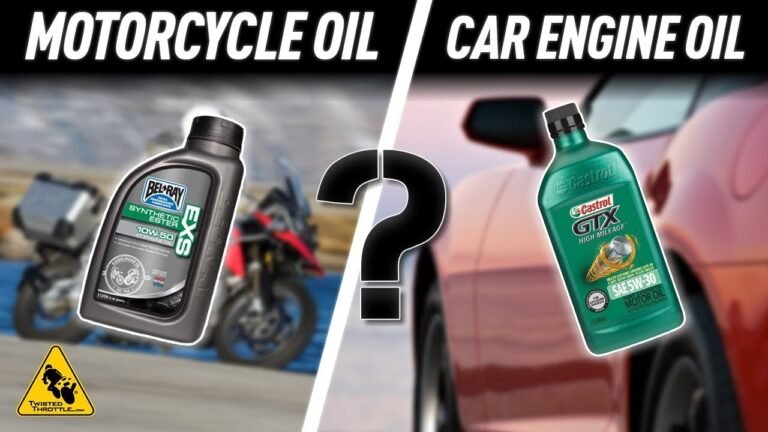
Some require the bike to stand upright, rather than resting on its side stand. Others use a sight glass or a special dipstick procedure. Follow the motorcycle manual.
Lawn mowers and small engines
Some models require the dipstick to be screwed in for the reading, while others require it to rest in the opening without being screwed down. Check the engine instructions.
Vehicles without a conventional dipstick
Use the approved electronic measurement or workshop procedure. Do not remove parts or use an improvised measuring tool.
Why Vehicle-Specific Instructions Matter
Dipstick markings, oil capacity, and the way a dipstick seats can vary. A method that is correct for one engine may give the wrong result on another. The manual is the best source for the required oil type, the measuring procedure, and the safe range.
If you do not have a paper manual, check whether the manufacturer provides an owner’s manual online for your exact model year and engine. If the instructions remain unclear, a qualified mechanic can confirm the correct method.
Confirm the exact model
Match the vehicle’s year, engine, and trim where relevant before using service information.
Do not rely on universal rules
Use the actual manufacturer’s instructions for engine temperature, dipstick seating, and oil quantity.
Frequently Asked Questions
Q
How often should I measure engine oil?
Follow the interval in your owner’s manual. Check before a long trip and more often if your vehicle has a history of oil consumption, develops a leak, or operates under conditions that call for closer monitoring. A repeated drop in level deserves attention even when the next oil change is not due.
Q
Should I measure engine oil when it is hot or cold?
Use the temperature procedure specified by your vehicle manufacturer. Some engines require a cold check, while others call for a warm engine followed by a waiting period. Checking under the wrong conditions can produce a misleading result.
Q
Does the oil need to reach the MAX mark?
No. The oil generally needs to stay within the marked range, not exceed the upper limit. If the reading is between MIN and MAX, follow your manual’s guidance. Never add extra oil simply to push the level above MAX.
Q
How many quarts are between MIN and MAX on a dipstick?
The amount varies by engine. Some manufacturers specify the volume represented by the marks, but there is no universal amount for every car. Check the owner’s manual or service information before using a volume estimate.
Q
Can I use any engine oil to top up the level?
No. Use oil that meets the viscosity grade and performance specifications required for your engine. Check the owner’s manual or the manufacturer’s approved service information. Using the wrong oil can affect engine protection and may conflict with the vehicle’s requirements.
Q
What if my dipstick shows no oil?
Repeat the measurement on level ground under the specified conditions. If the dipstick remains dry, do not assume the engine is safe to run. Check the manual and arrange for the correct oil to be added and the cause investigated. If an oil-pressure warning or unusual engine noise is present, keep the engine off and seek professional help.
Q
Can I measure engine oil while the engine is running?
For a conventional dipstick, the engine is generally switched off before checking, and the manual specifies how long to wait. Some electronic systems have their own instructions, which may involve a particular operating state. Never remove a dipstick or open the oil filler cap while the engine is running unless the manufacturer explicitly requires a procedure designed for that purpose.
Q
What is the difference between an oil-level warning and an oil-pressure warning?
An oil-level warning indicates that the amount of oil may be outside the vehicle’s expected range. An oil-pressure warning indicates that the engine may not be maintaining adequate oil pressure. Low pressure can cause severe damage quickly, so stop safely and shut off the engine when the pressure warning appears. Check the manual before deciding what to do next.
✦ Wrapping Up
Conclusion
Learning how to measure engine oil is a simple way to care for your car and catch problems early. Park on level ground, follow the correct engine temperature and waiting instructions, wipe and reinsert the dipstick, and read the level against the MIN and MAX marks. If your vehicle uses an electronic gauge, follow its approved measurement procedure instead.
When the level is low, add the correct oil in small amounts and recheck it. Avoid overfilling, and do not ignore repeated oil loss, unusual oil appearance, or warning lights. A few careful minutes can help you spot a problem before it becomes a costly repair.
💡 Key Takeaway
Check your owner’s manual, measure the oil using the correct procedure, and confirm that the level is within the approved range before your next long drive.
The direct answer to “does cvs sell motor oil” is simple: don’t assume your nearest CVS has it. CVS isn’t a dedicated autoparts chain, and any engineoil…
You open the hood, pull the dipstick, and wonder if you grabbed the right can. Maybe you’re in the parts store, staring at two aisles: “Motor Oil” and “Engine…