To change engine oil at home, park on level ground, let the engine cool, drain the old oil, replace the oil filter, add the correct new oil, and check for leaks and the proper oil level.
Changing engine oil at home can save a trip to the repair shop and help you learn basic car care. For drivers across the United States, this job can fit into a Saturday morning, whether the car is parked in a home garage or on a level driveway. You need the right oil, a matching filter, a few basic tools, and a safe way to reach the drain plug.
The key is to follow the instructions for your exact vehicle. Oil type, oil capacity, filter location, drain plug torque, and service intervals vary by make, model, engine, and model year. Your owner’s manual is the main guide. This article explains the general process, the safety checks that matter, and what to do if something does not go as planned.
What You Need Before Changing Engine Oil
Gather every tool and supply before you begin. A planned oil change is easier than one that leaves you with a draining engine, a stuck filter, and a missing wrench. Keep the new oil, filter, drain plug seal if needed, and cleanup supplies within reach.
The exact tools depend on the vehicle. Some cars have an easy-to-reach drain plug and a spin-on filter, while others use a cartridge filter beneath a plastic engine cover. Some models also have underbody panels that must come off before you can reach the service points.
Read the maintenance section of the owner’s manual and, if needed, the service instructions for your exact engine. Do not guess the drain plug size, filter type, oil grade, or tightening torque.
Correct engine oil
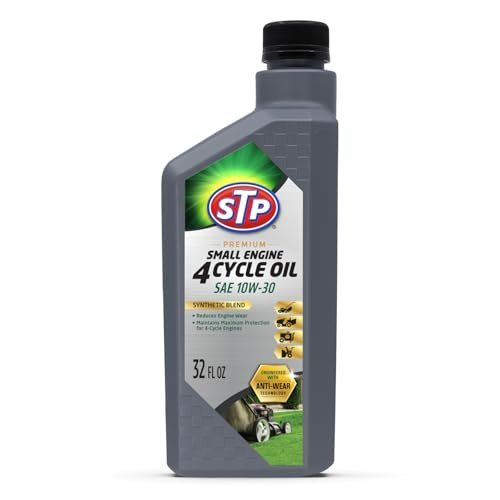
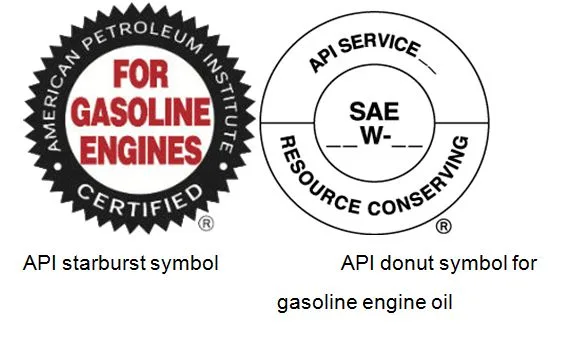
Buy the viscosity grade and performance specification required by the manufacturer. The label may show a grade such as SAE 0W-20 or SAE 5W-30, but the correct choice depends on the engine.
Replacement oil filter
Use a filter listed for your exact vehicle and engine. Check whether it needs a new O-ring, drain plug washer, or other seal supplied with the filter.
Basic hand tools
Prepare the correct socket or wrench for the drain plug, a filter wrench if needed, a funnel, and a torque wrench when the service procedure specifies a tightening torque.
Oil drain pan
Choose a stable pan large enough to catch the expected oil volume. A wide opening helps prevent splashes when oil first flows out.
Safety and cleanup supplies
Wear safety glasses and oil-resistant gloves. Keep absorbent material, shop towels, a work light, and a container for used oil nearby.
Safe lifting equipment
Use ramps or a floor jack and properly rated jack stands only when appropriate for the vehicle. Follow the vehicle’s lift-point instructions and the equipment manufacturer’s directions.
How to Choose the Right Engine Oil
Start with the owner’s manual, not a guess based on the car’s age or the weather. The manual identifies the approved viscosity grade and may list a specific industry standard or manufacturer approval. The same vehicle name can use different oils in different engines or model years.
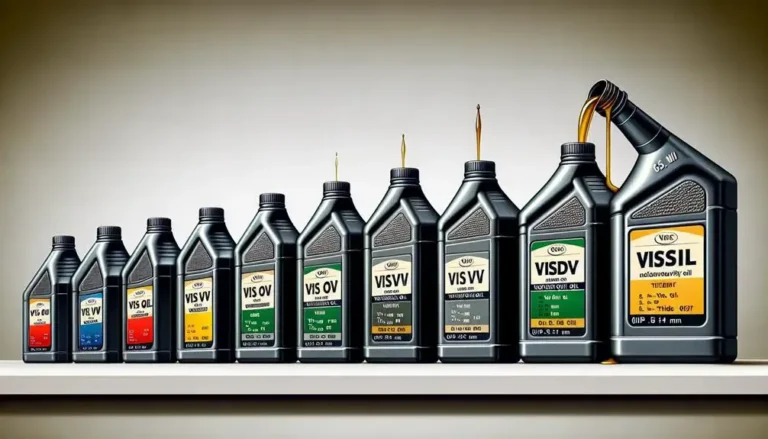
Viscosity describes how oil flows under specified temperature conditions. In a grade such as 5W-30, the W relates to winter performance, while the second number describes viscosity at higher operating temperatures under the relevant test standard. Neither number alone tells you whether the oil meets every requirement for your engine.
Synthetic oil is required for some engines and permitted in many others. Conventional, synthetic-blend, and full-synthetic labels do not replace the required viscosity or performance specification. If the manual lists an exact approval, choose oil that meets it.
Check the oil cap and manual
The oil filler cap may display a viscosity grade, but use the owner’s manual to confirm all requirements.
Check the amount
Find the specified refill capacity, including whether the figure assumes an oil filter change. Treat it as a guide, then verify the final level using the stated procedure.
Avoid unapproved additives
Do not add extra oil treatments or engine flush products unless the vehicle manufacturer recommends them for the specific service.
How to Select the Correct Oil Filter
The oil filter traps contaminants carried by the engine oil. A filter that looks similar to the original may have a different thread, seal diameter, bypass setting, or internal design. Use a catalog or parts listing that identifies your exact vehicle and engine.
Some engines use a metal spin-on filter. Others use a replaceable paper element inside a reusable housing. Cartridge systems may need a new housing O-ring, and the filter kit may include a new drain plug seal. Confirm which parts the service instructions require.
Verify fit before draining
Compare the replacement part number with a trusted vehicle-specific listing and make sure the new filter is on hand before removing the old one.
Inspect included seals
Identify every required O-ring or washer. Do not reuse a seal that the manufacturer says must be replaced.
Prepare Your Car and Work Area Safely
Safety comes before the oil change. Park on firm, level ground away from traffic, set the parking brake, and switch off the engine before you work underneath the vehicle. Keep children and pets away from the work area, and make sure you have enough light to see the drain plug, filter, and support points.
A short engine run may make cold oil flow more easily, but hot oil and exhaust parts can burn you. If the engine has been running, allow enough time for the oil and nearby parts to cool to a safe working temperature. Never reach beneath a running engine or place your hands near moving belts or fans.
If you need extra clearance, use equipment approved for the vehicle and the job. Never rely on a hydraulic jack alone to hold a vehicle above you. Do not use bricks, loose blocks, unstable timber, or improvised supports as substitutes for rated lifting equipment.
Some vehicles have low ground clearance, a sealed underbody, or a filter that is difficult to reach. If you cannot identify the correct lift points or cannot support the car safely, have a qualified shop perform the service.
Confirm the ground is level
A level surface helps keep the vehicle stable and makes the final oil-level check more reliable.
Secure the vehicle
Set the parking brake and follow the manual’s guidance for wheel chocks and transmission position.
Use approved supports
Position ramps or jack stands only at the points specified for your vehicle. Check that the equipment is stable before approaching the underside.
Protect yourself
Wear eye protection and gloves. Keep loose clothing and hair away from moving parts, and avoid touching hot exhaust components.
Should You Raise the Car for an Oil Change?
Not always. Some vehicles provide enough clearance to reach the drain plug and filter from above or from the side without lifting. Others require ramps or a properly supported lift because the drain plug sits beneath the engine.
Use ramps only on suitable, level ground and follow their instructions for approach, positioning, and securing the vehicle. If you use a floor jack, lower the vehicle onto correctly positioned jack stands before going underneath. Never crawl under a vehicle supported only by a jack, even for a quick task.
What to Check Before Opening the Drain Plug
Identify the engine oil drain plug, oil filter, and oil filler cap before loosening anything. The transmission drain plug may look similar, and removing the wrong plug can cause serious problems. If you are unsure which component is the engine oil drain, stop and consult the service manual or a qualified mechanic.
Place the drain pan directly below the expected oil stream, allowing room for the flow to change direction as the pan empties. Keep the drain plug within reach and plan where you will place the used filter without spilling oil.
How to Change Engine Oil at Home Step by Step
Once the vehicle is secure and all supplies are ready, follow the service procedure in order. The broad process is similar across many gasoline and diesel vehicles, but the exact access steps and tightening specifications vary. If the owner’s manual gives a different sequence, follow the vehicle-specific instructions.
Step 1: Locate the oil filler cap and dipstick
Identify the engine oil filler opening and the dipstick, if fitted. Confirm that the filler cap can be opened before you drain the oil, so you are not left with an empty engine and a cap you cannot remove.
Step 2: Position the drain pan
Place the pan under the engine oil drain plug. Allow enough space for the initial stream and any change in direction as the oil flow slows.
Step 3: Remove the drain plug carefully
Use the correct wrench or socket to loosen the plug. Finish removing it with care, keeping your hand out of the direct oil stream. Let the oil drain into the pan without reaching under an unstable vehicle.
Step 4: Inspect the drain plug and seal
Check the plug threads and sealing surface for visible damage. Replace the washer or seal if required by the service instructions, and do not force a damaged plug back into the oil pan.
Step 5: Remove the old oil filter
Use the correct method for a spin-on filter or cartridge housing. Keep the drain pan beneath the filter area because oil will usually spill as the filter comes off. Check that the old filter’s rubber gasket has not stuck to the engine mounting surface.
Step 6: Prepare the new filter
Compare the old and new parts. If the instructions call for it, lightly coat the new rubber gasket with clean engine oil. Follow the filter manufacturer’s instructions about pre-filling; some filter positions or designs do not allow it.
Step 7: Install the new filter
Fit the filter or cartridge and its required seals in the specified order. Tighten a spin-on filter by the filter maker’s stated method, or tighten the housing to the vehicle’s specified torque. Do not overtighten.
Step 8: Reinstall the drain plug
After the old oil has drained, clean the plug and sealing area. Install the plug with the correct seal and tighten it to the specified torque when a torque value is provided. Avoid using extra force to make up for uncertain threads.
Step 9: Add fresh engine oil
Place a clean funnel in the filler opening and add the specified oil gradually. Start with less than the full listed capacity if you are unsure how much will remain in the engine, then check and top up as directed.
Step 10: Refit the cap and check the oil level
Secure the oil filler cap. Check the dipstick or electronic oil-level system according to the owner’s manual. Some vehicles require a warm engine, a wait period, or a specific parking and ignition procedure before the level reading is valid.
Step 11: Start the engine and inspect for leaks
If the level is correct and all parts are fitted, start the engine briefly as directed by the service procedure. Watch the oil pressure warning and inspect for leaks from a safe position. Shut the engine off immediately if the oil pressure warning stays on or a significant leak appears.
Step 12: Recheck the level and secure the area
Switch off the engine and perform the final level check using the manufacturer’s method. Add small amounts if needed, without exceeding the specified range. Refit any underbody panels and remove tools only after the vehicle is safely lowered.
How to Replace a Spin-On Oil Filter
A spin-on filter is a sealed metal canister that screws onto a mounting point. After placing the drain pan below it, loosen the filter with the appropriate tool and unscrew it carefully. Oil may remain inside, so keep the filter upright as you move it away when possible.
Check the mounting surface for the old rubber gasket. If the old gasket remains attached, remove it carefully before installing the new filter. Two gaskets stacked together can allow oil to escape under pressure.
Apply a thin film of clean oil to the new gasket if the filter instructions call for it. Screw the filter into place and tighten it according to the printed instructions or vehicle service data. Pliers or a wrench should not be used to force the filter tighter than specified.
How to Replace a Cartridge Oil Filter
A cartridge filter sits inside a housing, often made of plastic or metal. The housing may need a special socket, and its cap can be damaged by the wrong tool or excessive force. Check the instructions for the correct removal method and torque before opening it.
Remove the old element and replace every required seal. Place each O-ring in its designated groove rather than leaving it on the threads or stretching it over a sharp edge. Reassemble the housing in the correct order and tighten it to the specified value.
How Much New Oil Should You Add?
Use the listed capacity as a starting point, not permission to pour the entire amount in without checking. The actual refill amount can vary with the engine, filter change, and how much old oil remains after draining. The dipstick or approved electronic level check determines whether the final level is within the specified range.
For example, if a hypothetical vehicle lists a refill capacity of five quarts with a filter change, you might add less than five quarts first, check the level using the required method, and then top up in small amounts. This example is illustrative; use your own vehicle’s published capacity and procedure.
Too little oil can reduce lubrication, while too much can cause foaming, leaks, or other engine problems. If you accidentally overfill the engine, remove the excess before driving rather than assuming the difference is harmless.
How to Check Your Work After an Oil Change
A successful oil change ends with checks, not just a full oil bottle. Before driving, verify the oil level, confirm that the filler cap and drain plug are secure, and look for signs of leakage. Follow the manual for the timing of the final level reading because some engines need a specific wait period or electronic measurement procedure.
After the first brief engine run, inspect the drain plug and filter area from a safe position. Never reach beneath a running vehicle or touch hot parts to look for a leak. If you see oil dripping steadily, smell burning oil, or notice a warning light, shut the engine off and identify the cause before continuing.
Once the checks pass, lower the vehicle safely if it was raised, reinstall any required covers, and clean up spills. A quick final review can catch a loose cap or a forgotten tool before the car leaves the driveway.
Oil level is within the approved range
Use the dipstick marks or the electronic display procedure listed in the manual. Do not rely on the amount poured in alone.
No visible oil leaks
Check around the drain plug and filter area after the brief engine run. Stop if fresh oil appears.
Oil pressure warning behaves normally
The warning should follow the normal start-up behavior described in the manual. If it remains on, shut the engine off immediately.
All service parts are secure
Confirm the filler cap, dipstick, filter housing, drain plug, and any removed underbody panels are properly installed.
Service record is updated
Record the date, odometer reading, oil grade, filter part number, and any unusual findings for the next service.
What to Do if the Oil Pressure Light Stays On
Shut off the engine immediately if the oil pressure warning remains on after starting or comes on while driving. Do not keep the engine running to see whether the light clears. Low oil pressure can cause severe damage in a short time.
When the engine is off and the vehicle is safely parked, check the oil level using the correct procedure. Look for a loose drain plug, a leaking filter, or a large spill, but do not restart the engine if the cause is unclear or the warning persists. Arrange professional diagnosis or towing when needed.
What to Do if You Find an Oil Leak
A leak near the filter can result from a loose filter, a damaged seal, a mispositioned O-ring, or an old gasket left on the mounting surface. A leak near the drain plug may point to a missing washer, damaged threads, or incorrect tightening. The location can help guide inspection, but it does not prove the cause.
Turn the engine off and allow hot parts to cool before inspecting the area. Do not tighten a plug or housing blindly while the engine is hot, and never crawl under a vehicle that lacks proper support. If threads are damaged or the source remains uncertain, have the vehicle inspected before driving.
Common DIY Oil Change Mistakes to Avoid
Most oil change problems come from a mismatch, a missed seal, or a rushed final check. Slow down at the drain plug and filter, where a small mistake can lead to a leak or damage. Use the service manual whenever the instructions depend on the exact engine.
Using the wrong oil grade
Oil that fits one engine may not meet the requirements of another. Confirm the viscosity and performance approvals for your exact vehicle.
Removing the wrong drain plug
Some transmission drain plugs resemble engine oil plugs. Identify the correct component before loosening it.
Working under a car supported only by a jack
A jack can fail or shift. Use approved ramps or correctly rated jack stands at the proper lift points.
Forgetting the old filter gasket
An old gasket left on the mounting face can create a double seal and cause a major leak.
Overtightening the drain plug or filter
Excess force can damage threads, seals, filter housings, or the oil pan. Use the specified tightening method and torque.
Adding the full capacity without checking
Oil can remain in the engine after draining. Fill in stages and verify the final level.
Ignoring a warning light
A persistent oil pressure warning is a stop-engine condition. Do not continue driving to test it.
Leaving off an underbody cover
A removed shield may protect components from road debris or guide airflow. Reinstall it as directed.
Can You Change Oil Without a Torque Wrench?
Some filter instructions specify hand tightening, but drain plugs, cartridge housings, and other parts may have exact torque requirements. A torque wrench helps achieve the specified force and lowers the risk of damage from overtightening.
If the service instructions provide a torque value, use the appropriate tool rather than guessing. If you do not have the required tool or cannot identify the correct value, consider borrowing the tool or having a shop complete that part of the job.
Can You Change Engine Oil Without Raising the Car?
Yes, if the drain plug and filter are safely accessible without going underneath the vehicle. Some cars allow access from the engine bay, while others have enough clearance for the service points to be reached from the side without lifting.
Never force your body into a narrow space or reach beneath a vehicle that could roll or settle. If safe access requires lifting, use approved equipment and support the vehicle properly.
How Often Should You Change Engine Oil?
Follow the oil change interval set for your vehicle, engine, oil specification, and driving conditions. There is no single mileage or time interval that fits every car. Many newer vehicles use an oil-life monitoring system, while others specify a distance, a time limit, or whichever comes first.
Frequent short trips, heavy traffic, extreme temperatures, towing, dusty roads, and other severe conditions can affect the service schedule. The owner’s manual may list a separate severe-service interval. Check that section if your daily routine involves repeated short drives or heavy loads.
Do not extend the interval just because the oil still looks clean. Oil color alone cannot show whether the oil has retained all the properties the engine needs. Use the specified schedule or monitoring system, and reset the oil-life reminder only after the service is complete.
Use the manual’s interval
Check both the mileage and time limits, including any separate schedule for severe driving.
Understand the oil-life monitor
Follow the vehicle’s instructions for the reminder and its reset process. The monitor does not remove the need to check oil level between services.
Track your service history
Write down the date and odometer reading. This helps you plan the next service and maintain a useful maintenance record.
Does Synthetic Oil Last Longer?
Some synthetic oils support extended service intervals when the vehicle manufacturer allows them, but the word synthetic does not automatically permit a longer interval. The engine design, oil approval, driving conditions, and vehicle maintenance schedule still control the decision.
Use the oil-life monitor or maintenance schedule for your vehicle. Do not assume that every synthetic oil can safely remain in every engine for the same distance or length of time.
How to Dispose of Used Engine Oil and Filters
Used engine oil must be handled carefully because it can contain contaminants collected during engine operation. Let it drain into a clean collection pan, then transfer it to a clean, sealed, leak-resistant container suitable for transport. Keep it separate from coolant, gasoline, brake fluid, solvents, and other waste.
In the United States, many local recycling centers, household hazardous waste programs, and participating automotive service or parts businesses accept used motor oil. Acceptance rules vary by location, and not every site takes oil filters, so confirm the local program before making the trip.
Never pour used oil onto soil, into a street drain, into a septic system, or into a sink or toilet. Do not mix it with other fluids, since contamination can prevent recycling. Store the container upright and out of reach of children and pets until you can take it to an approved site.
Seal and label the container
Use a clean, sturdy container that will not leak in transport. Keep the lid secure and mark it as used motor oil.
Check local acceptance rules
Confirm whether the site accepts used oil, oil filters, and oily absorbent material. Each item may have a different disposal route.
Drain and contain the old filter
Let excess oil drain into the pan where practical, then store the filter so it cannot leak during transport. Follow local rules for filter recycling or disposal.
Clean spills promptly
Use absorbent material and dispose of contaminated cleanup supplies according to local requirements. Keep oil away from storm drains and waterways.
Can You Reuse or Mix Old Engine Oil?
Do not pour drained used oil back into the engine as a substitute for fresh oil. It may contain contaminants and no longer meet the engine’s lubrication needs. Collect it for an approved recycling program instead.
Avoid mixing used engine oil with other automotive fluids. Even if a recycling site accepts used oil, contamination with coolant, fuel, solvents, or brake fluid may make the container unacceptable.
DIY Oil Change vs. Professional Service
Changing oil at home can reduce labor costs if you already own the required tools and can dispose of used oil conveniently. However, the total cost includes oil, the filter, seals, equipment, cleanup supplies, and your time. The first service may cost more if you need to buy a jack, stands, ramps, or a torque wrench.
A repair shop may be the better option when access is difficult, the drain plug or filter housing is damaged, the car requires special service procedures, or you do not have a safe place to work. Professional service can also help when the vehicle has an active leak, an oil pressure warning, or another issue that needs diagnosis.
Compare the full cost and the work involved rather than assuming home service is always cheaper. A safe, correct oil change matters more than saving a small amount on labor.
Home oil change
Best when you have the right tools, safe access, clear service instructions, and a local place to recycle used oil.
Professional oil change
Often better when the vehicle needs special equipment, the service points are hard to reach, or you are unsure how to complete a step safely.
Warranty and maintenance records
Check the warranty terms and maintenance documentation for your vehicle. Keep receipts for oil and filters and record the work you perform.
How Long Does a Home Oil Change Take?
A straightforward oil change may take around 30 to 60 minutes for someone familiar with the vehicle and equipped with the right tools. A first attempt can take longer while you identify the filter, read the instructions, set up safe supports, and clean up.
That time estimate is a planning guide, not a guaranteed duration. Underbody panels, a stuck filter, a difficult cartridge housing, or damaged threads can add substantial time. Stop if a part will not loosen with the correct method rather than applying force blindly.
A Final Checklist Before You Drive
Before leaving your driveway, take one last look at the work area. The engine should have the correct oil level, the drain plug and filter should be properly installed, and there should be no sign of an active leak. Every cover or shield removed during service should be back in place.
If the oil pressure warning remains on, the engine makes an unusual new noise, or fresh oil appears beneath the vehicle, do not continue driving until the problem is understood. A short delay for inspection is far less costly than risking major engine damage.
Oil level checked
The dipstick or electronic system shows the correct level under the specified checking conditions.
Drain plug and filter checked
Both are installed with the correct seals and tightening method.
Filler cap and dipstick secured
Nothing is left loose or sitting on the engine.
No warning lights or fresh leaks
The oil pressure warning follows normal behavior, and the inspection reveals no active leak.
Used oil stored for recycling
The old oil and filter are contained safely and ready for an approved collection point.
Maintenance record updated
The date, odometer reading, oil grade, and filter details are recorded for the next service.
Frequently Asked Questions
Q
Can I change my engine oil at home without special equipment?
You can change oil at home with basic hand tools if the vehicle provides safe access to the drain plug and filter. You still need the correct oil, filter, drain pan, and any required seals. If the car must be raised, use suitable ramps or a floor jack with correctly rated jack stands; never work beneath a vehicle held only by a jack.
Q
Should I change the oil filter every time I change the oil?
For many vehicles, the normal oil service procedure includes replacing the oil filter. Follow the maintenance schedule and service instructions for your exact engine. Replacing the filter as specified helps remove trapped contaminants and avoids leaving an old filter in service beyond its intended interval.
Q
Should the engine be hot or cold when draining oil?
Oil that is mildly warm may drain more easily than cold oil, but hot oil can burn your skin. If the engine has been running, let the oil and nearby parts cool enough for safe work. Follow the vehicle’s service procedure and never reach near moving parts or touch hot exhaust components.
Q
How do I know when I have added enough oil?
Use the dipstick or the vehicle’s approved electronic oil-level procedure. Add oil gradually, check the level under the conditions specified in the owner’s manual, and top up in small amounts if needed. Do not rely only on the bottle count or the listed refill capacity, and do not fill above the specified range.
Q
What happens if I overfill my engine with oil?
Too much oil can cause the crankshaft to churn the oil, create foam, increase pressure in some systems, or contribute to leaks and engine problems. The effects depend on the engine and the amount of overfill. If the level is above the permitted range, remove the excess before driving.
Q
Can I drive right after changing the engine oil?
You can generally drive after the service is complete, provided the oil level is correct, all parts are secure, and the engine starts without a persistent oil pressure warning or unusual noise. Inspect for leaks after the brief start-up check. If a warning remains on or oil leaks steadily, shut the engine off and do not drive until the problem is resolved.
Q
Where can I take used engine oil in the United States?
Check your local household hazardous waste program, recycling center, or participating automotive service or parts business. Call ahead to confirm that the location accepts used motor oil and ask whether it also accepts filters. Keep the oil in a sealed, leak-resistant container and do not mix it with other fluids.
✦ Wrapping Up
Conclusion
Learning how to change engine oil at home can make routine car care more manageable. The process is straightforward when you have the correct oil and filter, follow the vehicle-specific instructions, support the car safely, and take time to check your work.
The most important steps are matching the oil to the engine, removing and replacing the filter correctly, tightening parts as specified, checking the final oil level, and looking for leaks before driving. Used oil and filters also need proper collection and disposal.
If you encounter damaged threads, a stuck component, an unclear drain plug, unsafe access, or a persistent oil pressure warning, stop and seek qualified help. Knowing when not to proceed is part of good maintenance.
💡 Key Takeaway
Before starting your next oil change, read the owner’s manual, confirm the oil grade and filter part number, gather the correct tools, and identify a local used-oil recycling site. Complete the job only when you can work safely and verify the final oil level.
 The question “is motor oil the same as engine oil” shows up in every forum…
You pick up a 0W40 and a 5W30 off the shelf, and you’re not sure which one is actually thicker. That’s the core question behind what motor oil is thicker, and…
 Figure out when to use synthetic motor oil and you’ll stop secondguessing yourself…
You’re gripping a jug in the auto parts aisle. The front label says “Full Synthetic Motor Oil.” The carton behind it says “Engine Oil.” Your brain stutters. Is…