How to Drain Motor Oil: Easy Guide
Learning how to drain motor oil is usually simple when the engine has a clear sump plug. Motor oil, also called engine oil, lubricates, cools, and cleans the engine, so a partial drain becomes unsafe if the engine runs before the level is restored. The right method depends on the exact engine, not just the vehicle’s make.
Many passenger cars need roughly 4 to 6 US quarts, though the manufacturer’s refill specification always controls. As of 2026, used-oil handling rules also vary by country and local law. Start with the quick answer, then identify your engine’s approved drain route.
How to Drain Motor Oil
Quick Answer
How to drain motor oil safely starts with confirming the engine’s approved drain point. Place a drain pan below it and warm the oil as directed. Open the plug slowly, then replace the filter and specified seals.
Refill to the listed specification, check the level, and recycle used oil.
How Engine Oil Drains and Why the Engine Isn’t Empty
Motor oil leaves most engines through gravity. The engine oil pan, also called the sump, stores oil around the oil pickup. A factory plug, valve, or hose provides a low-point exit for the accessible oil.
What happens during a normal gravity drain
The oil pump draws oil from the pickup and sends it through the engine during operation. When you open the drain point, oil leaves the pan through gravity without using that pump.
As the level drops, air may eventually reach the pickup inlet. The flow can slow or stop even though usable oil remains elsewhere in the pan. A stopped stream doesn’t necessarily mean the sump is empty.
Oil can also remain above, below, or beside the drain opening. Some engines have a deep pocket, raised pickup, sloped pan, or internal baffle that traps a portion of the factory fill.
Why some oil stays inside the engine
| Location | Why oil remains | What it means |
|---|---|---|
| Below the drain outlet | Some pan shapes have a deeper pocket | The recovered amount may be less than the refill quantity |
| Oil pickup area | Air can reach the pickup before the last oil leaves | Flow may stop with usable oil still below the pickup |
| Spin-on filter | Used oil stays inside the canister | Replace the filter during service |
| Cartridge housing | Oil remains in the housing and cap | Drain and inspect the housing |
| Oil cooler | A measured amount remains in the cooler passages | A gravity drain won’t empty every circuit |
| Upper oil passages | Oil remains above the lower drain opening | The listed refill quantity accounts for internal needs |
A full service drain means you’ve completed the manufacturer’s supported procedure. It doesn’t mean every drop of factory oil must leave the engine.
Don’t calculate the refill from the amount collected in the drain pan. Add fresh oil in stages, then use the specified dipstick or electronic-level procedure.
Why the stream sometimes stops early
A plug is usually below the pickup, but it isn’t always below the lowest point in the pan. Oil can remain trapped under a raised pickup, behind a baffle, or in a separate sump section.
A drain hose can also restrict flow if it kinks, passes upward, or stays connected after the pan moves away. A partly closed valve creates a similar result.
If the stream slows, check the oil temperature, hose route, valve position, and drain-pan placement. Don’t assume the opening is clogged until those basic causes are ruled out.
Open the plug slowly
Warm oil can be trapped above a sealing washer. The washer may release a sudden stream as soon as the plug breaks free.
Keep the plug just below the opening after loosening it. Let the oil fall directly into the drain pan and keep your hands clear of the flow.
Don’t confuse an oil drain with another fluid fitting
Appearance alone can’t prove that a plug or hose contains engine oil. Transmission fluid, coolant, power-steering fluid, and brake fluid can look similar under the vehicle.
A lower radiator hose on some vehicles carries transmission fluid rather than engine oil. Cutting or disconnecting that hose will not drain the engine and may leave the transmission dangerously low.
Trace every fitting to its connected component before touching it. Check the parts diagram if the hose, plug, or passage is unclear.
Engine oil pan bolts are normally structural fasteners. Removing them may release oil, but doing so can damage the pan threads, gasket surface, or oil pickup.
Don’t cut, drill, or puncture an unidentified component to create a drain route. Ask a dealer or repair shop for the engine-specific procedure.
Before You Start: Identify the Engine and Drain Route
Start with the exact engine fitted to the vehicle. The model year and trim level often aren’t enough, because one model can use several engines, filters, oil capacities, and drain arrangements.
What information identifies the correct engine?
The vehicle identification number, commonly called the VIN, is the best starting point. Some vehicles also have an engine-code plate under the hood, on the body, or inside the service booklet.
Use the VIN, engine code, and build information to confirm:
- Oil capacity
- Oil viscosity and performance specification
- Oil filter or cartridge
- Drain-plug location
- Drain-plug torque
- Drain-plug washer or gasket
- Service interval
- Priming or dry-sump procedures
Production changes can matter within a single model year. Two similar vehicles may have different oil pans, filter housings, or drain plugs.
An engine swap can make the original vehicle manual wrong. In that case, the engine code and engine builder’s documentation are more reliable.
Which powertrain does the vehicle have?
The powertrain determines whether the vehicle has motor oil to drain and which safety procedures apply.
| Vehicle type | What to verify | Drainage implication |
|---|---|---|
| Conventional car or truck | Engine code and factory drain point | Follow the supported gravity or extraction route |
| Hybrid | Engine location and high-voltage warnings | The gasoline engine may still need oil service |
| Plug-in hybrid | Engine-start behavior and level-check method | Follow the powertrain-specific procedure |
| Electric-only vehicle | Absence of a combustion engine | There is no motor oil to drain |
| Dry-sump vehicle | Engine builder and oil-system layout | Use the prescribed tank and crankcase procedure |
| Engine-swapped vehicle | Actual engine code and builder | Original vehicle instructions may not apply |
Do electric and hybrid vehicles need an engine-oil drain?
Electric-only vehicles have no motor oil to drain. Some other fluids, such as reduction-gear fluid, may require service, but that fluid is not motor oil.
Hybrid vehicles usually retain a gasoline engine. That engine still needs oil, even if the vehicle can travel some distance without the engine running.
Treat hybrid equipment as energized unless the documented service procedure has made it safe. Orange cables identify high-voltage areas, but they don’t give you permission to work beneath the vehicle.
If the oil level is checked through a combined powertrain display, follow that procedure. Don’t assume a hybrid engine uses the same dipstick sequence as an older gasoline model.
Can motorcycles and small engines use the same process?
Motorcycles and small engines may drain through a sump plug, hose, inspection plug, or separate oil port. The opening can sit close to the crankcase, leaving much of the oil in the head and upper passages.
Some motorcycle inspection plugs contain a magnet. They may also collect metal particles, so inspect the plug and old oil before disposal.
Follow the engine manufacturer’s drain time and refill quantity. Don’t transfer a car-style drain procedure to an engine with a different cooling or lubrication layout.
What makes a dry-sump engine different?
A dry-sump engine stores most of its oil in a separate external tank. An oil pump feeds the engine, while a scavenge system returns oil from the crankcase.
The service procedure may involve separate tank and crankcase drain points. It may also require a specific prefill or pump-priming sequence before the first start.
Never run the oil pump with an empty reservoir or dry scavenge section. Starting the engine before the system is full can cause rapid lubrication failure.
How do you find the approved drain route?
Use this sequence instead of guessing from the shape of the engine:
- Find the VIN, engine code, and build information.
- Open the owner’s manual.
- Review the oil-change procedure for the exact engine.
- Locate the factory plug, valve, hose, or designated service port.
- Compare the fitting with the parts diagram.
- Confirm the connected fluid.
- Check access, drainage, and waste-container placement.
- Verify the oil, filter, seals, capacity, and torque.
A service video can help you recognize a fitting. It can still show a different engine or production version, so confirm the procedure against exact vehicle documentation.
If the manual is unavailable, give the VIN to a dealer or qualified repair shop. Ask for the engine code, drain route, filter type, oil quantity, and plug torque.
Can you reach and contain the oil?
Check access before removing any fastener. Low ground clearance, undertrays, splash shields, heat shields, exhaust parts, and turbochargers can block the normal route.
A drain pan must fit beneath the opening without tipping. Its capacity should safely exceed the engine’s full refill quantity.
If safe access requires lifting arrangements you don’t have, stop. A mobile technician or repair shop is safer than working beneath an unsupported vehicle.
Tools, Oil, Filters, and Parts You’ll Need
The exact tool list depends on the drain route. At minimum, you need safe vehicle support, a suitable waste-oil drain pan, the correct socket, and a way to seal the plug correctly.
A waste-oil drain pan is separate from the engine oil pan. The engine pan holds oil inside the engine. Your drain pan collects oil during servicing.
What tools and handling items do you need?
| Item | Purpose | Selection point |
|---|---|---|
| Low-profile drain pan | Collects gravity-drained oil | Capacity, stability, and clearance |
| Sealed waste-oil container | Stores oil after draining | Intended for used oil and easy to close |
| Correct socket and ratchet | Removes the drain plug | Exact drive size and fit |
| Torque wrench | Reinstalls the plug | Range must cover the specified value |
| Oil filter wrench | Removes a spin-on filter | Correct type and diameter |
| Clean funnel | Guides oil into the filler neck | Fits without touching the neck |
| Oil-absorbent material | Catches drips and small spills | Keep it beside the drain point |
| Safety glasses | Protect against splashes | Properly fitted and worn |
| Nitrile gloves | Reduce skin contact | Intact and oil resistant |
| Wheel chocks and rated jack stands | Support the vehicle | Correct load rating and support points |
| Scan tool | Resets the oil-life monitor where required | Vehicle-compatible and menu-specific |
| Clean shop towels | Clean threads and check leaks | Free of grit |
Have more fresh oil available than the listed refill capacity. The extra amount allows for a small spill, a level that settles, or a final top-up.
Keep fresh oil in a clean, sealed, labelled container. Don’t use an unlabelled food or drink container.
How do you choose the right drain pan?
Choose a pan that fits beneath the drain point and holds more than the engine’s full refill quantity. A shallow pan works well under many sump plugs.
A deeper reservoir or wheeled cart may be better for a high-capacity engine or restricted access. Make sure it remains stable on the work surface.
The pan must be removable after filling. Don’t choose a deep container that you cannot slide out from beneath the vehicle.
Leave enough room to close the waste container. Don’t fill it to the brim, and label it when workplace or local rules require that.
How do you use the correct socket?
Fit the socket fully before applying force. A loose socket can round the plug head and turn a simple drain into a major repair.
Use controlled hand pressure at first. If the plug resists, clean the area and apply penetrating oil as directed.
Don’t use an impact wrench to remove or install the drain plug. It can crack the plug, damage the oil pan, or strip corroded threads.
Stop if the plug head is rounded, cracked, or already damaged. A technician may have a safer removal method or access to a matching replacement.
Which oil should you use?
Use the exact viscosity and performance specification listed for the engine. Viscosity alone may not meet the bearing, oil-pump, emissions, or manufacturer-approval requirements.
SAE J300 classifies oil viscosity. It doesn’t prove that an oil is approved for a particular engine. API 1509 covers API viscosity classification and labeling, but the engine maker’s stated approval still matters.
A label such as 0W-20 or 5W-30 tells you how the oil flows across temperatures. Check the manual for any separate performance category or approval.
Oil color doesn’t establish its grade, approval, or condition. Additives and normal aging can change the color.
Which filter should you buy?
Verify whether the engine uses a spin-on filter, cartridge filter, or another documented arrangement. A physically similar filter can have a different seal, bypass pressure, or anti-drainback valve.
Use the filter or cartridge number specified for the exact engine. Don’t rely only on outside diameter or the vehicle model.
If the engine uses a cartridge, check whether the housing requires a new O-ring. Top-mounted filter caps may have a separate seal or an integrated ring.
Most engines specify a new filter at every oil drain. Documented exceptions exist, so check the exact maintenance schedule.
Which seals and small parts may need replacement?
A drain plug may require a crush washer, gasket, O-ring, or specified thread sealant. Replace the sealing part when the manufacturer calls for a new one.
Some plugs come with a bonded seal. Don’t add extra washers or stack sealing parts unless the service documentation allows it.
Inspect the old parts before discarding them. A crushed washer can look intact while failing to seal properly.
Should everything be staged before opening the plug?
Stage the tools, new parts, waste container, and fresh oil before opening the drain point. You shouldn’t need to search for a socket or filter while oil is flowing.
Before opening the plug, confirm that:
- The engine and drain route are correct.
- The oil and filter match the engine.
- The plug torque is known.
- The drain pan has enough capacity.
- The vehicle is safely supported.
- Used oil can be transferred to an approved container.
- The new seals are available.
- You can reach the plug without improvised supports.
If any item is missing, close the opening and resolve the issue first.
Safety, Spill Control, and Used-Oil Disposal
Treat motor oil as a fluid that can cause burns, slips, contamination, and fire. Hot oil and vehicle-support failures can cause serious injury before the drain is finished.
Stop if you cannot verify the drain plug, connected fluid, torque specification, or lifting method. Appearance alone is never enough to identify an engine-oil drain.
Is hot oil easier and safer to drain?
Warm oil drains faster, but very hot oil is not safer. Use the temperature specified by the manufacturer and avoid draining immediately after hard driving.
The oil pan, exhaust, catalytic converter, and surrounding shields can remain dangerously hot. Turbochargers may also retain heat after shutdown.
Open the plug slowly, because a sealing washer can release a sudden flow. Wear gloves and safety glasses, but don’t treat gloves as protection against very hot oil.
What vehicle-support method is safe?
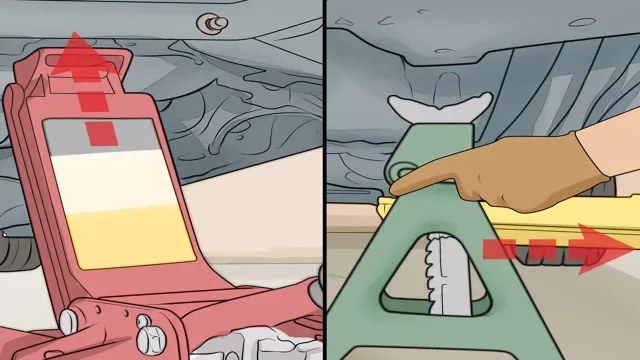
Park on firm, level ground and chock the wheels that remain loaded. Use the manufacturer’s approved lifting points.
A vehicle lift or properly rated jack stands are suitable when used as directed. Never work beneath a vehicle supported only by a jack.
Keep tools, loose clothing, and hands clear of the drain stream. Don’t use a steep driveway as an improvised ramp when a safe lift or service bay is available.
Stop if the vehicle needs an unstable support, unknown support point, or improvised stand. A service visit is safer than a crushing injury.
How do you control spills before opening the plug?
Position the drain pan before loosening any fastener. Its capacity should exceed the engine’s listed refill quantity.
Keep absorbent pads beneath and around the plug. Oil can remain on the undertray, heat shield, and nearby frame before dripping later.
For an internal drain hose, keep the connection closed until the pan is ready. Release it slowly and keep the hose end over the container.
Watch the pan before it overflows. Don’t try to lift a full, awkward pan while standing beneath the vehicle.
Can you run the engine after draining it?
No. Keep the engine off until the correct oil level is restored and the drain point, filter, and seals are secure.
An oil pump can circulate air or run dry within seconds. Bearings and other load-bearing parts may be damaged before a warning appears.
Don’t start the engine to test the drain, pump the oil, or check for flow. If the engine must remain drained for transport, keep it off and secure the opening.
Can compressed air remove the remaining oil?
No. Compressed air can spread oil mist through the engine bay and garage. It can also force contamination into places where the oil must remain clean.
Use gravity, rated extraction, or a documented pump connection. If the oil won’t flow, check the route before applying more force.
How should used oil be handled?
Keep used oil in a suitable closed container. Don’t mix it with coolant, solvent, paint, fuel, or another waste fluid unless an approved collector specifically accepts the mixture.
Never pour used oil into a storm drain, sewer, soil, surface water, or watercourse. Don’t empty it onto the ground.
In the United States, the U.S. Environmental Protection Agency’s used-oil management guidance explains the federal standards in 40 CFR Part 279. State and local rules can be stricter.
In the UK, check the Environment Agency and the relevant local authority. Household and workplace waste rules may differ.
Take used oil to an approved collection center, service shop, recycling facility, or mobile collector. Keep it separate from contaminated absorbents and old filters unless the local handler accepts them together.
What should you do after a used-oil spill?
Contain the spill and keep it away from drains, soil, and water. Don’t simply wipe up the visible oil and assume the area is clean.
| Spill location | First action | What not to do |
|---|---|---|
| Concrete or paving | Absorb and collect the fresh oil | Don’t hose it into a drain |
| Gravel or soil | Stop the spread and contain what you can | Don’t spread contaminated material |
| Painted surface | Absorb first, then use a surface-safe cleaner | Don’t use an aggressive solvent blindly |
| Drain or waterway | Keep people away and report it promptly | Don’t push oil farther into the drain |
| Workplace | Follow the site spill plan | Don’t hide the spill |
On concrete, work from the outside of the spill toward the center. Let absorbent material remain in place for the time stated on its packaging.
Sweep or scoop the used material into a sealed waste container. Don’t scatter oily granules across the surface or wash them into a sewer.
On soil or gravel, avoid digging broadly without guidance. That can mix contamination through a larger area. Contact the local environmental authority for larger spills.
If oil reaches a drain, stream, pond, or shoreline, report it to the appropriate authority. Give the location, estimated quantity, and time of the spill.
What should you do if oil touches skin or eyes?
Remove contaminated clothing and gloves. Wash exposed skin with soap and clean running water.
For eye contact, flush with clean water for at least 15 minutes. Remove contact lenses if they’re easy to access. Seek medical advice if irritation, pain, or vision changes continue.
Don’t induce vomiting if used oil is swallowed. Contact a local poison center, medical professional, or emergency service for instructions.
Used oil poses a serious aspiration risk if it enters the lungs. Keep the product container or safety data sheet available when seeking help.
What should you do if used oil catches fire?
Move people away and call emergency services. Don’t spray water onto a burning pool of oil, because the oil may spread across the surface.
Use an extinguisher rated for flammable liquids only if you’re trained and the approach is safe. Stay away from a burning engine, fuel system, or vehicle when conditions are unsafe.
When should you stop the drain job?
Stop when the route is uncertain, the plug is damaged, the vehicle support is unsafe, or the oil will not drain through a confirmed opening.
Seek qualified help if you find:
- A rounded, seized, cracked, or missing plug
- Stripped oil-pan threads
- A leak at the pan seam
- No supported drain route
- A damaged hose or valve body
- An unknown dry-sump system
- An engine swap without reliable documentation
- Coolant, fuel, or large metal debris in the oil
- A persistent oil-pressure warning
- A spill beyond your containment equipment
Keep the engine off while the problem remains unresolved.
Prepare the Vehicle for a Clean Drain
Preparation determines whether the drain stays controlled. Verify the vehicle, create safe access, position enough capacity, and stage the correct parts before opening the oil system.
What should you check before opening the plug?
Check the VIN, engine code, oil specification, capacity, filter, drain route, and plug torque. If the vehicle was modified, confirm that the original vehicle manual still applies.
Inspect the area beneath the engine for an existing leak. Don’t confuse old contamination with fresh oil during the final check.
Confirm that you have enough fresh oil and a safe way to handle every used-oil pint you expect to recover.
How should you warm the oil?
Warm the engine only as directed by the manufacturer. Moderately warm oil flows faster than cold oil, while very hot oil creates burn and splash risks.
Let the exhaust and oil pan cool enough to work around safely. Don’t wait until the oil is completely cold if that makes it too thick to drain.
Follow the manual’s temperature or operating procedure when one is provided. There is no universal safe temperature for every engine.
How should you level and support the vehicle?
Place the vehicle on firm, level ground. Chock the wheels that remain loaded and use the approved lifting points.
A level vehicle helps oil travel toward the drain point. A steep cross-slope can leave oil trapped or push it outside the pan.
Keep the drain pan clear of jack stands, wheels, ramps, and suspension components. Confirm that the vehicle cannot roll while the drain point is open.
Should you remove the undertray or splash shield?
Remove the undertray or shield only when access requires it. Some undertrays include a factory drain-through opening that allows the plug to be removed without full removal.
Support a heavy shield after loosening its fasteners. Don’t let it fall onto the oil pan, exhaust, or drain hose.
Keep trim clips and fasteners in a small container. Plastic clips can break if you pull on the panel edge instead of the clip.
How do you position the drain pan?
Place the pan directly beneath the opening. Check its position from more than one angle, because some plugs discharge at an angle.
The pan must sit level and remain stable. Don’t balance it on loose boards, tools, or an uneven wheel stop.
Leave enough room to remove the pan later. A full container that can’t slide out from under the vehicle creates a second spill.
What should the surrounding area look like?
Wipe dirt away from the plug, hose, and filter housing. Cleaning first helps you spot fresh oil and keeps grit out of the threads.
Keep oily rags away from the main flow. They can soak up oil and carry it outside the drain pan.
Place clean towels, the correct socket, and replacement seals within reach. Don’t leave the plug hanging while you search for tools.
What is the final pre-drain check?
You’re ready to open the drain point when:
- The engine and fluid route are confirmed.
- The oil and filter match the engine.
- The plug torque is known.
- The required seals are available.
- The vehicle is safely supported and level.
- The drain pan has enough capacity.
- The hose discharges into the pan.
- Used oil has an approved disposal route.
- The plug can be reinstalled without rushing.
If any answer is no, resolve it before removal. Reassembly and correct oil level matter as much as the drain itself.
Choose the Right Drainage Method
Choose the route specified for the exact engine, not simply the opening that looks easiest to reach. A factory sump plug usually gives the most complete gravity drain.
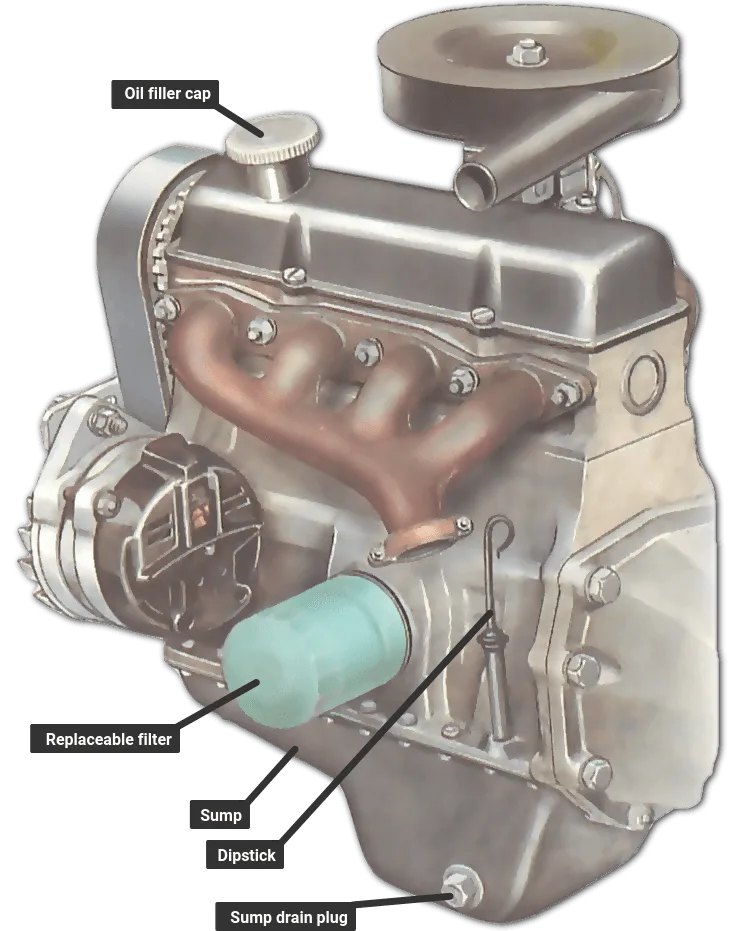
How do the main drainage methods compare?
| Method | Best fit | Main limitation |
|---|---|---|
| Gravity drain through a sump plug | Most conventional engines with an accessible plug | Oil remains in the pickup, filter, cooler, and pan pockets |
| Drain valve or internal hose | Engines designed for repeated service access | The valve, hose, or clamp may be awkward to reach |
| Top-side cartridge access | Supported upper filter-housing procedures | Most lower-pan oil remains |
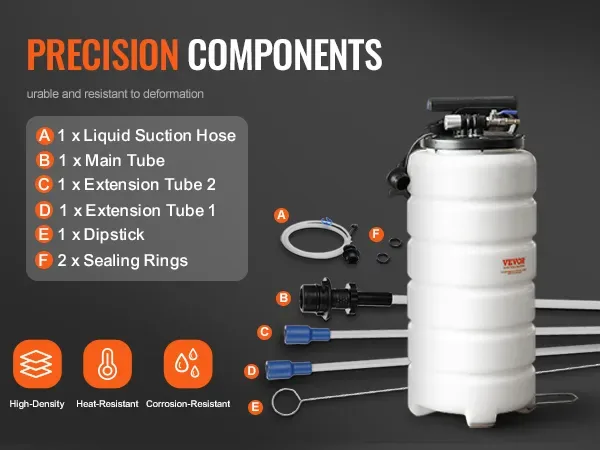
| Vacuum extraction | Missing plugs or very low clearance | Requires rated equipment and a supported connection |
| Oil-pump extraction | Specific engines with a documented dipstick-tube route | A wrong tube position can damage internal parts |
| Oil-pan removal | Engines with no practical supported drain route | Labor-intensive and requires correct sealing |
| Dry-sump drainage | Performance and specialty systems | Requires the correct tank, scavenge, refill, and prime sequence |
Which method should you use?
Use the manufacturer-supported method that removes the most oil with the least disassembly. If the exact engine has an accessible factory plug and safe clearance, gravity drainage is normally the first choice.
If the plug is missing, blocked, or inaccessible, check for a documented valve, hose, service port, or extraction connection.
A top-side cartridge opening can be useful for inspection, but it doesn’t empty a deep oil pan. A spin-on filter alone provides even less complete drainage.
When is gravity drainage best?
Gravity drainage is best when the engine has a confirmed low-point plug, valve, or hose. It needs no powered equipment.
The vehicle must be level, the oil must be at a workable temperature, and the waste container must be correctly placed.
A low-point gravity drain usually removes more accessible oil than filter access. It still leaves some oil inside the engine.
When is a drain valve or hose better?
A valve or internal hose is better when the manufacturer designed that route into the engine. Repeated service points can reduce disassembly.
Check the hose for kinks, sharp edges, and blocked outlets. Make sure it can discharge into the drain pan without touching hot components.
If the valve is seized, leaking, or damaged, stop. Don’t force it or clamp the hose in a position that blocks flow.
When is extraction reasonable?
Extraction is reasonable when there’s no practical gravity opening or too little clearance for a drain pan. The equipment must connect through a documented service point.
A rated fluid vacuum can remove much of the pan oil. It can still leave oil in the filter, cooler, pickup, and upper passages.
Don’t connect a household vacuum, random air compressor, or unsupported pump to the engine. Oil mist, fire risk, and equipment damage make that unsafe.
When should the oil pan come off?
The oil pan should come off only when the engine has no practical supported plug, valve, hose, or extraction connection.
Removing structural pan bolts as a shortcut can damage the pan, threads, gasket surface, or pickup. Composite and thin aluminum pans can also crack if pried or heated.
Pan removal is an advanced service operation. It requires correct sealing, bolt torque, tightening sequence, and oil quantity.
Which methods should you reject?
Reject any route you can’t identify from the exact engine documentation. Don’t cut a hose, puncture the pan, or remove structural bolts just because no plug is visible.
Appearance can’t distinguish engine oil from transmission fluid or coolant. Confirm the connected passage before opening any fitting.
If a service provider can’t identify the drain route, ask them to stop and locate the engine specification. A random leak is not an acceptable service method.
Branch 1: Drain Through a Sump Plug, Valve, or Hose
Open the confirmed drain point slowly and let gravity remove the accessible oil. Keep the pan under the opening, control the first flow, and don’t force damaged hardware.
What should happen when the sump plug opens?
A controlled stream should leave the engine when the plug breaks its sealing washer. Oil trapped around the washer can pour out suddenly.
Hold or suspend the plug just below the opening. Don’t pull it completely away if that lets the opening gape and splash oil onto the underbody.
How do you drain through a sump plug?
Follow this sequence after the vehicle is prepared:
- Clean the area around the plug.
- Position the waste-oil pan under the opening.
- Fit the correct socket and loosen the plug slowly.
- Hold the plug below the opening.
- Let the oil drain without rushing the flow.
- Watch the pan so it doesn’t overflow.
- Inspect the oil and drain opening.
- Fit the specified new washer or gasket.
- Hand-thread the plug before tightening it.
- Tighten to the exact engine torque.
If the plug discharges at an angle, angle the pan to match. Don’t let oil run along the underbody before reaching the container.
You can leave the plug loosely installed while drainage finishes if it no longer blocks the opening. Many technicians use this approach to reduce spill risk.
How do you drain through a drain valve?
Open the valve only after confirming its function and flow direction. Place the pan beneath the outlet first.
Turn the valve slowly. Internal pressure can release a concentrated stream as the valve begins to open.
After drainage, close the valve fully and inspect its O-ring or washer. Replace the seal if it’s cracked, flattened, stretched, or hardened.
Don’t use a valve that leaks when closed. A damaged valve body needs repair or replacement, not repeated force.
How do you drain through an internal hose?
Keep the hose connection closed until the pan is ready. Support the hose so it can’t move when the fitting releases.
Disconnect the fitting according to the service procedure. Keep the hose end over the pan and away from the exhaust.
Let the oil drain until the stream slows or the manual’s specified time has passed. Don’t leave the open connection unattended.
Reconnect the hose with the correct fitting or clamp. Check the full route for kinks, sharp edges, and contact with moving parts.
How long should the oil drain?
Let the oil drain for the time stated by the engine procedure. A slow stream and the manual’s timing are better guides than waiting for a fixed minute count.
Once air reaches the pickup, the flow may stop with oil still inside. Additional waiting may recover only a small amount.
If flow stops unusually early, check the oil temperature, hose, valve, and drain-pan position before applying more force.
What should you inspect before closing the drain?
Inspect the plug threads, plug head, washer seat, sealing surface, and drain holes. Look for corrosion, cracks, stripped threads, sealant, and debris.
Check the oil for coolant, fuel, water, or large metal particles. Keep a labelled sample if the engine’s condition is uncertain.
Don’t reinstall a damaged plug, contaminated seal, or blocked drain opening. Correct the cause before adding fresh oil.
How do you reinstall the drain plug correctly?
Fit the correct new washer or gasket. Make sure it sits flat and no grit is trapped under the plug head.
Hand-thread the plug first. If it binds before seating, back it out and inspect the threads.
Tighten the plug to the exact manufacturer value with a suitable torque wrench. Don’t use an impact wrench or add force after the specified value is reached.
After tightening, wipe the area and check for seepage. Keep the engine off until the oil level has been restored.
What should you do if no oil comes out?
No oil may come out because the plug is closed, the hose is blocked, the oil is cold, or the opening isn’t an engine-oil drain.
| Check | What to look for |
|---|---|
| Drain point | Confirm the fitting and connected fluid |
| Oil temperature | Confirm the oil can flow at the specified state |
| Hose or valve | Check for kinks, closure, blockage, or disconnection |
| Drain pan | Confirm it isn’t full or blocking the outlet |
| Opening | Look for sealant, debris, or visible damage |
| Engine layout | Check whether this engine uses another drain route |
Don’t use compressed air, a hammer, or extra plug torque to force the issue. Ask a technician to assess a blocked or damaged route.
Branch 2: Drain Oil Without a Standard Drain Plug
Use only a manufacturer-supported alternative when the engine has no accessible drain plug. Top-side filter access, rated extraction, a supported pump connection, or controlled pan removal may be appropriate.
When is top-side cartridge access valid?
Top-side cartridge access is valid only when the manufacturer supports draining through the upper filter housing. It may require removal of an engine cover, air box, filler neck, or other panel.
The method can remove oil from the housing and upper engine. It won’t normally empty the lower sump.
Place the drain pan beneath the housing before loosening the cap. Oil trapped above the cartridge can pour out as soon as the seal releases.
Remove the cap evenly and keep it level. Let the housing drain before removing the cartridge.
Install the new cartridge and specified housing seal. Seat and tighten the cap exactly as directed.
When is suction extraction reasonable?
Suction extraction is reasonable when the engine lacks a practical plug or lacks clearance for a drain pan. Use rated equipment through a documented connection.
Fit the hose through the specified service opening. Keep it clear of the oil pickup, baffles, and sharp casting edges.
Run the pump in the manufacturer’s sequence. Keep the waste container under the discharge outlet and stop before it overflows.
Suction won’t empty every internal pocket. Oil can remain in the filter, cooler, pickup, crankcase, and upper passages.
Can oil be pumped through the dipstick tube?
Oil can be pumped through the dipstick tube only when the engine or service procedure supports that connection.
Use the correct adapter and pump. Lower the hose gently so it doesn’t strike the pan or oil pickup.
Secure the connection before operating the pump. Follow the equipment’s specified flow and return sequence.
Reinstall the dipstick or tube correctly afterward. A loose or damaged tube can leak oil into the crankcase.
When is oil-pan removal justified?
Oil-pan removal is justified only when no practical supported plug, valve, hose, or extraction connection exists.
Remove as much oil as possible first. Place a large pan beneath the pan seam before loosening the bolts.
Support the pan as it separates. Don’t pry between the pan and engine block, and don’t use impact tools on structural fasteners unless the service documentation allows it.
Inspect the oil pickup, screen, baffles, windage tray, and inside of the pan. Check for sludge, coolant, fuel, and large metal fragments.
Reinstall the pan with the specified gasket, sealant, torque, and tightening sequence. Follow the stated cure time for any sealant before filling.
How does a dry-sump system change the process?
A dry-sump system changes where most oil is stored and how the engine is primed. Drain the external tank, crankcase, and only the lines or valves named by the engine builder.
Follow the builder’s sequence from tank to crankcase, then refill and prime the system before starting. Don’t use a normal sump-drain procedure for a system you don’t understand.
What must be drained on a dry-sump engine?
A dry-sump service may include the external oil tank, crankcase sump, scavenge section, filter, cooler, and selected oil lines. Use only the drain points listed for that system.
Place a separate container beneath each outlet if the procedure requires it. Keep the drain valves closed until every container is ready.
Some systems drain the tank through a plug or hose. Others use a valve that must remain closed during normal operation. A plug on the tank may have a sealing washer or O-ring that needs replacement.
Inspect the tank for sludge, coolant, fuel, or metal. A dry-sump system can show contamination in the tank even when the crankcase looks clean.
Don’t disconnect a scavenge hose just because it contains oil. Removing the wrong connection can release part of the oil system or introduce air into a line that must remain sealed.
How do you refill and prime a dry-sump system?
Refill the dry-sump system with the exact oil quantity and sequence specified by the engine builder. Fill the external tank, crankcase, filter, and any prefill point in the stated order.
Some engines need a powered pump to circulate oil before the first start. Others use a manual prefill or a short crank sequence with the pump primed.
Follow the builder’s pressure targets or sight-glass instructions. Don’t start the engine simply because the reservoir looks full. The tank, lines, and scavenge section may still contain air.
After the first start, check every specified level again. Keep the engine off if the oil-pressure warning remains on or if the builder’s pressure requirement hasn’t been met.
What if the dry-sump documentation is missing?
Stop if you can’t identify the tank, scavenge system, fill points, and priming procedure. A conventional oil change can leave a dry-sump engine dry or cause an oil pump to run without pressure.
Ask the engine builder, engine specialist, or a shop familiar with that lubrication system for the current procedure. Don’t infer the sequence from a visually similar racing engine.
Replace the Oil Filter and Drain Residual Oil
Replace the filter that matches the engine, then remove residual oil from the housing and other specified areas. A new filter can leak immediately if it’s installed over trapped oil, a damaged seal, or a dirty mounting face.
Which filter design does the engine use?
The engine’s filter arrangement determines how you remove the old unit and where residual oil can remain.
| Filter design | Service method | Main seal to inspect |
|---|---|---|
| Spin-on filter | Remove the complete canister | Gasket or O-ring |
| Cartridge filter | Open the housing and replace the element | Housing-cap O-ring |
| Top-mounted cartridge | Access the cap from above the engine | Cap seal and housing lip |
| Integrated element | Replace the element or housing assembly as specified | Housing gasket |
| Screen-based system | Clean or replace the screen only if the manual allows it | Retainer or housing seal |
A similar-looking filter can have a different sealing diameter, bypass pressure, or anti-drainback valve. Match the filter number and engine code.
How do you replace a spin-on filter safely?
Place the drain pan beneath the filter before loosening it. Oil can pour out as the gasket separates from the mounting face.
- Wipe dirt from the filter mounting surface.
- Turn the filter in the loosening direction for that design.
- Catch the first flow in the waste-oil pan.
- Inspect the old gasket and mounting face.
- Compare the new filter with the old one.
- Clean the surface without forcing grit into the oil passage.
- Fit the new gasket as specified.
- Thread the filter onto the stud by hand.
- Tighten it by the filter manufacturer’s specified amount.
- Check that it sits evenly.
Most spin-on filters loosen when turned counterclockwise when viewed from below. Some designs are reverse-threaded, so confirm before applying force.
A loose filter wrench can damage the canister. Don’t use an impact wrench to start or finish the filter unless the service documentation specifically allows it.
Some engines call for a light film of clean oil on the gasket. Use only the amount and method stated in the procedure.
Pre-filling a spin-on filter is normally unnecessary. Some performance engines require it, so use oil inside the filter only when the manufacturer or engine builder directs it.
How do you replace a cartridge filter safely?
Remove the housing cap slowly and keep it level. Oil trapped above the cartridge can pour out as soon as the cap seal breaks.
- Mark the cap orientation if the housing isn’t symmetrical.
- Place a pan beneath the housing.
- Loosen the cap evenly.
- Remove it without twisting the cartridge.
- Let the housing drain into the pan.
- Remove the old cartridge, spring, or retainer.
- Inspect the housing bore and sealing surface.
- Install the new cartridge in the specified direction.
- Fit a new housing O-ring if required.
- Seat and tighten the cap to the specified torque.
Don’t force a cartridge past a damaged housing lip. A crooked element can split the seal and create a leak that appears only after the engine warms.
If the manual permits a light oil film on the O-ring, use a small amount. Don’t use threadlocker, silicone sealant, petroleum jelly, or an unapproved adhesive.
A cap that won’t loosen evenly may be damaged or stuck. Stop before twisting it hard enough to break the housing or cartridge.
How do you drain residual oil from the filter housing?
Let the filter housing drain into the waste-oil pan after removing the cap or canister. Keep the pan under the opening until the flow has slowed or stopped.
Some engines also have a drain point for the oil cooler or upper oil gallery. Use it only when the service procedure identifies it.
An oil-cooler line can look like an engine drain hose. Trace the connected passage before opening a fitting, especially on vehicles with a separate transmission cooler.
A cartridge housing can retain a noticeable amount of oil. This residual oil is why the final refill quantity must come from the engine specification rather than the recovered volume.
Wipe the housing rim and mounting face before installing the new seal. Grit trapped under an O-ring can create a steady leak.
Can removing the old filter show an engine problem?
Yes. Inspect the old filter and oil for cracks, collapsed seals, coolant, fuel, heavy sludge, or large metal particles.
A dark filter and dark oil can be normal after service. A milky mixture or a sudden heavy deposit deserves a diagnosis before the engine is refilled.
A split spin-on canister may have allowed unfiltered oil to circulate. A damaged cartridge seal can let contaminants enter the housing.
Keep a clean, labelled sample if a technician may need it. Don’t return contaminated oil to the engine or pour it into a storm drain.
When should a filter be changed?
Change the filter at every oil drain unless the manufacturer documents another interval. Some vehicles use an extended-drain program with a specific filter and oil approval.
A short-trip or severe-service schedule may require more frequent changes. The oil-life display doesn’t replace the published maintenance schedule.
An oil filter removes contaminants while oil carries them through the lubrication system. It can’t restore depleted additives, correct the wrong viscosity, or fix an oil-consumption problem.
If the vehicle has multiple filters or a remote filter, service each one according to the engine procedure. Don’t assume every canister uses the same replacement interval.
How should you dispose of the old filter?
Let the filter drain into the waste-oil container. Then place it in a sealed bag or approved filter-recycling stream.
Local rules may allow a drained filter in household waste, or they may require a collection point. Check the rule for your location before putting it in the trash.
Keep the old filter away from the new filter and the oil filler neck. Residual oil can contaminate a clean surface or drip during transport.
Refill, Prime, and Recheck the Engine
Refill the engine with the exact oil specification and listed capacity, then prime and check the level using the manufacturer’s procedure. Don’t use the recovered volume as the refill quantity.
Which oil quantity should go back in?
Use the manufacturer’s refill quantity for the exact engine and service condition. It may include oil needed in the filter, cooler, upper passages, and other internal areas.
Some manuals list a dry-engine capacity. Others include filter prefill or state a different quantity for a normal service drain.
Have extra clean oil available for a small top-up. Don’t plan to replace a large part of the listed quantity with oil of unknown grade or approval.
Keep the fresh oil sealed until filling. Don’t mix leftover oil of an unidentified specification into the new supply.
How do you fill the engine without overfilling?
Clean the oil filler neck and cap before opening them. Remove grit from the sealing surface so it doesn’t fall into the filler passage.
Add oil in stages. Pause and check the level before adding more. The dipstick or electronic gauge is the final reference, not the amount left in the bottle.
Follow the manual’s settling and engine-temperature instructions. Some engines are checked cold, while others require a warm operating cycle.
If the level approaches maximum, stop adding. Oil near the full mark can be a false reading if the dipstick or filler neck is contaminated.
How do you check the oil level correctly?
For a dipstick-equipped engine, park on level ground and follow the manual’s temperature instructions. Pull the dipstick, wipe it, insert it fully, then read it again.
For an electronic oil-level system, use the vehicle’s specified menu or message. Some systems require the engine to run briefly, while others require a stopped engine or key cycle.
Recheck after the initial fill and after the oil has circulated. A small top-up can be normal if the manual allows for residual movement, but don’t add oil without measuring.
If the dipstick and electronic gauge disagree, stop and check the dipstick type and measurement procedure. A wrong stick can produce a false reading.
Does a conventional engine need a separate priming step?
Most conventional engines don’t need a separate priming step after the correct oil level is restored. Confirm the manual before cranking.
Some engines use an electric oil pump, a prefill port, or a specified cranking sequence. Follow that procedure exactly and monitor the oil-pressure indication.
Don’t crank the engine with the drain plug loose, the filter housing open, or the oil level below minimum. Those conditions can introduce air and delay pressure.
A brief warning light during startup may be normal on some vehicles. It must go out within the manufacturer’s stated time. A light that remains on calls for diagnosis.
How do you start the engine after the refill?
Before starting, confirm that the plug, valve, filter, housing cap, and filler cap are secure. Reinstall any shield that protects moving or hot components.
Start the engine and watch the oil-pressure warning, charge warning, and service messages. Keep the vehicle stationary and controlled during the first check.
If the oil-pressure warning remains on, stop the engine. Check the level, drain point, filter, and priming procedure before trying again.
Listen for knocking, metallic noise, or an immediate pressure fluctuation. A new leak beneath the engine means the engine should remain off until the source is corrected.
What should you check after the first start?
Let the engine run only for the time specified by the manual or enough to verify stable operation. Watch for leaks at the plug, filter, housing cap, filler neck, and oil-cooler fittings.
Recheck the oil level after the specified settling period. Keep the vehicle level and use the same dipstick or electronic procedure as before.
If the oil level falls quickly, inspect the drain point and filter housing. Don’t simply add oil over a leak or a loose filter.
Check beneath the vehicle after a short period. A small drip may take time to travel through shields before reaching the ground.
Record any warning message before clearing it. A scan tool can help identify the oil-pressure, oil-level, or service information, but it doesn’t replace a physical inspection.
What if the engine has an oil leak after refill?
Keep the engine off and inspect every opening you disturbed. Common causes include a loose plug, missing washer, damaged filter gasket, or crooked cartridge cap.
A sump plug may leak from a crushed washer, dirty sealing face, stripped thread, or incorrect torque. Don’t tighten it repeatedly without finding the cause.
A spin-on filter can leak if its gasket was reused, folded, or installed over dirt. A cartridge housing can leak if the O-ring was omitted or pinched.
A drain hose can leak at a loose clamp or cracked connection. Check the entire route, including areas hidden by an undertray.
Clean the area and repair the fault before adding more oil. Then refill and repeat the level check.
What if the oil level is too high?
Remove the excess through a supported method and place it in an approved waste-oil container. Don’t keep adding oil because the level is below maximum.
Check the dipstick, filler neck, and engine temperature before drawing oil out. A false reading can make the level appear higher than it really is.
Overfilled oil can foam, increase crankcase pressure, and cause leaks at seals or into the exhaust system. Correct the level before extended driving.
If the engine is hot, use a rated extraction method or a safe siphon. Don’t loosen a drain plug in traffic or on an unsupported vehicle.
What final checks should you complete?
Run the final service check before releasing the vehicle.
| Check | What confirms it |
|---|---|
| Drain point | Plug or valve is clean, sealed, and torqued |
| Filter | Correct unit is seated with no fresh leak |
| Oil level | Dipstick or electronic reading is within range |
| Filler cap | Cap is clean, fitted, and locked |
| Shields | Undertray and guards are safely reinstalled |
| Leaks | No fresh oil appears beneath or beside the engine |
| Warning lights | Oil-pressure and service indicators behave normally |
| Used oil | Container is closed and routed to approved handling |
| Service record | Date, mileage, oil, quantity, and filter are recorded |
Reset the oil-life monitor only after the required service is complete. Use the vehicle’s documented reset method rather than assuming every model uses the same menu sequence.
Record the date, mileage, oil specification, quantity, filter, and next service point. Keep receipts and digital records with the vehicle’s maintenance file.
If any check remains uncertain, keep the engine off and contact the dealer or a qualified repair shop. A clean service record is worth more than a quick restart followed by a repeated leak.
Common Mistakes and Quick Troubleshooting
A drain can look complete while leaving behind a small but important problem. The usual issues are damaged hardware, a leak after reassembly, an incorrect level, or contamination that needs diagnosis.
Why won’t the drain plug turn?
A drain plug usually won’t turn because corrosion, hardened sealant, or damaged threads have locked it to the oil pan. The wrong socket or an impact wrench can make the problem worse.
| Symptom | Likely cause | Safer response |
|---|---|---|
| The plug turns but won’t unthread | Cross-threading, corrosion, or installation damage | Stop and inspect the threads |
| The plug head slips | Rounded socket or damaged plug head | Stop and seek specialist removal |
| The plug won’t budge | Heavy corrosion or sealant | Apply penetrating oil and allow time to soak |
| Oil pours out immediately | Oil trapped around a sealing washer | Control the flow with a drain pan |
| A washer breaks or folds | Old, hardened, or reused sealing washer | Fit the specified replacement |
Clean the area before applying penetrating oil. Let it soak for the product’s stated time and reapply only as directed.
Use a socket that fits completely. Don’t hammer the plug, heat the surrounding area, or use an impact wrench for final removal.
If the plug is rounded, cracked, or stripped, stop. A technician may have a safe removal method or a replacement plug that matches the engine.
Why is oil coming from another opening?
Oil is coming from another opening when the pan seam, filter housing, drain hose, or nearby fitting is lower than the point you opened. Find the actual source before tightening or replacing anything.
A loose oil-pan bolt can let oil seep from the pan seam. That opening is not a normal service drain.
A missing filter or loose cartridge cap can release oil from the engine’s upper housing. A cracked drain hose can leak before oil reaches the waste container.
A transmission cooler line may sit near the oil pan and look like an oil drain. Don’t disconnect it until the connected fluid and engine diagram are confirmed.
Use absorbent pads to trace the path. Don’t add sealant to an unidentified opening or use a random plug as a permanent repair.
Why is less oil coming out than the listed capacity?
The recovered amount is lower because oil remains in the pickup, filter, cooler, upper passages, and deeper pan sections. A gravity drain doesn’t empty every internal pocket.
Suppose the manual lists a 5.0 US quart refill quantity and 4.2 quarts drain from the pan. Don’t assume that 0.8 quarts is the correct refill amount.
Add fresh oil in stages and follow the specified level procedure. Use the manual’s partial-drain quantity when one is provided.
A filter-only drain leaves most of the oil in the pan. A top-side cartridge drain may remove upper oil but leave the lower sump largely full.
Why is the engine low on oil after filling?
The engine can show low oil because of a leak, an incorrect level-reading procedure, a wrong dipstick, or increased oil consumption. Keep the engine off until you identify the cause.
Check the level on level ground using the specified engine state. Inspect the plug, filter, housing cap, filler neck, and oil-cooler connections.
Fresh oil on a shield or undertray may indicate a small leak that isn’t visible from above. A puddle after a short drive points to a larger leak.
If the oil-pressure warning returns, shut the engine down. Adding oil over a leak can create an overfill or leave the lubrication system unprotected.
Why is there a new leak after the service?
A new leak usually comes from a loose plug, missing washer, damaged filter gasket, or a cartridge cap that wasn’t seated evenly. Recheck every opening you disturbed.
For a sump plug, inspect the plug head, washer, threads, and sealing face. A washer can look intact while failing to seal.
For a spin-on filter, check the mounting face and gasket. Grit or an uneven seat can let oil escape.
For a cartridge filter, check the O-ring, cap threads, cartridge orientation, and any spring or retainer. Don’t run the engine to test the seal.
A drain hose can leak at the clamp, fitting, or cracked rubber. Inspect the routing for sharp edges and hot components.
Why is the oil-pressure warning still on?
A persistent oil-pressure warning means the engine may not have enough pressure to protect its bearings and other load-bearing parts. Shut the engine down.
A brief oil-pressure light during startup can be normal on some vehicles. The manufacturer’s manual should state how long it may remain visible.
Before restarting, check the oil level, plug, filter, filler cap, and priming procedure. A full lower sump doesn’t prove that a remote or dry-sump system is full.
If the warning returns immediately, stop using the engine until a technician checks the oil-pump and lubrication system.
What do coolant, fuel, or metal in the oil mean?
Any confirmed coolant, fuel, or large metal particles in the oil calls for diagnosis before you refill. A dark color alone is less concerning than a milky mixture, shiny droplets, or heavy debris.
| Finding | Possible meaning | Next step |
|---|---|---|
| Milky or beige oil | Coolant contamination | Diagnose the cooling system, head, and gasket area |
| Fuel odor | Excess fuel entering the oil | Stop and inspect the fuel system |
| Large bright fragments | Possible bearing or rotating-part wear | Keep a sample and seek inspection |
| Fine dark grit | Possible normal wear | Compare with mileage and engine condition |
| Heavy sludge | Contamination, infrequent service, or oil degradation | Have the oil evaluated |
Collect a clean, labelled sample if the engine’s condition is uncertain. Don’t pour a contaminated sample into a drain or mix it with ordinary used oil.
Can oil-pan bolts be used as a drain route?
No. Oil-pan bolts are normally structural fasteners. Removing them can damage the pan, threads, gasket surface, or oil pickup.
A factory drain-through hole in an undertray is a different feature. Remove the tray only as the service procedure directs.
If no supported route exists, ask a technician about extraction or controlled oil-pan removal. Don’t improvise a shortcut.
Can compressed air force out the remaining oil?
No. Compressed air can spread oil mist through the engine bay and garage. It can force contamination into areas that must remain clean.
Use gravity, rated extraction, or a supported pump connection. If flow stops, check the plug, hose, valve, temperature, and container first.
When should you stop and get help?
Stop the procedure when the route is uncertain, the hardware is damaged, the vehicle support is unsafe, or the oil contains contamination.
Seek qualified help for a rounded or seized plug, stripped threads, a leaking pan seam, a damaged hose, an unknown dry-sump system, or an engine swap without documentation.
Keep the engine off while the issue remains unresolved. Repeatedly adding oil to an unresolved leak can cause further damage.
Key Numbers: Capacity, Torque, Oil Grade, and Drain Time
The numbers that matter come from the exact engine documentation. Generic values can lead to a wrong-oil refill, overfill, leak, or stripped thread.
What does engine oil capacity mean?
Engine oil capacity is the quantity needed to fill the engine and its related oil system to the specified level. It is not the amount you expect to collect in the drain pan.
| Measurement | What it represents | How to use it |
|---|---|---|
| Total system capacity | Oil in the pan, filter, cooler, and other passages | Reference value for the engine’s oil system |
| Refill quantity | Amount specified for a service condition | Follow the exact manual or service procedure |
| Recovered volume | Oil that leaves the drain route | Useful for checking, not for deciding the refill |
| Minimum level | Lowest acceptable reading during operation | Never run below this point |
| Maximum level | Highest acceptable reading before overfilling | Stop before reaching it |
Some manufacturers list a dry-engine capacity. Others include filter prefill or state a different quantity for a normal service drain.
Read the manual’s definition before using the number. Don’t assume every engine with a listed 5-quart capacity needs exactly 5 quarts after every drain.
How much oil should come out of the engine?
The recovered amount depends on the drain route, oil temperature, pan shape, filter design, and residual oil. No fixed percentage applies to every engine.
A low-point gravity drain may yield close to the listed refill quantity. A top-side cartridge drain leaves most of the oil in the pan. A spin-on filter alone releases only a small amount.
For example, if the manual lists 5.0 US quarts and 4.2 quarts leave the drain pan, don’t automatically add 0.8 quarts. Residual oil may already be inside the engine.
Add fresh oil in stages and stop at the specified dipstick or electronic range. If the manual gives a partial-drain quantity, use it.
The recovered amount can help show that oil is leaving the engine. It can’t establish the correct final level by itself.
Which oil grade and approval should you use?
Use the exact viscosity and performance specification listed for the engine. A viscosity grade alone may not meet the oil-pump, bearing, emissions, or manufacturer-approval requirements.
SAE J300 classifies oil viscosity. API 1509 provides API’s reference for engine-oil viscosity classification and labeling. Neither replaces the engine maker’s stated approval.
A label such as 0W-20 or 5W-30 describes viscosity behavior. Check the manual for any separate performance category or approval.
| Specification | What it tells you | What it doesn’t prove |
|---|---|---|
| SAE viscosity grade | How the oil behaves across temperatures | Manufacturer approval for the engine |
| API performance category | Performance in a defined API test framework | Suitability for every engine |
| Manufacturer approval | Compatibility with a specified engine or component | That every oil of the same viscosity is suitable |
| OEM recommendation | The maker’s preferred oil specification | That an unlisted oil is acceptable |
Use the specification for the exact engine, production year, and market. An engine swap can change the requirement.
Don’t choose oil only because the climate is cold or the old container says 5W-30. Check the manual and the new oil’s certification markings.
Oil color doesn’t establish grade, approval, or condition. Additives and normal aging can change the color.
How do you interpret drain-plug torque?
Drain-plug torque is the specified clamping force for the plug, washer, and oil-pan surface. Use the value for the exact engine, not a generic workshop rule.
Torque may be listed in Newton-metres, pound-feet, or both. A conversion can help you read the unit, but it doesn’t replace the engine-specific value.
| Unit relationship | Approximate conversion |
|---|---|
| 20 Newton-metres | 15 pound-feet |
| 25 Newton-metres | 18 pound-feet |
| 30 Newton-metres | 22 pound-feet |
| 40 Newton-metres | 30 pound-feet |
These are unit conversions, not recommended drain-plug values. Don’t apply them to an engine unless its documentation lists that exact torque.
Hand-thread the plug before using the torque wrench. If it binds, back it out and inspect the threads.
A crush washer may need replacement at every service. Some engines use a reusable gasket or specified thread sealant. Don’t stack washers or use thread tape unless the manufacturer requires it.
Excess torque can strip threads, crack the plug, or distort the oil-pan sealing surface. Too little torque can cause a leak after the engine warms.
How long should gravity drainage take?
Let the oil drain for the time stated by the engine procedure. Many gravity drains take roughly 10 to 20 minutes, but the engine design and oil temperature control the result.
| Condition | What you may notice | What to do |
|---|---|---|
| Cold, thick oil | Slow flow or dripping | Warm only to the documented state |
| Moderately warm oil | Steady stream that gradually slows | Let it drain until the stream ends |
| Very hot oil | Fast initial flow and more splash risk | Use a stable pan and control the opening |
| High or low drain point | Different residual volume | Use the listed refill procedure |
| Dry-sump system | Oil remains in several locations | Follow the builder’s tank and crankcase sequence |
A drain time isn’t a cleanliness test. Flow may stop when air reaches the pickup even though usable oil remains below it.
If no oil leaves a confirmed open plug, check the temperature, hose, valve, and opening. Don’t use compressed air or extra torque to force a flow.
Which service interval and oil-life data should you record?
Record the interval specified for the exact vehicle, engine, and operating condition. A generic internet interval may not fit a short-trip, towing, or severe-service application.
| Operating condition | Why the interval may change | What to check |
|---|---|---|
| Normal commuting | Usually follows the standard schedule | Mileage, time, and specified oil |
| Short trips | The engine may not reach full operating temperature | Severe-service guidance |
| Heavy towing or loaded driving | Higher load and temperature increase demand | Towing-specific oil and interval |
| Frequent high-speed use | More heat and oxidation | Manufacturer severe-use schedule |
| Extended drain interval | Requires a specific oil and filter system | Approval and service conditions |
| Low-speed or stationary operation | Oil may not circulate or burn off normally | Fleet or equipment guidance |
As of 2026, oil-life monitors remain maintenance reminders rather than laboratory oil-analysis tools. Their reset procedure can vary by model and software version.
Record mileage or kilometres, plus time-based requirements where the manufacturer specifies them. Don’t rely only on a dashboard percentage.
A short-trip pattern may need more frequent service even when annual mileage is low. A severe-service schedule can also change the oil specification.
How should you measure the final oil level?
Measure the final level with the dipstick or electronic system exactly as the manufacturer specifies. The vehicle should be level and at the required engine temperature or operating state.
| Method | Correct sequence |
|---|---|
| Dipstick | Park level, pull and wipe, insert fully, then read |
| Electronic gauge | Follow the menu and engine-state instructions |
| Cold-level check | Compare with the manufacturer’s cold range |
| Warm-level check | Warm the engine as directed, stop safely, and recheck |
| Dry-sump system | Check every reservoir and crankcase point specified |
Pulling the dipstick and leaving it inserted can give a false reading. Oil on the outside of the tube can make the level appear too high.
After filling, pause for the specified settling time and check again. Start the engine only after the required oil level is present.
After circulation, repeat the specified recheck. A small top-up can be normal if the manual allows for residual movement, but don’t add oil without measuring.
What service data should you record?
Record enough information to reproduce the service later.
| Record item | Why it matters |
|---|---|
| Date | Establishes the service timeline |
| Odometer reading | Connects the service to mileage |
| Engine code | Confirms the specification |
| Oil grade and approval | Prevents a future wrong-oil top-up |
| Quantity added | Helps explain level behavior |
| Filter or cartridge | Records the part used |
| Drain-plug torque | Preserves correct reassembly |
| Next service point | Supports the next maintenance decision |
| Recycling receipt | Provides a record where required |
Keep receipts and digital records with the vehicle’s maintenance file. They can help a future owner or repairer understand the service.
Final Decision Guide: DIY, Mobile Service, or Shop?
Choose the option that matches your access, tools, documentation, and disposal options. The cheapest service isn’t the best choice when the drain route or vehicle support is uncertain.
When is DIY draining a sensible choice?
DIY draining is sensible when the engine has a confirmed drain point, safe access, correct parts, and a practical used-oil solution.
| Check | DIY-friendly result | Shop or mobile service is safer |
|---|---|---|
| Drain route | Factory plug, valve, or hose is confirmed | Route is hidden, missing, or undocumented |
| Vehicle support | Proper lift or rated jack stands are available | No safe lifting setup is available |
| Tools | Correct socket, torque tool, and filter tool are ready | Tools are incomplete or access is restricted |
| Parts | Oil, filter, and seals match the engine | Engine or retrofit information is unclear |
| Disposal | Approved collection route is available | No suitable disposal point is nearby |
| Plug condition | Plug moves without force or damage | Plug is seized, rounded, or stripped |
| Engine condition | No active warning, leak, or contamination | Oil-pressure light, coolant, metal, or leak is present |
DIY work requires basic spill control. Keep absorbent material, a lidded waste container, and tools beside the vehicle before opening the drain point.
If the vehicle is supported by a lift or proper stands, you can work from a stable position. Never use a jack alone as a support.
A mobile service can handle routine work with less home equipment. A workshop is usually better when the engine needs diagnosis or physical repair.
When is a mobile oil-change service better?
A mobile service is better when you lack safe lifting access, a waste-oil route, or the tools for a clean refill. It can also suit a vehicle with restricted ground clearance.
Ask whether the provider uses the correct route for the exact engine. Some mobile services rely on a sump plug and aren’t equipped for a hidden valve, top-side cartridge, or dry-sump system.
Confirm the oil quantity, performance specification, filter, disposal method, and oil-life reset. Ask whether undertray removal is included.
A routine service through a supported plug is usually straightforward. A seized plug, damaged pan, or engine leak needs repair equipment rather than a standard mobile change.
Mobile work may be unsuitable if the vehicle cannot stand on firm, level ground. The provider needs safe access and a stable waste container.
When should a repair shop handle the job?
A repair shop should handle the job when the drain point is damaged, inaccessible, undocumented, or part of a complex oil system.
| Situation | Why a shop is the better choice |
|---|---|
| Seized or rounded drain plug | Specialized removal may prevent pan damage |
| Stripped oil-pan threads | A replacement plug or thread repair may be needed |
| No supported drain route | The engine needs a documented alternative |
| Dry-sump engine | Tank, scavenge, and pump steps must be controlled |
| Hybrid powertrain | High-voltage safety procedures may apply |
| Active leak or oil-pressure warning | The engine may be damaged or low on oil |
| Coolant or metal in the oil | Diagnostic work is needed before refill |
| Engine swap with missing documents | Original vehicle specifications may be wrong |
| Composite or thin metal pan | Removal and sealing require careful technique |
A shop should also handle a route that requires removing structural oil-pan bolts. That operation isn’t a substitute for a drain plug unless the manufacturer authorizes it.
If the engine has a damaged gasket, warped pan flange, or cracked housing, a simple drain-and-refill won’t repair the cause.
How do DIY, mobile, and workshop costs compare?
DIY service usually has the lowest cash cost, but it requires your time, tools, lifting access, and disposal. Mobile service adds convenience and service fees. A workshop adds labor, diagnostic time, and specialized access.
| Option | Main cost factors | Best for |
|---|---|---|
| DIY | Oil, filter, tools, lifting equipment, disposal, and time | Routine service on an accessible vehicle |
| Mobile service | Oil, filter, travel fee, call-out fee, and labor | Routine service with limited home access |
| Repair shop | Labor, lift time, specialty tools, diagnosis, and warranty | Seized plugs, leaks, complex engines, or uncertain routes |
The same oil and filter can cost different amounts by brand, market, and vehicle. Labor rates, waste-oil fees, undertray removal, and mobile travel charges also vary.
A low advertised price may exclude a specialty filter, a larger oil quantity, undertray removal, or disposal. Ask what the quoted service includes.
A shop visit can cost more upfront but prevent a second job. That’s especially true when the plug is seized or the engine has a leak. Paying for diagnosis may be cheaper than repeatedly adding oil.
As of 2026, service providers may quote a standard oil-change package or a larger repair after finding damaged hardware. Ask for approval before authorizing extra work.
Which option fits common situations?
| Situation | Best starting point | Reason |
|---|---|---|
| Older sedan with an easy plug | DIY or mobile service | The route is usually accessible |
| Low-clearance crossover | Mobile service or shop | A pan may not fit beneath the vehicle |
| No home oil recycling | Mobile service or shop | Used oil must reach an approved handler |
| Motorcycle with a documented plug | DIY within the manual’s limits | Small engines may retain oil in the head |
| Hybrid with a gasoline engine | Hybrid-aware service | High-voltage equipment needs caution |
| Seized drain plug | Repair shop | Forced removal can damage the pan |
| Dry-sump performance engine | Engine specialist or qualified shop | Priming and oil-system sequence are critical |
| Oil with coolant or metal | Diagnostic repair shop | The cause may involve the cooling or lubrication system |
| Engine swap with missing documents | Engine builder or specialist | Original vehicle specifications may be wrong |
If you don’t know whether an engine uses a dry-sump or conventional layout, don’t guess. Ask for the engine code and oil-system diagram.
What should you ask a service provider?
Ask for the engine code, oil specification, quantity, filter, drain route, plug torque, and disposal method before work begins.
Useful questions include:
- Which engine and oil filter does the vehicle use?
- Is the drain route a plug, valve, hose, filter opening, or extraction port?
- Will the undertray or splash shield need removal?
- How much oil is expected to drain?
- What oil quantity and performance specification will you use?
- How will the old filter be handled?
- Where will the used oil go?
- What drain-plug torque applies to this engine?
- Will the provider inspect for leaks or contamination?
- Will the oil-life monitor be reset?
- Will you receive a service record?
If the provider can’t identify the engine or drain point, ask them to stop. A service that begins by removing random bolts or hoses isn’t following a confirmed procedure.
A reputable provider should explain extra work before performing it. Unexpected damage deserves a diagnosis and price discussion, not an automatic addition to the bill.
What’s the safest decision to make?
Use this order: confirm the engine, confirm the oil route, confirm safe access, contain the oil, complete the supported drain, refill to specification, and verify the level.
| If this is true | Then choose this action |
|---|---|
| There is no combustion engine | Stop. There is no motor oil to drain. |
| The engine code is unknown | Identify the engine before touching a plug or hose. |
| The route is confirmed and accessible | Follow the manufacturer’s gravity or extraction procedure. |
| The vehicle can’t be supported safely | Use a mobile service or repair shop. |
| The plug is seized or damaged | Use a repair shop or specialist. |
| The oil contains coolant or large debris | Keep the engine off and obtain a diagnosis. |
| The level is correct and no leak appears | Complete the service record and monitor the next interval. |
| A leak or warning appears after refill | Stop the engine and correct the fault before driving. |
The best choice protects the engine and keeps people safe. If the route is clear and your setup is sound, DIY work can be straightforward. If access, documentation, or drain hardware creates doubt, use a mobile provider or shop.
What maintenance habits reduce repeat problems?
Follow the specified oil and filter schedule. Check the level between services and inspect the oil-pan area for fresh leaks.
Record the mileage, date, oil specification, quantity, and filter used. Use the same approved oil for routine top-ups unless the manufacturer says otherwise.
Change the filter at the documented interval. Don’t extend it because the oil looks clear or the vehicle has low mileage.
Reset the oil-life monitor after the required service. Treat it as a reminder, not a substitute for a level check or oil analysis.
Repair a damaged plug, washer, filter gasket, or oil pan before the next drain. Repeatedly tightening a leaking plug usually hides the symptom instead of fixing it.
Frequently Asked Questions
How long does it take to drain motor oil?
Most gravity drains take about 10 to 20 minutes after the plug is opened. Oil temperature, pan design, hose routing, and the manufacturer’s procedure can change the time. Let the stream slow naturally, then follow the service instructions.
Don’t wait indefinitely after the oil stops moving.
Should I drain motor oil while it’s hot or cold?
Drain it at the temperature specified by the manufacturer. Moderately warm oil flows better, while excessively hot oil creates burn and splash risks. Don’t drain immediately after hard driving.
Give the exhaust and oil pan time to cool enough to work around safely.
How much oil should come out of the engine?
The recovered amount may be less than the listed refill capacity because oil remains in the filter, pickup, cooler, and upper passages. Use the manufacturer’s refill quantity and follow the specified level procedure. Don’t pour drained oil back into the engine unless it has been properly treated and approved for reuse.
What if my engine has no drain plug?
Use only a documented alternative, such as top-side cartridge service, rated extraction, a supported oil-pump connection, or controlled oil-pan removal. Don’t remove oil-pan bolts or cut an unidentified hose. Confirm the engine code first, then ask a dealer or specialist if the route remains unclear.
How tight should the drain plug be?
Tighten the drain plug to the torque listed for the exact engine. Don’t copy a value from a similar vehicle or tighten by feel. Excess torque can strip threads or damage the oil pan, while too little torque can cause a leak after the engine warms.
Where should I take used motor oil and the old filter?
Take used oil to an approved collection center, recycling facility, service shop, or mobile collector. Filter handling varies, so check local rules before placing it in ordinary trash. Keep the container closed, separate the filter from fresh parts, and follow the collection site’s instructions.